


Upgrading Your Property with Durable Concrete Solutions
Your concrete floors, especially in garages, endure significant stress daily. From vehicle traffic and oil spills to chemical exposure and general wear, an unprotected concrete slab can quickly show its age. Protecting this foundational part of your property is not just about aesthetics; it’s about preserving its integrity and value for years to come.
Investing in the right concrete coating system offers a powerful defense. It transforms dull, vulnerable surfaces into durable, easy-to-clean, and attractive spaces. This upgrade enhances functionality and significantly boosts your property’s overall appeal.
In this comprehensive guide, we will explore concrete and garage floor coatings. We’ll compare the main types of coatings, such as epoxy and polyaspartic systems, helping you understand their unique benefits and applications. We will also provide essential insights into choosing the right product for your needs, crucial surface preparation techniques, and proper maintenance practices.
Our goal is to equip you with the knowledge to make informed decisions, ensuring your concrete surfaces receive the best possible protection. Many of today’s options provide truly high-performance concrete floor coatings, designed to withstand the toughest conditions and deliver lasting results.
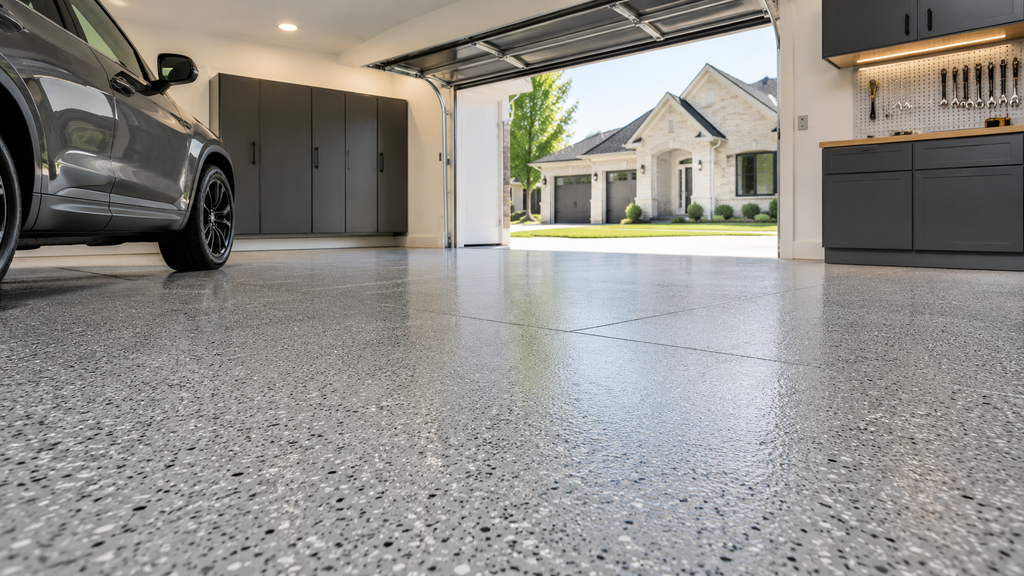
Comprehensive Guide to Concrete and Garage Floor Coatings
To create a strong and good-looking concrete floor, start by learning about different coating options. Each coating has unique features for different uses. Whether it’s protecting a home garage from spills or handling heavy industrial traffic, choosing the right resin and applying it properly is key. This helps the floor resist heat changes and stick well to the surface.
Comparing Modern Concrete and Garage Floor Coatings
When considering concrete floor coatings, several primary types stand out for their distinct properties and applications. These include 1-part water-based epoxies, 2-part 100% solids epoxies, polyaspartic coatings, and aliphatic urethane systems. Understanding their differences is key to selecting the most suitable solution for your property.
- 1-Part Water-Based Epoxy: Often found in DIY kits, these coatings are typically water-based and contain a lower percentage of solids. They are easier to apply and have lower VOCs, but they dry primarily through evaporation. This means they form a thinner film and generally offer less durability and chemical resistance compared to their 2-part counterparts. While they can provide a fresh look, they may be more susceptible to hot tire pickup and abrasion over time.
- 2-Part 100% Solids Epoxy: These systems consist of a resin (Part A) and a hardener (Part B) that chemically cross-link when mixed. Being 100% solids means they contain no solvents that evaporate, resulting in a thick, durable film build. They offer excellent adhesion, impact resistance, and chemical resistance. However, they have a limited pot life once mixed and can be prone to yellowing or chalking if exposed to direct UV light, making them best suited for indoor applications or as a basecoat beneath a UV-stable topcoat.
- Polyaspartic Coatings: A newer generation of coatings, polyaspartics are known for their rapid cure times and exceptional UV stability. They are a type of polyurea chemistry, offering superior abrasion, chemical, and stain resistance. Their quick drying allows for multi-coat systems to be applied in a single day, significantly reducing project timelines. Polyaspartic coatings are highly flexible, resisting cracking and chipping, and maintain their color and gloss even under prolonged sun exposure. They can serve as both a basecoat and a topcoat, making them a versatile choice for residential and commercial spaces requiring quick turnaround.
- Aliphatic Urethane: Often used as a topcoat over epoxy or polyaspartic systems, aliphatic urethanes provide an extremely hard, chemical-resistant, and UV-stable finish. While not typically applied directly to concrete as a primary coating, their role as a protective layer is invaluable. They enhance the overall durability, gloss retention, and resistance to scratches and scuffs, acting as a sacrificial layer that protects the underlying basecoat.
For those seeking robust and aesthetically pleasing solutions, exploring options for high-performance concrete floor coatings can provide insights into advanced material science and application techniques that deliver superior results.

Here’s a quick comparison of these popular coating systems:
| Feature | 1-Part Water-Based Epoxy | 2-Part 100% Solids Epoxy | Polyaspartic Coatings | Aliphatic Urethane (Topcoat) |
| Durability | Good | Excellent | Superior | Superior |
| Chemical Resistance | Good | Excellent | Superior | Superior |
| UV Stability | Poor | Poor (yellows) | Excellent | Excellent |
| Abrasion Resistance | Good | Excellent | Superior | Superior |
| Cure Time | Slow (days for full cure) | Moderate (days) | Fast (hours) | Fast (hours) |
| Application Ease | High | Moderate | Moderate (fast pot life) | Moderate |
| Film Thickness | Thin | Thick | Moderate to Thick | Thin |
| Hot Tire Pickup | Susceptible | Resistant | Highly Resistant | Highly R |
Key Selection Criteria for Concrete and Garage Floor Coatings
Choosing the right coating system involves more than just understanding the types; it requires evaluating your specific needs against key performance criteria.
- Abrasion Resistance: Consider the level of traffic your floor will endure. A residential garage with occasional vehicle parking will have different needs than a commercial workshop with heavy machinery or constant foot traffic. Coatings vary significantly in their ability to resist scratches, scuffs, and wear.
- UV Stability: If your garage door is frequently open, or if the floor is exposed to direct sunlight, UV stability is paramount. Epoxies can yellow or chalk over time when exposed to UV rays, while polyaspartics and urethanes are designed to resist these effects, maintaining their aesthetic appeal.
- Hot-Tire Pickup: This common issue occurs when hot tires from a recently driven vehicle lift and delaminate a coating from the concrete surface. Lower-quality or improperly cured coatings are most susceptible. High-solids epoxies, polyaspartics, and urethane topcoats are formulated to prevent this problem.
- Chemical Spills: Garages and workshops are prone to spills of oil, gasoline, antifreeze, and other automotive fluids. A chemically resistant coating creates a non-porous barrier that prevents these substances from penetrating and staining the concrete, making cleanup much easier. Resistance to de-icing salts, often tracked in during winter months, is also a critical factor.
- VOC Emissions: Volatile Organic Compounds (VOCs) are chemicals released into the air during and after application. Low-VOC or zero-VOC coatings are preferable for indoor environments, contributing to better air quality and complying with environmental regulations.
- Cost: While we won’t discuss specific pricing, it’s important to consider the overall value. A higher initial investment in a premium, durable coating system can lead to significant long-term savings by reducing the need for frequent repairs or recoating, and enhancing property value.
Critical Concrete Preparation and Repair Standards
The success and durability of any concrete floor coating depend mostly on careful surface preparation. Without it, even the best coatings can fail, causing peeling, bubbles, and early damage. This step is essential to get a strong, lasting finish, create a good bond between the coating and concrete, and control moisture properly.
Before applying a new coating, ensure the concrete is free from oil contamination; this guide on how to remove oil stains from a driveway with baking soda provides a practical starting point.
Substrate Profiling and Structural Repairs
Effective surface preparation creates a profile on the concrete that allows the coating to mechanically bond. This is far more effective than relying solely on chemical adhesion.
- Mechanical Preparation: The gold standard for concrete floor preparation is mechanical abrasion, typically achieved through diamond grinding or shot blasting. These methods create a Concrete Surface Profile (CSP) – a standardized measure of the surface roughness – ranging from CSP 1 (fine) to CSP 9 (very coarse). For most garage floor coatings, a CSP of 2-3 is recommended, creating a texture similar to 60-80 grit sandpaper. This process effectively removes laitance, old coatings, sealers, and contaminants, opening up the concrete pores for optimal adhesion.
- Acid Etching: While sometimes used for DIY projects, acid etching is generally less effective than mechanical methods. It creates a finer profile (CSP 1-2) and may not remove all contaminants or open the pores sufficiently for heavy-duty coatings. It also requires thorough rinsing to neutralize the acid and remove all residue, which can introduce moisture issues.
- Structural Repairs: Before any coating application, all cracks, divots, spalls, and uneven areas must be addressed. Cracks should be routed out and filled with appropriate elastomeric or rigid epoxy fillers. Divots and spalls require patching with a suitable concrete repair material. For new concrete, it’s crucial to allow a minimum of 30 days for the slab to fully cure and release excess moisture before applying any coating.

Substrate Compatibility and Moisture Mitigation
Beyond profiling and repairs, understanding the existing substrate and its moisture content is vital.
- Existing Coatings: Applying a new coating over an existing one is possible, but only if the previous coating is fully bonded, clean, and structurally sound. The existing coating must be thoroughly abraded (de-glossed) to create a profile for the new material to adhere to. An adhesion test (e.g., cross-hatch or pull-off test) is always recommended.
- Tile, VCT, or Wood: Applying concrete coatings over non-concrete substrates like ceramic tile, VCT (Vinyl Composition Tile) flooring, or wood is generally not recommended without specialized systems or significant preparation. These materials have different expansion/contraction rates, adhesion properties, and potential for movement or moisture issues. If attempted, rigorous adhesion testing and potentially a scratch coat or specialized primer for specific residential concrete work might be required, but risks remain high due to potential adhesive failure or substrate movement.
- Moisture Testing: Concrete is porous and can wick moisture from the ground, which can lead to coating delamination. Before any application, it’s imperative to conduct moisture testing using methods like calcium chloride tests or relative humidity (RH) probes. If moisture levels exceed the coating manufacturer’s specifications, a moisture vapor barrier basecoat may be necessary to prevent future issues. Ignoring moisture can lead to catastrophic coating failure.
Application Workflows, Tooling, and Cure Management
After preparing the concrete carefully, the application needs close attention, the right tools, and proper environmental conditions. A good finish depends on controlling pot life, mixing ratios, and wearing the correct personal protective equipment (PPE). For example, using 18-inch rollers helps cover the surface evenly, and applying with a squeegee spreads the material before rolling it again.
Environmental Windows and Temperature Thresholds
The ambient conditions during application significantly impact the coating’s performance and cure.
- Temperature: Most coatings have an optimal application temperature range, typically between 50°F and 90°F (10°C to 32°C). Applying coatings below this range can significantly slow down or even stall the curing process, leading to a soft, under-cured finish. Conversely, applying above the recommended range can drastically reduce pot life, causing the coating to “flash cure” or harden too quickly, making it difficult to apply evenly and potentially leading to roller marks or incomplete coverage. Surface temperature is often more critical than ambient air temperature.
- Relative Humidity and Dew Point: High humidity can interfere with the curing process, especially for moisture-sensitive coatings. The dew point is also a critical factor; if the surface temperature drops below the dew point, condensation can form on the concrete, preventing proper adhesion and potentially causing blushing or hazing in the coating. It’s best to apply when the surface temperature is at least 5°F (3°C) above the dew point.
- Weather Conditions: Avoid applying coatings if rain or heavy condensation is expected within 24-48 hours of application, particularly for outdoor or semi-exposed areas. Some specialized low-temperature formulas are available for colder climates, but they often come with specific application guidelines.
Curing Timelines and Maintenance Practices
Understanding the curing process and subsequent maintenance is essential for maximizing the lifespan of your coated floor.
- Cure Times: Different coatings have varying cure schedules. Generally:
- Light Foot Traffic: 10-24 hours for most 2-part epoxies and polyaspartics. 1-part water-based epoxies may require 24 hours.
- Vehicle Parking: 24-72 hours for most 2-part epoxies and polyaspartics. 1-part water-based epoxies often require a full 7 days before vehicle traffic to prevent hot tire pickup.
- Full Chemical Cure: Full chemical resistance and hardness are typically achieved within 5-7 days for polyaspartics and 7-30 days for epoxies. For 1-part systems, if vehicle parking is needed before full cure, placing corrugated cardboard under tires after 72 hours can act as a temporary “hot tire buffer.”
- Maintenance: Coated floors are significantly easier to clean than bare concrete. Routine maintenance involves sweeping or vacuuming to remove loose debris. For deeper cleaning, use a neutral pH cleaner and a soft-bristle brush or mop. Avoid harsh chemicals, abrasive cleaners, or pressure washers, especially within the first 30 days of application, as these can damage the coating. Promptly clean up spills to prevent staining, even with highly resistant coatings.
- Manufacturer Warranties: Most reputable coating manufacturers offer warranties against defects in materials. However, these warranties are almost always contingent on proper surface preparation and application according to their guidelines. Documenting your preparation steps and environmental conditions can be crucial if a warranty claim ever arises.
Frequently Asked Questions About Floor Coatings
What causes floor coatings to peel or delaminate under vehicle tires?
Peeling or delamination under vehicle tires, often referred to as “hot-tire pickup,” is a common and frustrating failure. It typically stems from a combination of factors:
- Inadequate Surface Preparation: This is the leading cause. If the concrete surface is not properly profiled (e.g., insufficient diamond grinding or shot blasting, or relying solely on acid etching), the coating lacks the mechanical bond necessary to adhere permanently.
- Moisture Transmission: Moisture vapor migrating up through the concrete slab can create hydrostatic pressure, pushing the coating off the surface. This is particularly prevalent in slabs on grade without an effective vapor barrier.
- Contamination: Oil, grease, sealers, or other contaminants left on the concrete surface before application will act as a bond breaker, preventing the coating from adhering properly. Poor degreasing is a frequent culprit.
- Insufficient Bond Strength: Lower-quality or improperly formulated coatings may simply not have the inherent bond strength to withstand the stresses of hot tires.
- Improper Cure: Driving on a coating before it has fully cured to its maximum hardness and adhesion can cause it to tear or lift.
How do 1-part water-based epoxies compare to 2-part 100% solids epoxies?
The distinction between 1-part water-based epoxies and 2-part 100% solids epoxies lies in their fundamental chemistry and performance:
- Curing Mechanism: 1-part water-based epoxies dry primarily through the evaporation of water. The epoxy components are dispersed in water, and as the water leaves, the solids coalesce to form a film. 2-part 100% solids epoxies, conversely, cure through a chemical cross-linking reaction between the resin (Part A) and the hardener (Part B). This reaction solidifies the material, making it a much more robust and dense coating.
- Solids Content and Film Thickness: 1-part systems have a lower solids content (often 50% or less), meaning a significant portion of the product evaporates, resulting in a thinner dry mil thickness. 2-part 100% solids epoxies, as the name suggests, have virtually no evaporative components, leading to a much thicker and more durable film build.
- Durability and Performance: Due to their chemical cross-linking and higher film thickness, 2-part 100% solids epoxies offer superior abrasion resistance, chemical resistance, and overall longevity compared to 1-part water-based versions. They are designed for heavy wear and tear, whereas 1-part systems are more suited for lighter duty applications and primarily aesthetic enhancements.
- Lifespan: A properly installed 2-part 100% solids epoxy system will have a significantly longer service lifespan than a 1-part water-based epoxy, especially in high-traffic areas or environments prone to spills.
How long should concrete cure before applying a protective coating system?
For optimal adhesion and performance, new concrete slabs should cure for a minimum of 30 days before applying a protective coating system. This crucial hydration period allows the concrete to achieve sufficient strength and alkalinity, but more importantly, it allows excess moisture to evaporate from the slab.
Fresh concrete has a lot of water. When this water evaporates, the concrete releases moisture vapor. Applying a non-breathable coating too soon can trap this moisture, causing blistering, peeling, and coating problems. The 30-day waiting period is a general rule; thicker slabs or high humidity might need more time. Always test moisture levels (like calcium chloride or RH probes) to make sure they meet the coating maker’s guidelines before applying.
Conclusion
Upgrading your property with durable concrete solutions is a smart investment that pays dividends in both protective performance and aesthetic appeal. By transforming your concrete surfaces with high-quality coatings, you’re not just enhancing their look; you’re providing them with long-term durability against the rigors of daily use, chemical exposure, and environmental factors.
Whether you’re aiming for a sleek, showroom-quality garage, a resilient workshop floor, or simply extending the life of your concrete slab, understanding the different coating types, the critical role of surface preparation, and proper application techniques is paramount. The ease of maintenance and the significant property enhancement that these coatings offer make them an invaluable addition to any home or commercial space.
With the right knowledge and a commitment to proper installation, your concrete floors can become a durable, attractive, and easily maintainable asset for years to come.