


How to Clean Breville Espresso Machine: The Complete Step-by-Step Guide
Your Breville espresso machine doesn’t fail all at once. It fails one skipped rinse at a time. That slow pour this morning, the bitter aftertaste that wasn’t there last month, the steam wand that sounds a little wheezier than it used to.
None of that means your machine is breaking down. It usually means coffee oil and mineral scale have quietly taken over parts you never look at, like the shower screen, the boiler, and the inside of the water tank.
The good news is that fixing it doesn’t require a repair technician and doesn’t take long. Most of what keeps an espresso machine running well comes down to a handful of small habits done consistently, not one big overhaul done occasionally. A two-minute wipe-down after each shot prevents most of the buildup that would otherwise turn into a real problem down the line.
Below is everything you need to know about how to clean Breville espresso machine parts properly. The daily habits, the monthly deep clean, tablet and vinegar descaling methods, and the grinder and water tank steps are most guides skip entirely.
Whether you’re running a Barista Express, a Barista Touch, or a Breville One Touch, the same core routine applies, even if a few buttons differ.
Why Cleaning Your Breville Espresso Machine Actually Matters
Every espresso machine runs on two things that fight against cleanliness: hot water and coffee oil. Hot water carries dissolved minerals that turn into scale inside the boiler and pipes. Coffee oil clings to the shower screen, portafilter basket, and group head, slowly turning rancid.
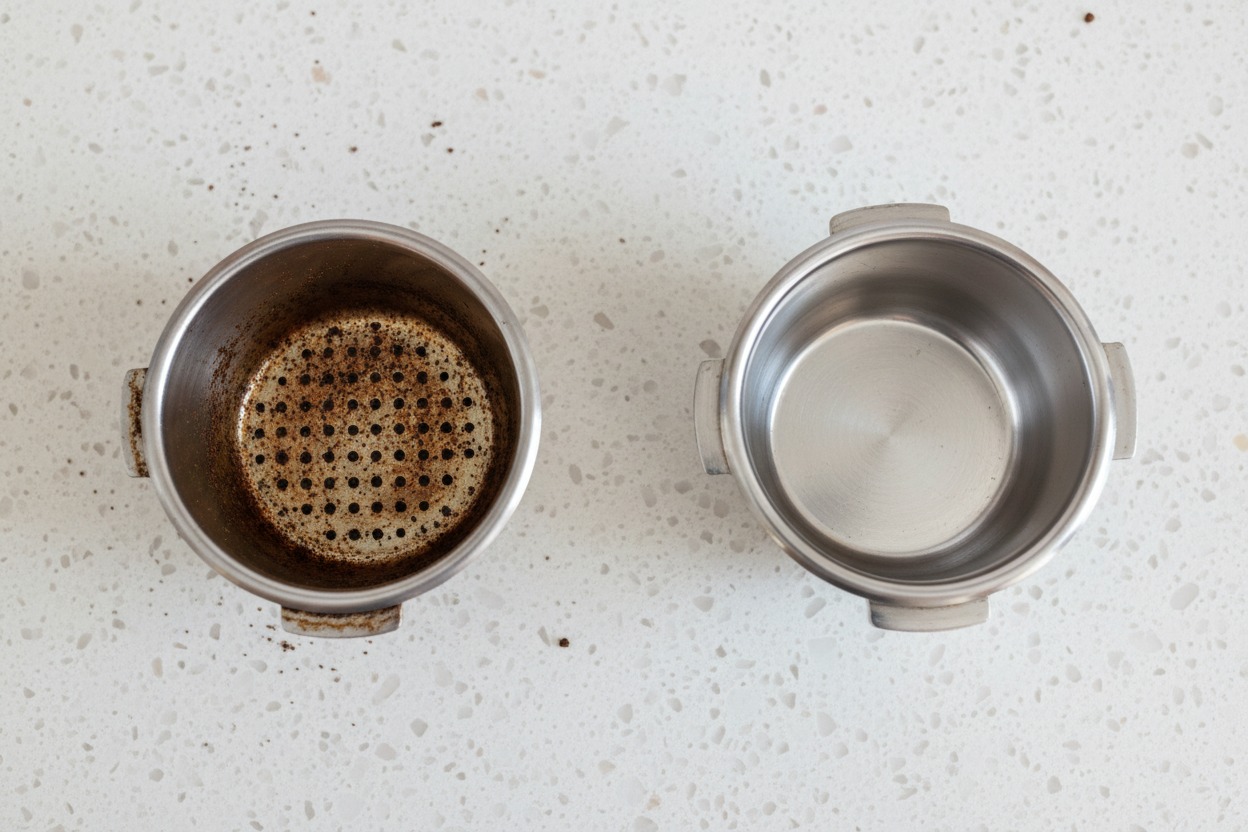
According to Breville’s own coffee cleaning and maintenance guidance, home machines tend to fail for a different reason than café machines do. Most homeowners simply underestimate how much regular upkeep their machines actually need. That’s not a knock on anyone. Nobody hands you a cleaning calendar when you buy the machine.
Here’s what’s actually happening inside your machine if it goes uncleaned:
- Coffee oils oxidize. They turn rancid and bitter, and that bitterness transfers into every shot afterward.
- Mineral scale builds up inside the boiler and heating element. The same white, chalky limescale that forms anywhere hot water collects or is repeatedly dispensed.
- Milk residue dries inside the steam wand tip, which can partially block steam flow and change your microfoam texture.
- A stale water filter or tank can grow mold and bacteria over time, which becomes a food-safety issue rather than just a taste one, as Corner Coffee Store’s Breville maintenance guide points out.
This isn’t just about being obsessed with a kitchen appliance. It’s about protecting a machine that often costs hundreds of dollars and making sure you get the best flavor from every cup.
Cleaning frequency, at a glance:
| Part | How Often | Why |
|---|---|---|
| Portafilter & basket | After every shot | Prevents oil buildup and stale taste |
| Steam wand | After every use | Stops milk from drying and hardening |
| Drip tray | Daily or when full | Prevents mold and odor |
| Group head purge | Daily | Flushes trapped grounds and oil |
| Deep clean (tablet cycle) | Every 1–2 months, or when the light activates | Removes oil deep in the brew group |
| Descale | Every 2–3 months (sooner with hard water) | Clears mineral scale from the boiler |
| Water filter | Every 1.5–2 months | Filters stay effective and stay sanitary |
| Grinder burrs | Monthly | Removes oil residue that dulls flavor |
If you have hard water at home, not just in your espresso machine, check out how to stop calcium buildup on faucets. The minerals that clog your faucets also build up inside your machine’s boiler.
Signs Your Breville Espresso Machine Needs Cleaning Right Now
Sometimes you don’t need a calendar reminder. The machine tells you. Here are the tells that mean “clean me” rather than “descale me,” and it helps to know the difference so you fix the right problem.
- Shots pull noticeably slower than usual, and the pressure gauge doesn’t climb as high. This is often mineral scale narrowing the internal water pathways, which points toward a descale rather than a tablet cycle.
- Coffee tastes bitter or “burnt” even with fresh, correctly-ground beans. That’s usually rancid oil sitting in the shower screen or group head, which a tablet cycle fixes.
- The steam wand sputters, spits, or produces weak microfoam. Dried milk is partially blocking the tip. A quick soak and a pin-sized cleaning tool usually clears it.
- Your espresso tastes musty or “off” in a way that’s hard to describe. This is worth checking the water tank and filter first, since stagnant water is often the quiet culprit nobody suspects.
- The grinder sounds slightly different, or the grind size feels inconsistent shot to shot. Oil-caked burrs are the usual reason, and a burr brushing session (never water) generally resolves it.
- The “CLEAN” or “DESCALE” light is flashing or solid, depending on your model. This is the most direct signal, and it’s worth acting on the same day rather than putting it off.
None of these symptoms means something is broken. They’re the machine’s version of a check engine light, and almost all of them are fixed with the routines in this guide rather than with a repair call.
What You’ll Need Before You Start
You don’t need a cabinet full of specialty products. Most of this is either already in your kitchen or came in the box with your machine.
- Breville cleaning tablets (or citric acid/vinegar as a backup)
- Breville descaling solution or packets
- A cleaning disc (usually included with the machine)
- A soft, lint-free cloth
- A small brush for the grinder burrs (a stiff paintbrush works fine)
- A jug or bowl to catch runoff during cleaning cycles
- Warm water and mild dish soap
- A steam wand cleaning tool or sachet, if you froth milk often
The Quick Daily Clean (Do This Every Time You Brew)
This is the two-minute routine that prevents most buildup problems before they start. Breville’s official step-by-step cleaning walkthrough breaks it into four small habits that take seconds once they become routine.
Step 1: Dispose of the Puck Immediately
Toss the spent coffee puck out of the portafilter right after pulling your shot, while the grounds are still warm and loose. The longer they sit and cool, the more oil seeps into the shower screen above the group head.
Step 2: Rinse and Wipe the Portafilter
Rinse the portafilter under the faucet for a few seconds, then dry it with a clean towel. Check that your tamper is dry too before putting it away, since a damp tamper left in a drawer is an easy way to invite bacterial growth.
Step 3: Purge the Group Head
Run a “blank shot”, brewing with no grounds in the basket, to flush lingering coffee and oil residue out of the group head. This single step prevents a lot of the “why does my espresso taste burnt” complaints people run into.
Step 4: Wipe the Steam Wand
Release a short burst of steam into a towel to purge any trapped milk, then wipe the wand down with a damp cloth once you’re done texturing milk. Home-barista enthusiasts on the Home-Barista community forum often add one extra trick: dip the wand tip into a small pitcher of clean water and pulse the steam for a second right after frothing, since it loosens residue before it can bake onto the metal.
How to Clean Breville Espresso Machine With Tablets
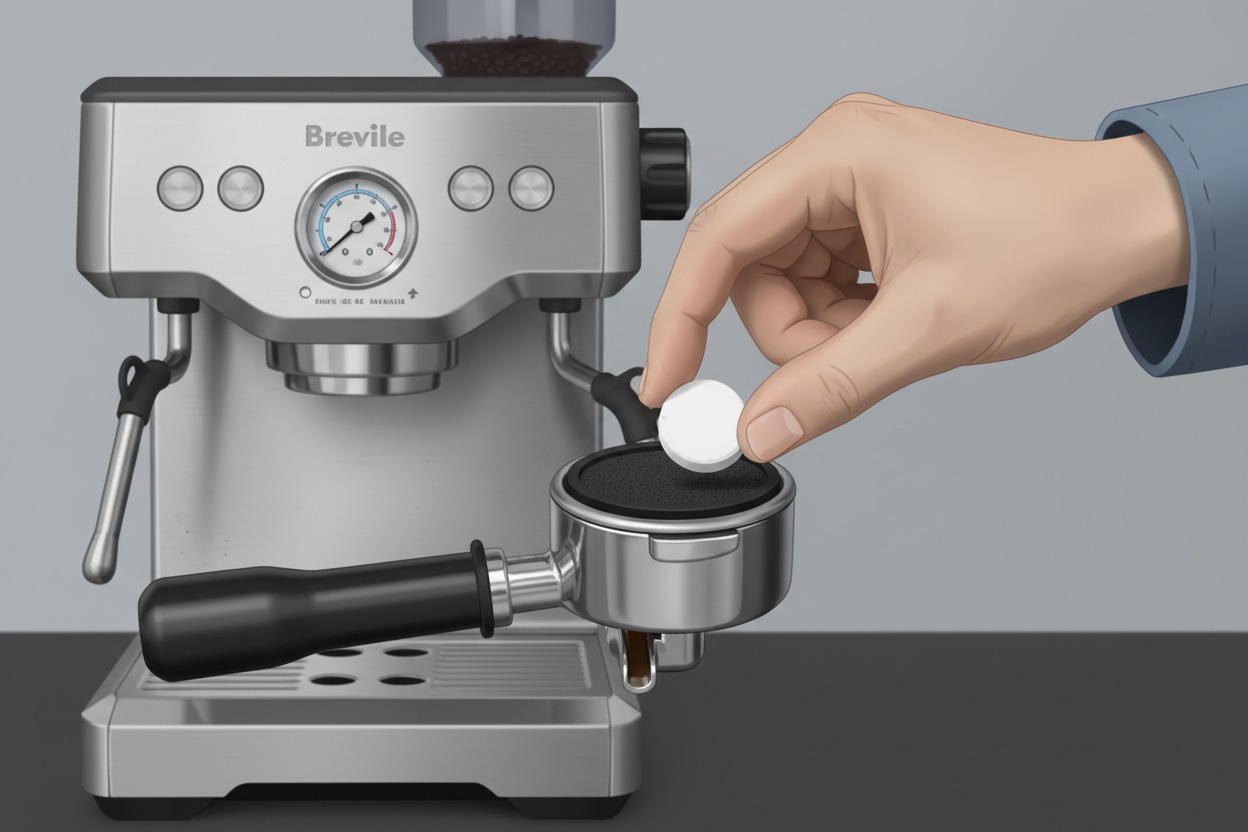
This is Breville’s recommended method, and it’s what the “CLEAN” light on most Barista-series machines is prompting you to do. The tablets are formulated specifically to lift baked-on coffee oil out of the brew group without damaging internal seals.
- Empty the drip tray and refill the water tank.
- Insert the rubber cleaning disc into the single-shot filter basket.
- Place one Breville cleaning tablet on top of the disc.
- Lock the portafilter into the group head, as if you were about to pull a shot.
- Hold down the power button along with the 1-cup and 2-cup buttons at the same time until the clean light starts flashing.
- Let the cycle run all the way through. It typically finishes with two beeps.
- Remove the portafilter and run a plain water cycle afterward to flush out any tablet residue.
One thing worth flagging: home users have reported that leftover tablet residue can occasionally clog the solenoid valve or shower screen if the machine isn’t rinsed thoroughly afterward, according to troubleshooting discussions on JustAnswer’s small appliance forum. A second or even third rinse cycle is worth the extra ninety seconds.
How to Clean Breville Espresso Machine Without Tablets
Ran out of tablets, or just prefer not to buy a specialty product? You have a few legitimate options, though none are quite as targeted as the purpose-made tablets.
- Backflushing with plain water only. Insert the blind (rubber) disc without a tablet and run several water-only cycles through the group head. This won’t chemically dissolve oil, but it physically flushes loose grounds and surface residue.
- A pinch of unscented dish soap on the blind disc, used sparingly and followed by multiple thorough water rinses. This is a common home workaround, though it shouldn’t replace the actual cleaning tablet method in the long term, since soap residue is harder to fully rinse from fine internal channels.
- Manual disassembly and cleaning. Remove the shower screen and any group head parts you can access, per your model’s manual, then hand-wash them in warm water and dry them completely before reassembly.
- Citric acid serves as a milder, food-safe alternative for descaling rather than for oil removal, more on that in the next section.
Tablets vs. no-tablets. A quick comparison:
| Method | Effectiveness on Oil | Effort | Cost |
|---|---|---|---|
| Breville cleaning tablets | High — purpose-built | Low | Ongoing but cheap per use |
| Water-only backflush | Low-moderate | Low | Free |
| Manual disassembly + soap | Moderate | Higher | Free |
If you clean without tablets regularly, plan on doing it more often, since none of the alternatives lifts oil quite as completely.
How to Clean Breville Espresso Machine With Vinegar
Vinegar is the go-to when you’ve run out of Breville’s official descaling solution, and it’s genuinely effective against mineral scale. Though it doesn’t remove coffee oil the way a cleaning tablet does. Vinegar is a descaler, not a degreaser.
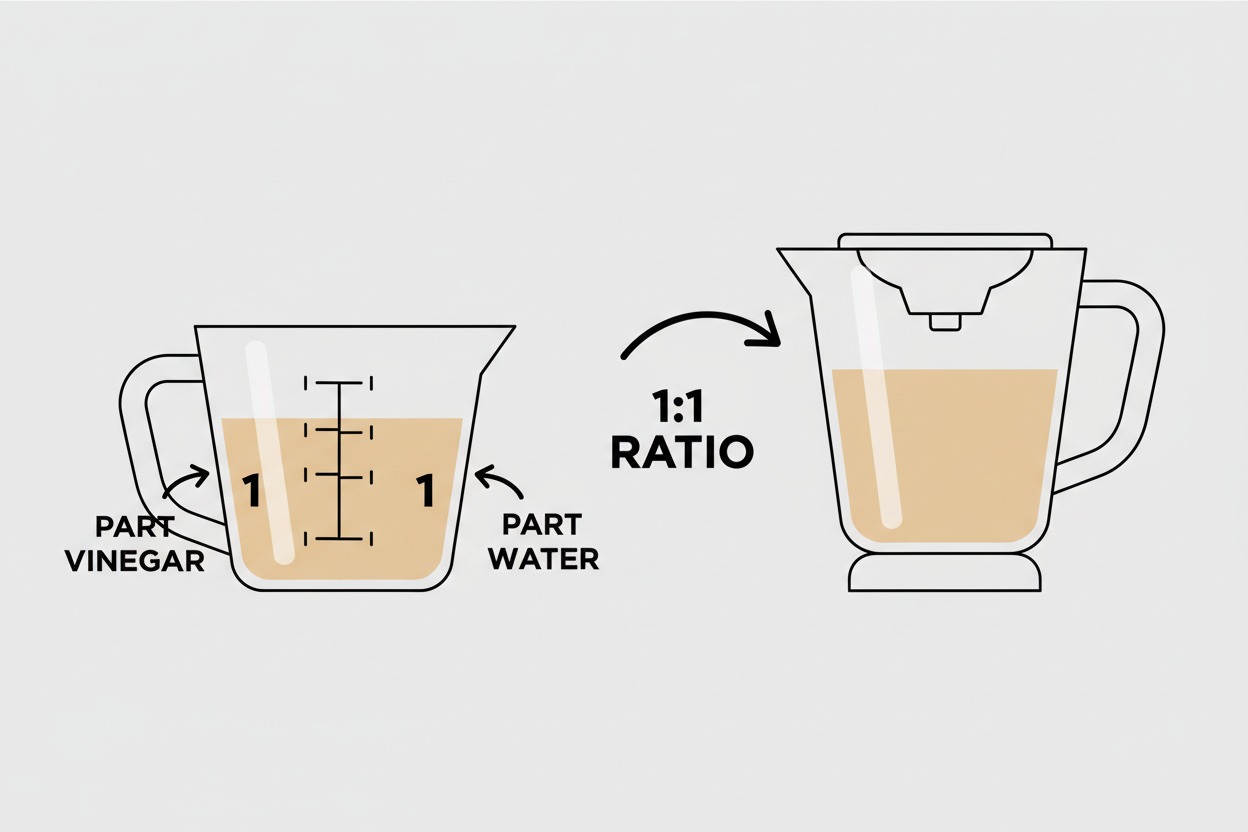
Breville’s own published cleaning guide confirms the exact ratio: mix one part water to one part white vinegar, then fill the water tank to the max line.
Steps:
- Remove the water filter first. It will absorb the descaling solution if left in during the process.
- Power on the machine and mix your vinegar-and-water solution in the tank.
- Place a large bowl or container beneath the portafilter, hot water spout, and steam wand.
- Run the mixed solution through the machine the same way you’d brew a shot, rotating through the portafilter, hot water outlet, and steam wand until it’s used up.
- Run a second water-only cycle afterward to completely flush the vinegar before brewing again.
- Do a final inspection and rinse if you still notice mineral residue, coffee grounds, or oil stains.
Vinegar’s smell lingers, so plan on two or even three water-only rinse cycles, not just one, especially if you’re sensitive to it showing up in your next cup.
Vinegar vs. Breville’s official descaler:
| Vinegar | Breville Descaler | |
|---|---|---|
| Cost | V ery low | Slightly higher |
| Smell/taste risk | Noticeable, needs extra rinsing | Formulated to rinse clean |
| Effectiveness on scale | Good | Excellent, tested for the machine |
| Availability | Any grocery store | Breville accessories, some retailers |
How to Deep Clean Breville Espresso Machine
A deep clean combines everything above into one thorough session, typically done every 1 to 2 months, depending on how often you brew. Owners making two to five cups a day generally need to deep-clean some parts weekly and others monthly, a rhythm that aligns with Breville’s own cleaning and maintenance guidance.
Here’s the order that works best, so you’re not undoing one step with another:
- Grinder cleaning first (dry components only. Never introduce water here).
- Cleaning tablet cycle through the group head to lift oil.
- Descale cycle with vinegar or Breville’s descaler to clear mineral buildup.
- Water tank and filter check. Rinse the tank and replace the filter if it’s due.
- External wipe-down, including buttons, drip tray, and housing.
- Steam wand deep soak, using a steam wand cleaner sachet if you froth milk daily.
Doing these in sequence, rather than picking one at random, means you’re not running a descale cycle through a machine that’s still coated in oil, or vice versa.
How to Clean Breville Espresso Machine Filter
The water filter is easy to forget because it sits quietly inside the tank doing its job, until it doesn’t. Breville’s filters need swapping roughly every 1.5 to 2 months, and letting an old filter sit too long doesn’t just reduce filtration performance. It can allow mold and bacteria to grow, which can make your espresso taste off or, in extreme cases, be unsafe to drink.
To clean or replace the filter:
- Remove the water tank from the machine.
- Pull the filter cartridge out of its housing.
- If it’s not due for replacement yet, rinse it gently under cool running water to remove loose sediment.
- If it’s been roughly two months, replace it with a new cartridge rather than trying to clean the old one. Filter media doesn’t “reset” once saturated.
- Soak a brand-new filter in cold water for a few minutes before installing it, to help activate the charcoal.
- Reinsert the filter, snap it back into the housing, and refill the tank.
Set a phone reminder for this one. It’s the single most-skipped maintenance step, mostly because nothing visibly signals that it needs doing the way a “CLEAN” light does.
How to Clean Breville Espresso Machine Water Tank
The tank itself is one of the simplest parts to clean, but it’s also one that people neglect because it looks clean at a glance, even when it isn’t.
- Remove the tank and empty any remaining water.
- Wash it out with warm water and a small amount of mild dish soap.
- Use a soft bottle brush to reach the corners and around the filter housing, where a thin biofilm can build up unnoticed.
- Rinse thoroughly. Soap residue left in the tank will affect your coffee’s taste.
- Let it air-dry completely before reinserting the filter and refilling, as trapping moisture inside a closed tank can encourage mold growth.
- Wipe down the tank’s rubber seal or gasket where it meets the machine, since grime tends to collect right at that seam.
Do this roughly every two to three weeks if you’re a daily user, and check it any time your coffee starts tasting flat or slightly musty.
How to Clean Breville Espresso Machine Grinder
If your machine has a built-in grinder, like the Barista Express, Barista Pro, or Barista Touch, the burrs need attention separate from the rest of the machine. This is also where people cause accidental damage by using the wrong method.
Do:
- Empty the bean hopper completely before cleaning.
- Use a soft brush or an old, clean paintbrush to sweep out coffee dust and oil residue from around the burrs.
- Wipe the hopper and chute with a dry or barely damp cloth.
- Run a small batch of beans through after cleaning to “re-season” the burrs before your next real grind.
Don’t:
- Use water to clean the burrs. As Breville’s own coffee grinder cleaning guide warns, never submerge an electrical appliance. Burrs are sensitive to rust, and soaking them in warm soapy water or running them through a dishwasher will ruin them.
- Use uncooked rice to “clean” the grinder. That trick only applies to blade grinders. Rice is hard enough to strain or damage burr grinders.
If you’d rather not disassemble the grinder every time, specialty grinder cleaning tablets are a food-safe alternative that absorb and remove oils from burr grinders without affecting your coffee’s flavor. Run one through occasionally between full manual cleanings.
How to Clean Breville One Touch Coffee Machine
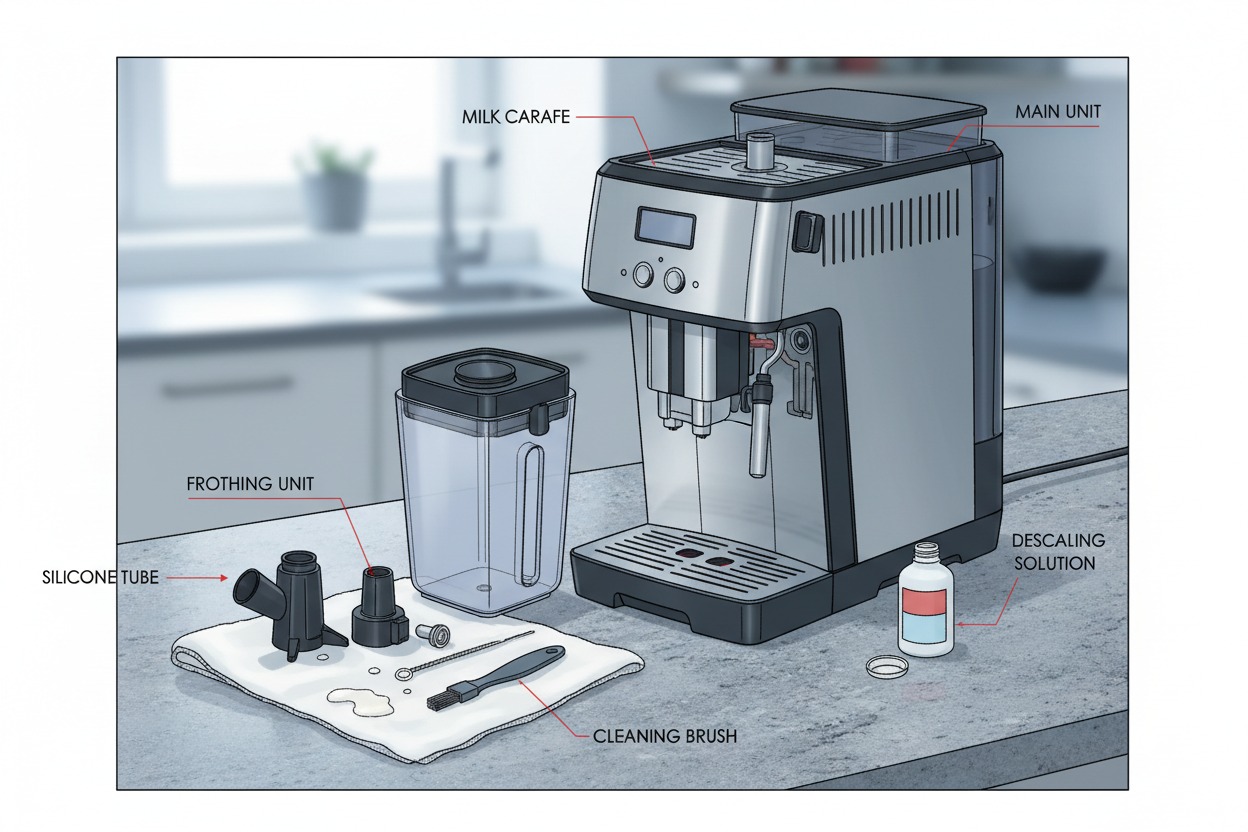
The Breville One Touch models add an automatic milk system to the mix, which means there’s one more component to keep track of: the milk carafe and its internal tubing.
Daily milk system care:
- After each use, run the machine’s built-in milk-system rinse cycle (usually triggered from the settings or a dedicated button).
- Empty any leftover milk from the carafe immediately. Don’t let it sit, even overnight in the fridge, without at least an initial rinse.
- Wipe down the external steam nozzle with a damp cloth.
Weekly deep clean:
- Disassemble the milk carafe lid and frothing components according to your manual.
- Wash all removable parts in warm, soapy water, using a small brush to reach the tubing interior.
- Check whether your specific carafe parts are dishwasher-safe. Some are, some aren’t, so it’s worth confirming rather than guessing.
Descaling the One Touch system:
Home users discussing their machines on Coffee Forums UK have flagged that running the machine’s automatic descale program too aggressively can occasionally trip an internal fuse on certain One Touch units, and instead suggest a gentler manual approach. Adding descaling crystals to the tank and running water through the brew head and milk frother, then repeating with plain cold water. If your descale light comes on and the automated cycle behaves oddly, this manual water-flush approach is a safe fallback. But always check your specific model’s manual first, since One Touch models vary generation to generation.
Cleaning Schedule Cheat Sheet
| Frequency | Tasks |
|---|---|
| Every use | Dump puck, rinse portafilter, purge group head, wipe steam wand |
| Daily | Empty drip tray, wipe exterior, rinse milk carafe (One Touch) |
| Weekly | Deep-clean the steam wand, check the water tank, and disassemble milk system parts |
| Every 1–2 months | Cleaning tablet cycle, grinder burr brushing |
| Every 1.5–2 months | Replace water filter |
| Every 2–3 months | Full descale cycle |
Expert Tips for Keeping Your Breville Machine Like New
- Use filtered or soft water whenever possible. The less mineral content in your water to begin with, the less scale you’ll fight later. This is the same principle used to manage hard water anywhere else in the house, including at your kitchen faucet.
- Never let the drip tray overflow before emptying it. Standing water plus warmth is exactly the environment mold likes.
- Store the portafilter, with the basket locked in, overnight so air can circulate and residual moisture doesn’t get trapped against the metal.
- Keep a small dedicated brush just for the grinder. Using the same brush for the group head and the burrs cross-contaminates oil and moisture between two parts that need very different care.
- Log your last descale date somewhere visible. A sticky note on the machine works fine. It’s easy to lose track of “when did I last do this” once you’re past the two-month mark.
If you’re already thinking about your kitchen’s broader cleaning routine, our kitchen cleaning guides cover other everyday appliance and surface maintenance that pairs well with a coffee-station refresh.
Common Mistakes to Avoid
- Skipping the water-only rinse after a tablet or vinegar cycle. This is the single biggest cause of “why does my coffee taste weird” complaints right after cleaning.
- Cleaning the grinder with water or soap. As covered above, this causes rust and ruins the burrs.
- Ignoring the water filter because there’s no warning light for it. Unlike the clean/descale indicator, nothing tells you the filter is overdue. You have to track it yourself.
- Using metal scrubbers or abrasive pads on the steam wand or portafilter can scratch stainless steel and create more surfaces for residue to cling to.
- Assuming “rinsing” counts as “cleaning.” Daily rinses handle surface residue; they don’t replace the monthly tablet cycle or the periodic descale.
FAQs
Is it safe to use vinegar instead of Breville’s descaling solution?
Yes! Breville’s own guide recommends a one-to-one mix of water and vinegar as an acceptable substitute. Just plan on an extra rinse cycle or two afterward to completely clear the smell and taste.
How often should I descale my Breville espresso machine?
Generally, every two to three months for average use, though homes with harder water may need it more often. Watch for the descale light. Most Breville machines will flag it automatically once mineral buildup is detected.
Can I put Breville portafilter parts in the dishwasher?
It’s best to hand-wash the portafilter, basket, and steam wand tip. Dishwasher heat and detergent can be harsher than needed and may affect gaskets or finishes over time. A quick hand rinse and wipe takes seconds anyway.
Why does my espresso taste sour or bitter even after cleaning?
Check whether you’ve replaced the water filter recently and whether the grinder burrs have oil buildup. Both are easy to overlook since neither triggers an obvious warning light the way the main clean cycle does.
What’s the difference between the daily clean and the deep clean?
The daily routine (puck disposal, portafilter rinse, group head purge, steam wand wipe) takes under two minutes and prevents most buildup. The deep clean, grinder brushing, tablet cycle, descale, filter check, reaches the internal components that daily wiping simply can’t touch, and should happen on the one-to-two-month schedule outlined above.
Conclusion
Cleaning your Breville espresso machine really comes down to two habits: a quick daily wipe-down that takes less time than pulling your actual shot, and a more thorough monthly session that keeps oil and scale from building up where you can’t see them. Neither one requires special skill. Jusr consistency!
Set a recurring reminder for your descale and filter dates, keep a small brush next to your machine for the grinder, and you’ll get years more life (and noticeably better-tasting coffee) out of the same machine. If your kitchen has other hard-water trouble spots too, our guide on preventing calcium buildup on faucets is a natural next read.