


How to Remove Candle Wax From Fabric: The Complete Fabric-by-Fabric Guide
It always starts the same way.
You’re having a lovely dinner, a relaxing evening, or a holiday gathering. Candles are lit. The mood is perfect. And then? A drip. A pool of wax lands right on the tablecloth you just washed, your favorite sweater, or the curtains you paid too much for.
What will be your first instinct? You will grab the cloth and start rubbing.
That’s the worst thing you can do. And it’s exactly why so many wax stains become permanent.
Here’s the good news: wax is almost never a permanent stain. In most cases, you can get every bit of it out, including the color, by using tools you already have at home. But the method you use matters a lot.
In this guide, I’m going to show you how to remove candle wax from fabric the right way. I will explain specific methods for every fabric type, every wax type, and every fabric scenario from clothing to curtains to couch upholstery.
Let’s get into it.
Why Candle Wax Stains Are Actually Two Problems in One
Most people treat a wax stain like a single problem. It’s actually two and this is why most methods feel like they only half-work.
Problem 1: The wax itself. When warm wax drips onto fabric, it seeps between the fibers as it cools. Once it hardens, it grips those fibers from the inside. You can see and feel that raised, stiff patch on your fabric.
Problem 2: The residue it leaves behind. Even after you remove all visible wax, an oily, greasy ring often remains in the fibers. If the candle was colored, there’s also dye left behind. This is the part that trips most people up. They remove the wax, think they’re done, toss the item in the dryer, and the heat permanently sets the greasy residue into the fabric.
Treat both problems in order, and you’ll get complete, clean results. If you skips the second step, and you’ll have a ghost of the stain forever.
Understanding Your Wax Type Before You Start
Not all candle wax is the same, and the type of wax affects how easy it is to remove from fabric.
Paraffin wax is the most common candle wax. Around 70% of candles sold worldwide are made with it. It hardens quickly and tends to sit closer to the fabric surface rather than soaking deep into the fibers. It’s generally the easiest type to remove.
Soy wax is softer and oilier by nature. Even after you lift the solid wax, it almost always leaves behind a greasy residue that needs an extra treatment step. You’ll need to address that oily mark more aggressively than with paraffin.
Beeswax is the densest of the three. It penetrates textured fibers deeply especially in woolens, knits, and velvet. It can be quite stubborn. It also has a higher melting point than paraffin or soy, so low iron settings may not be enough to pull it out completely.
Knowing your wax type sets your expectations and helps you choose the right treatment intensity before you start.
In our previous post, we shared effective methods on how to remove candle wax from various surfaces, ensuring your home stays clean and wax-free. If you missed it, be sure to check out our detailed guide on removing candle wax for step-by-step instructions and helpful tips.
What You’ll Need (All Basic Household Items)
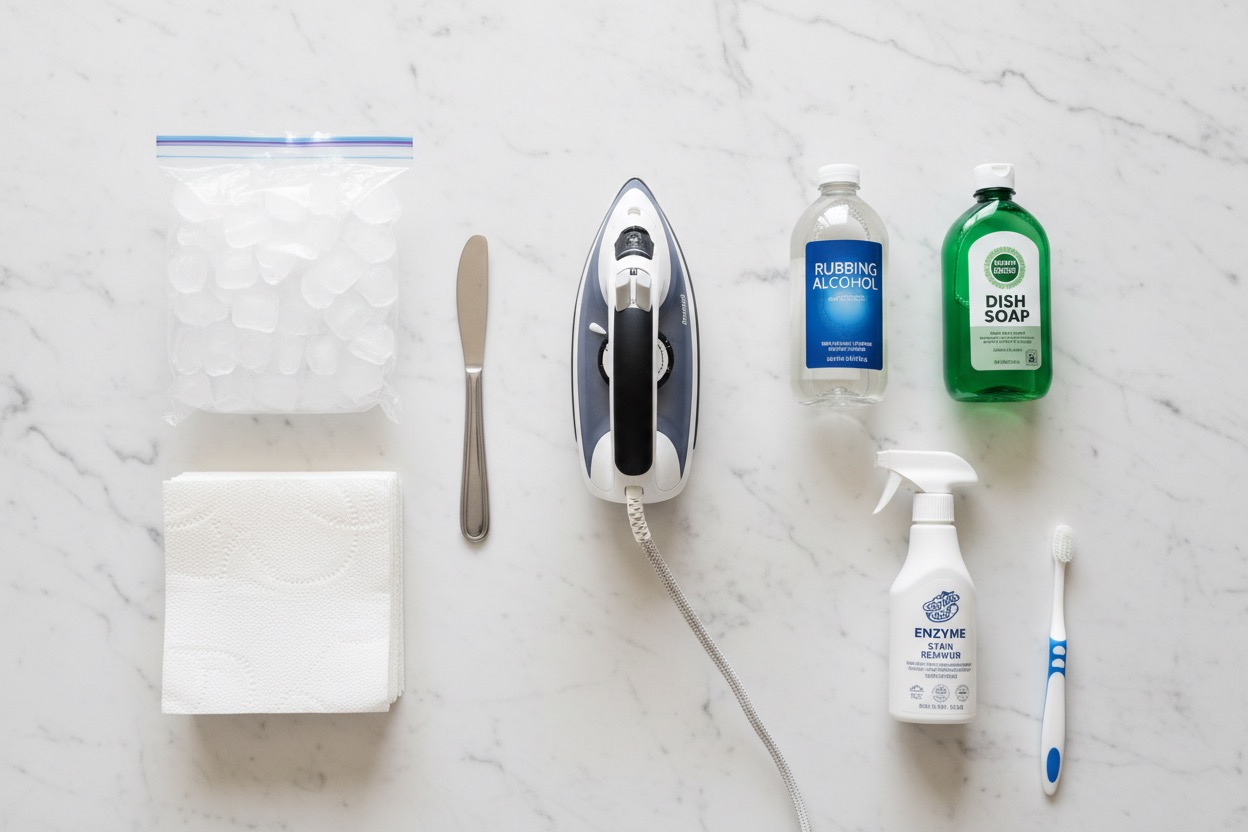
You don’t need any special products for most situations. Here’s your toolkit:
- Ice cubes or an ice pack for hardening the wax
- A dull butter knife, plastic card, or spoon for scraping
- White paper towels or unprinted brown paper bags for absorbing wax during the iron method
- A clothes iron or hair dryer for the heat method
- Rubbing alcohol (isopropyl alcohol) for dye stains and greasy residue
- Clear dish soap for final cleaning on most fabrics
- White distilled vinegar — gentle alternative for natural fabrics
- An enzyme-based stain remover like Zout, OxiClean, or Tide Ultra Stain Release for stubborn marks
- Glycerin especially useful for soy wax greasy residue on wool
- A soft-bristled toothbrush for working stain remover into textured fabrics
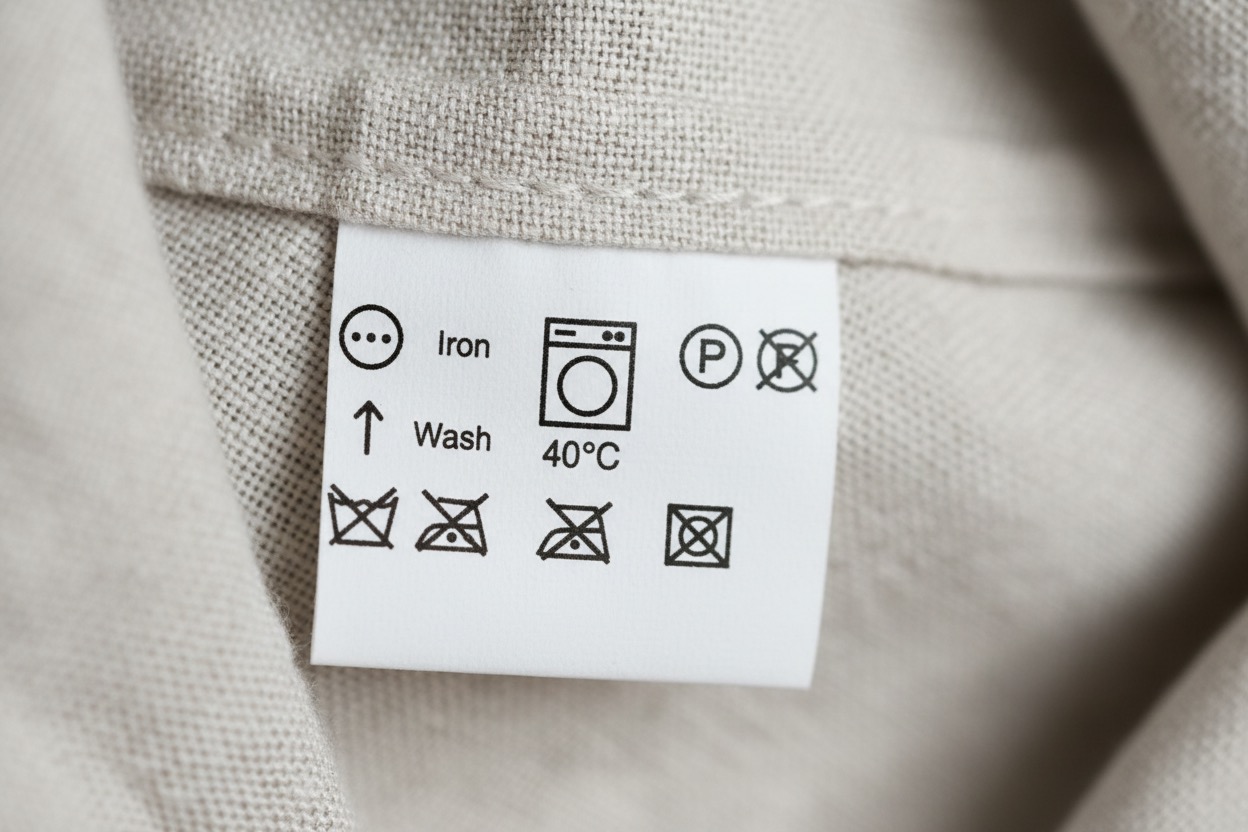
💡 Always read your fabric’s care label before you start. That small tag is the rulebook. Ignoring it can turn a fixable wax stain into permanent damage. See the care label guide later in this article.
The Golden Rules Before You Touch Anything
Before in explain a specific methods, these rules apply to every fabric and every wax type without exception.
Rule 1: Never touch hot or warm wax. Liquid wax spreads into fibers the second you touch it. The stain doubles in size. Always let it cool to room temperature or freeze it faster with an ice pack.
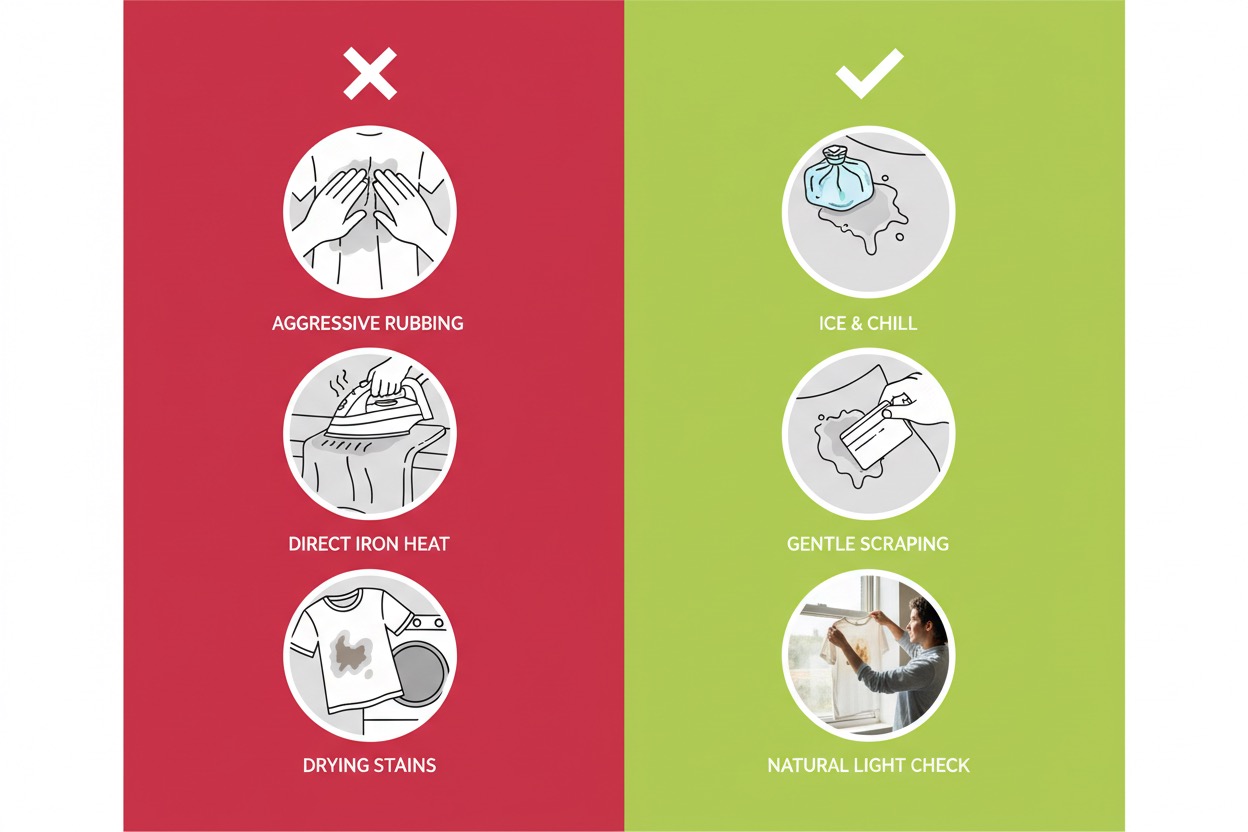
Rule 2: Never rub the stain. Rubbing pushes wax deeper into fabric fibers and spreads it outward. Always scrape, chip, and blot. Never rubbing is always suggested.
Rule 3: Work from the outside edges inward. If you’re scraping or blotting, always work toward the center of the stain. Working outward spreads it.
Rule 4: Always use white paper towels and white cloths. Colored cloths can transfer dye onto your fabric while you’re trying to clean it. Keep it white to be safe.
Rule 5: Don’t put the fabric in the dryer until the stain is 100% gone. Dryer heat is the enemy here. It permanently sets both the greasy wax residue and any dye stain into the fabric fibers. You must check the item carefully before drying.
Rule 6: Test cleaning solutions on a hidden spot first. Flip the garment inside out and test on an interior seam. Check a hem on a tablecloth. Make sure rubbing alcohol or stain remover won’t lift the fabric’s color.
The Core 3-Stage Method (Works on Most Fabrics)
Before we get to fabric-specific advice, here’s the foundation method that applies to most situations. Everything else is an adaptation of these three stages.
Stage 1: Harden and Scrape the Wax
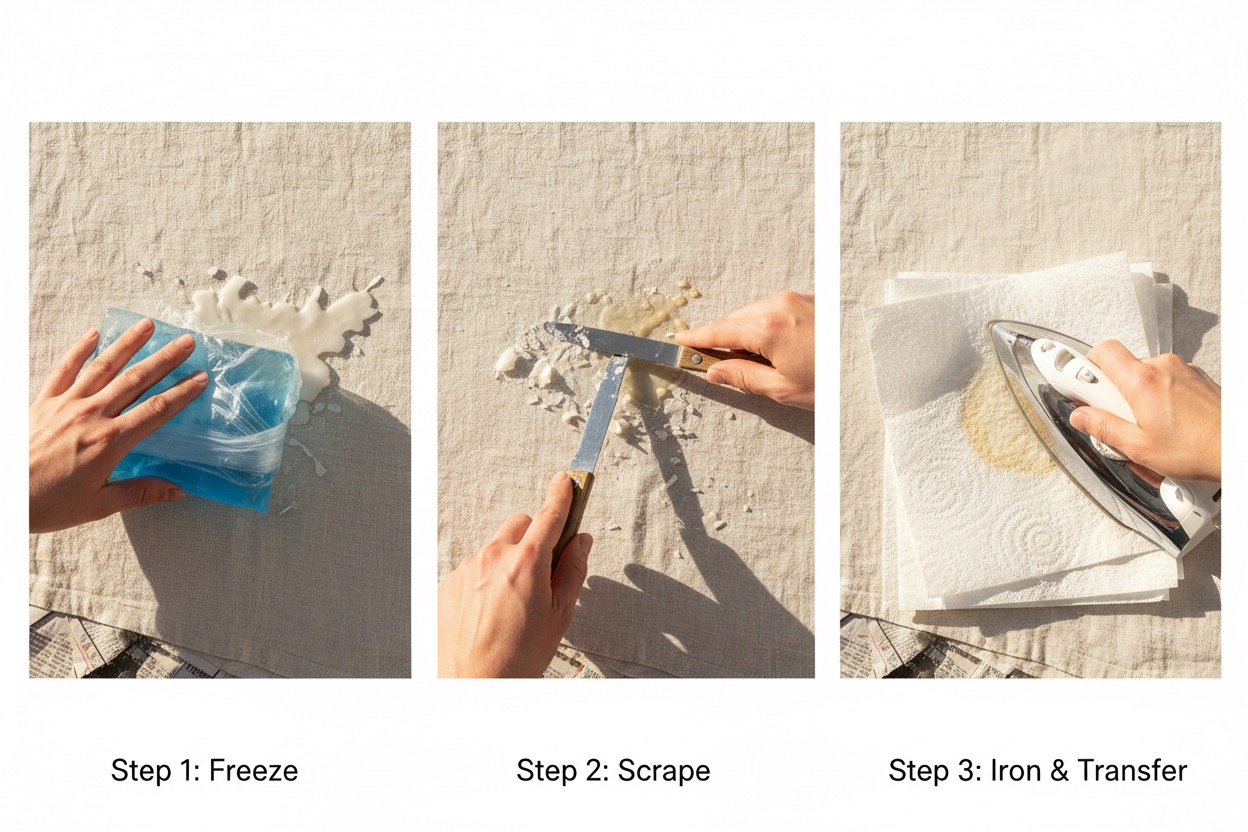
- Let the wax cool fully at room temperature. If you’re in a hurry, place an ice pack or a sealed bag of ice cubes over the stain for 10 minutes.
- Once the wax is hard and brittle, use a dull butter knife, the edge of an old credit card, or the back of a spoon to gently chip and scrape the wax.
- Lift from the edges and work toward the center.
- Collect the chips and discard them. Don’t grind them back into the fabric.
At this stage, you’ll remove most of the bulk wax. A thin layer will remain embedded in the fibers. That’s normal.
Stage 2: Heat and Transfer the Residual Wax
- Place a clean white paper towel underneath the stained area and another one on top of it. The stain should be sandwiched between two clean layers.
- Set your iron to a low-to-medium heat setting with the steam turned OFF.
- Press the iron gently over the top paper towel. Move it slowly. Don’t hold it in one spot for more than a few seconds.
- The heat melts the remaining wax, and the paper towels absorb it by capillary action.
- Move to a fresh section of paper towel as each section becomes saturated with wax. You’ll see a greasy mark transfer with each pass.
- Repeat until no more wax appears on the paper towel.
⚠️ For delicate fabrics: Skip the iron and use a hair dryer on low heat instead. Hold it 4–6 inches from the fabric and use a paper towel to blot up the softened wax.
Stage 3: Treat the Leftover Residue or Dye Stain
After stage 2, you may still see:
- A faint greasy or oily ring from the wax’s natural oils
- A color stain from dyed candle wax
For the greasy ring:
Apply a drop of clear dish soap or an enzyme-based stain remover directly to the spot. Gently work it in with your fingertip or a soft toothbrush. Let it sit for 5–10 minutes. Rinse with cool water.
For a dye stain:
Dampen a white cloth with rubbing alcohol and blot the colored area. Always blotting, never rubbing. Work from the outer edge of the stain inward. The color should transfer onto the cloth with each blot. Rinse afterward with cool water.
Final wash: Machine wash or hand wash according to the care label. Check before drying.
How to Read Your Care Label (Quick Reference)
Your fabric’s care label is your most important tool. Here’s what the key symbols mean for wax removal:
| Symbol / Text | What It Means for Wax Removal |
|---|---|
| Iron symbol (one dot) | Low heat only. Keep iron below 110°C / 230°F |
| Iron symbol (two dots) | Medium heat safe. Standard iron method applies |
| Iron symbol (three dots) | High heat safe. Most aggressive iron settings okay |
| Iron with X | No iron. Use hair dryer or cold method only |
| Hand wash only | Never machine wash; hand-treat with care |
| Dry clean only | Take to a professional for wax removal |
| Bleach triangle (empty) | Any bleach is safe. It helps with tough dye stains on white fabric |
| Bleach triangle with X | No bleach ever. It stick to enzyme removers and rubbing alcohol |
| Square with circle | Tumble dry is okay but only AFTER stain is fully treated |
When in doubt on a care label symbol, the American Cleaning Institute has a full guide to laundry care symbols.
Fabric-by-Fabric Guide: The Exact Method for Each Material
This is where most guides fall short. The same method that works perfectly on cotton can permanently damage silk. Here’s exactly what to do for each fabric type.
Cotton and Denim
Good news: Cotton and denim are the most forgiving fabrics for wax removal. They handle heat well and tolerate most stain removers without color damage.
Method:
- Freeze for 10–15 minutes with an ice pack. Scrape off all hardened wax.
- Sandwich between white paper towels and press with a medium-heat iron (no steam). Repeat with fresh sections of paper until wax stops transferring.
- Apply an enzyme-based stain remover like OxiClean to any greasy ring. Let sit 10–15 minutes.
- For dye stains, blot with rubbing alcohol.
- Machine wash in the warmest water safe for that color (check care label).
- Air dry or tumble dry only once stain is completely gone.
Bonus method for white cotton tablecloths: After removing the wax, soak the stained area in a solution of 1 tablespoon of sodium percarbonate (like OxiClean Free) per liter of water at 40°C for 1–2 hours. This clears even stubborn grease rings beautifully.
Linen
Linen is a natural fiber that’s fairly durable but can watermark easily. It also tends to wrinkle badly when handled wet, so work carefully.
Method:
- Freeze and scrape. Linen can handle firm scraping, but don’t gouge the weave.
- Use the iron method with paper towels on both sides. Linen can handle medium heat.
- If a greasy ring remains, apply a small amount of clear dish soap and work it in gently with a soft cloth.
- For scented candle wax that’s left a lingering smell, sprinkle a small amount of baking soda on the damp area after cleaning and let it sit for 30 minutes before brushing off.
- Machine wash at 40°C (or as directed on label).
Silk
Silk is a high-risk fabric for wax removal. Heat can damage silk fibers, and harsh solvents can strip the sheen permanently. Go slow and gentle.
Method:
- Do not use a hot iron. Freeze only or place an ice pack on the stain for 10 minutes.
- Use your fingernail or the edge of a credit card to very gently chip away the hardened wax. Use almost no pressure.
- For remaining residue, use a hair dryer on the coolest setting possible, held 6+ inches away. Blot the softened wax with a clean white cloth.
- Apply a small drop of mild dish soap diluted in cool water and blot gently. Rinse by blotting with a damp cloth.
- Never wring or twist silk. Lay flat to dry.
⚠️ If the stain covers a large area, or if the silk is vintage or high-value, take it to a professional dry cleaner. This is one situation where DIY risk isn’t worth it.
Wool
Wool fibers are absorbent and texture-rich, which means beeswax especially gets trapped deep in the weave. Wool also shrinks in hot water and under excessive heat. So, you need to be precise.
Method:
- Freeze and scrape gently. Wool fibers can snag — use a credit card with minimal pressure.
- Use the iron on its lowest wool setting. Keep it moving constantly, never rest it in one spot.
- For the greasy residue that soy or beeswax tends to leave on wool, glycerin works really well. Apply a few drops to the spot, let it sit for 5 minutes, then rinse with cool water.
- For dye stains, blot with a solution of 1 part rubbing alcohol diluted with 2 parts water — no undiluted alcohol on wool.
- Machine wash on a wool or delicate cold-water cycle with a wool-safe detergent. Never hot water. Lay flat to dry. Never hang wool while wet, as it stretches under its own weight.
Polyester and Synthetic Blends
Synthetics are tricky because they have a lower heat tolerance than natural fibers. An iron that’s perfectly safe for cotton can melt or leave a shiny scorch mark on polyester.
Method:
- Freeze and scrape. Polyester’s smooth surface usually means wax sits more on top of the fiber than inside it — good news.
- For the iron method, set it to the lowest possible heat setting (the single-dot symbol). Keep the paper towel layer thick, use 2–3 layers, as a buffer between the iron and the fabric.
- Better yet, skip the iron on polyester entirely and use a hair dryer on low heat. It gives you more controlled, gentler warmth.
- Treat residue with dish soap and cool water.
- Machine wash in cold water to avoid heat-setting any remaining residue.
Velvet
Velvet is one of the most delicate fabrics for wax removal because the pile (the upright cut fibers) can be permanently flattened or matted by heat or heavy pressure.
Method:
- Freeze with an ice pack and chip away the wax very gently. Always scrape in the direction of the pile (usually top to bottom).
- Do not place an iron directly on velvet — ever. The heat and pressure will crush the pile and leave a permanent shiny patch.
- Instead, lay the velvet face-down on a clean paper towel. Apply a very low-heat iron to the back of the fabric. The pile faces down into the paper towel, which absorbs the wax.
- For residue, blot with a tiny amount of rubbing alcohol on a white cloth. Let dry naturally.
- Gently steam (not iron) the velvet back to life using the steam function held 2–3 inches above the fabric to re-fluff the pile.
⚠️ If you’re dealing with antique or silk velvet, take it straight to a professional dry cleaner. These are too valuable to risk.
Microfiber
Microfiber is popular for sofas, cleaning cloths, and activewear. It’s notoriously easy to watermark, which means certain liquid cleaners can leave a stain worse than the one you started with. Another article that pairs naturally with this one is How to Clean Bamboo Flooring. It takes the discussion a little further and gives you another practical perspective.
Method:
- Freeze and scrape — microfiber’s tight weave holds wax firmly, so scrape carefully.
- Use the iron or hair dryer with paper towels. Check the care tag. Many microfiber items only allow “S” (solvent) cleaning or “W” (water) cleaning.
- For residue: if the care tag says “S,” use a solvent-based stain remover. If it says “W,” use dish soap and water solution.
- Blot, never rub, and allow to air dry.
- Once dry, rub the area gently with a soft-bristled brush to restore the microfiber texture.
Upholstery Fabric (Sofas and Chairs)
The challenge with upholstery fabric is that you can’t take it off and put it in the washing machine. Every step has to happen in place, and you can’t let the fabric get too wet.
Method:
- Freeze with an ice pack pressed against the spot for 5–10 minutes.
- Scrape carefully with a plastic card. Avoid metal tools that can snag threads.
- Use a hair dryer instead of an iron on upholstery. Hold it 4–6 inches away on a low setting, and blot the softened wax with a white paper towel as you go.
- For residue, blot with a solution of a few drops of dish soap and warm water.
- For dye stains, blot with rubbing alcohol on a clean white cloth.
- Blot with clean water to rinse, then blot dry with a clean towel. Point a fan at the area to speed drying.
According to cleaning professional Karina at Spekless Cleaning, a product like Goo Gone sprayed directly on stubborn upholstery wax residue, left for a few minutes, and wiped clean is highly effective when standard methods aren’t cutting it.
Curtains and Drapes
Curtain fabric varies wildly (from sheer polyester to heavy linen, blackout fabric, and embroidered panels). Always check the care label first.
Method for machine-washable curtains:
- Take the curtain down. Lay it flat and freeze the wax spot with an ice pack.
- Scrape thoroughly.
- Use the iron method with paper towels, or for delicate curtain fabrics, use the hair dryer and blot method.
- Pre-treat any residue or dye stain before washing.
- Machine wash on the gentlest cycle appropriate for the fabric weight and fiber.
- Air dry flat if possible. Hanging while wet can cause curtain panels to stretch or distort.
For dry-clean-only or sheer curtains:
- Freeze and gently chip away the visible wax only. Don’t attempt the iron or solvent steps yourself.
- Take to a professional dry cleaner with the stain clearly identified. Let them handle the residue.
Tablecloths and Napkins
Tablecloths are usually cotton or linen. These two are the friendliest fabrics for wax removal. But they can be large, and wax spills at dinner tables often cover a wide area.
Method:
- Fold the tablecloth so the stained section is accessible and place it in the freezer for 20–30 minutes to harden the wax across the whole spill.
- Scrape off as much as you can. With tablecloths, you might have several drip spots.
- Lay the tablecloth flat on an ironing board. Use the paper towel iron method, working in sections.
- For white cotton or linen tablecloths with any yellow or oily ring remaining, mix 1 tablespoon of oxygen bleach powder with 2 cups of warm water and soak the spot for 1 hour.
- Machine wash at 40–60°C depending on fabric.
Bonus method for sturdy natural-fiber tablecloths: Cleaning experts at Speed Queen laundromats note that for thick cotton or linen, pouring a steady stream of boiling water through the back of the stained area can push the wax out by force. This works especially well on natural fibers after you’ve already scraped off the bulk of the wax. Only try this on fabrics rated for hot water.
How to Remove Colored Wax Dye Stains From Fabric
This deserves its own section because colored candle wax is a two-part problem and the dye is often the harder part.
Once you’ve removed the wax using the method above, you may be left with a pink, red, blue, green, or dark brown stain from the candle’s dye. Here’s how to tackle it.
Step 1: Try rubbing alcohol first.
Dampen a white cloth with rubbing alcohol (isopropyl alcohol). Blot the stain from the outside edge inward. The dye transfers onto the cloth with each blot. Move to a clean section of cloth with each pass. This works on most fabric types and most dye colors. Another article that pairs naturally with this one is How to Remove Sweat Stains From Hats Safely. It takes the discussion a little further and gives you another practical perspective.
Step 2: Enzyme-based stain remover.
Apply a generous amount of an enzyme-based stain remover like Zout or OxiClean Spray directly to the dye stain. Let it sit for at least 15–20 minutes before washing. Enzymes break down the organic compounds in the dye residue.
Step 3: For white or light-colored fabrics.
If alcohol and enzymes haven’t fully cleared the stain, a sodium percarbonate (oxygen bleach) soak works extremely well. Mix 1 tablespoon per liter of warm water and soak for 1–2 hours. This is safe for most colors and all white fabrics. Never use chlorine bleach on colored fabric. This discussion naturally leads to How to Remove Avocado Stains for Good. That article covers a connected topic and can help fill in a few details that are only touched on here.
Step 4: Check before drying.
Look at the stain in natural light before the fabric goes into the dryer. If any color remains, repeat the treatment. Once the dryer sets it, it may be permanent.
Quick reference by dye color:
| Dye Color | Difficulty Level | Best Treatment |
|---|---|---|
| White / uncolored wax | No dye issue | Greasy residue only — dish soap or enzyme remover |
| Yellow / gold | Easy | Rubbing alcohol + enzyme remover |
| Light pink / lavender | Easy-medium | Rubbing alcohol + enzyme remover |
| Red | Medium | Rubbing alcohol, enzyme remover, oxygen bleach soak |
| Dark blue / navy | Medium-hard | Rubbing alcohol, enzyme remover, multiple treatments |
| Black / dark burgundy | Hard | Multiple enzyme treatments; professional dry cleaner may be needed |
What to Do With Old, Set-In Wax Stains
Most guides only cover fresh spills. But what if you just discovered a wax stain that’s been sitting for weeks or longer?
Old wax stains are harder, but not hopeless.
Step 1: Re-soften the old wax. Use a hair dryer on low heat to gently warm the old wax deposit. Once slightly softened, scrape away what you can.
Step 2: Apply a pre-soak. Mix a paste of powdered oxygen bleach and warm water (2 parts powder to 1 part water) and spread it over the stained area. Let it sit for 4–6 hours for old stains (much longer than fresh ones need).
Step 3: Use a stain pre-treatment before washing. Apply a heavy-duty enzyme stain remover like Persil ProClean directly to the stain. Work it in gently with a toothbrush. Let it sit for 20–30 minutes.
Step 4: Wash and repeat. Machine wash in the warmest water safe for the fabric. If the stain is still visible after washing, don’t dry it. repeat the entire process. Old stains may need 2–3 treatment cycles.
Step 5: Accept professional help if needed. If a set-in dye stain on a delicate or valuable item isn’t responding after 2 rounds of home treatment, a dry cleaner with professional solvents can often clear what home methods can’t.
Expert Tips From Cleaning Professionals
These are the insights that make the difference between a stain that comes out and one that doesn’t.
“Match your method to the surface.”
Logan Taylor, founder of Seattle-based Dazzle Cleaning Company, emphasizes that the single biggest mistake people make is using the same method on every fabric. Delicate fabrics need gentler cold methods; sturdy fabrics can handle aggressive heat.
“Sandwich the stain between paper.”
Using paper towels both above AND below the stain during the iron method (not just on top) absorbs wax from both sides simultaneously and cuts treatment time in half, according to the University of Georgia Extension Textiles Program.
“Always check for dye — even with ‘white’ wax.”
Some candles described as white or cream contain trace pigments. After removing the wax, check the fabric under natural light before washing. What looks clean under artificial light can still carry a faint yellowish tint you’ll miss until it’s set in the dryer.
“Avoid paper towels on fluffy or textured fabrics.”
Persil’s laundry care team notes that for fabrics like fleece, wool, and velvet, paper towel fibers can get caught in the fabric pile as the wax melts and then re-harden there. Use unprinted brown paper bags or blotting paper instead. They are smoother and don’t shed.
“Glycerin is underrated for soy wax on wool.”
Soy wax’s oily nature makes it particularly stubborn on wool. A few drops of glycerin applied to the residue, left for 5 minutes, and then rinsed away dissolves the greasy film more gently than rubbing alcohol, which can be drying for wool fibers.
“Never trust the dryer until you check in natural light.”
Rosa Nogales-Hernandez, head of home cleaning at Valet Living, says the most common mistake she sees is people drying stained items too early. Check in natural, daylight-quality light. If you see anything (any ring, shadow, or color) treat it again before drying.
Common Mistakes That Make Fabric Wax Stains Worse
Let me save you from the errors that turn a manageable stain into a permanent problem.
❌ Wiping or rubbing hot liquid wax. It spreads the stain and pushes it deeper. Always wait.
❌ Using a high heat iron on polyester or synthetics. It melts the fibers, creates a shiny scorch mark, and that’s permanent damage — not a stain you can treat.
❌ Scrubbing the stain. Rubbing moves wax sideways through the fibers and outward. Always blot and chip — never scrub.
❌ Using colored cloths to blot. The dye in the cloth can transfer to your fabric and create a second stain on top of the first.
❌ Skipping the residue treatment step. Even if you can’t see grease, it’s often there. Pre-treating before washing is not optional. It’s what separates a fully clean fabric from one with a ghost mark.
❌ Putting the item in the dryer before the stain is fully gone. This is the biggest mistake. Heat permanently sets residue and dye. Check the item in natural light before every drying cycle.
❌ Placing velvet or silk face-up under the iron. For these fabrics, the stained side should face DOWN onto the absorbent paper. Iron from the back.
❌ Using undiluted rubbing alcohol on wool. It is too concentrated. It can damage wool fibers. Always dilute with 2 parts water before applying to wool.
Real Scenario Guide: What to Do When It Happens to You
Here are four specific real-life scenarios with exactly what you should do step by step.
Scenario 1: White paraffin candle dripped on a cotton tablecloth during dinner.
Best case scenario. This is the easiest one.
- Let the wax cool while you finish eating. Don’t touch it.
- Fold the tablecloth and put it in the freezer for 20 minutes after dinner.
- Chip off all hardened wax.
- Iron with paper towels on both sides. 3–5 passes with a medium-heat iron.
- Machine wash at 60°C. Done. No dye stain to worry about.
Scenario 2: A red pillar candle tipped and dripped on a white linen shirt.
This one has two problems: the wax AND the red dye.
- Freeze immediately with an ice pack. Scrape.
- Paper towel iron method on medium heat. The white wax lifts easily.
- Blot the red dye stain with rubbing alcohol until the cloth shows no more transfer.
- Apply OxiClean spray, let sit for 20 minutes.
- Wash at 40°C. Check carefully before drying. If any red remains, repeat the alcohol + enzyme treatment before the next wash.
Scenario 3: Soy wax from a jar candle spilled on a wool sweater.
Soy wax + wool = patience required.
- Freeze with ice pack for 10 minutes.
- Very gently chip away the wax. Wool snags. So, be careful.
- Iron on the lowest wool setting with paper towels. Keep the iron moving.
- Apply a few drops of glycerin to the greasy ring left behind. Wait 5 minutes, blot clean with a damp white cloth.
- Machine wash on cold wool cycle with wool-safe detergent.
- Lay flat to dry.
Scenario 4: Colored candle wax dripped on a velvet throw pillow.
Most people think velvet is ruined. It usually isn’t.
- Let the wax harden completely. Ice pack over the spot.
- Chip the wax very gently in the direction of the pile. Take your time.
- Lay the velvet face-down on a clean paper towel. Apply the lowest heat iron setting to the BACK of the velvet fabric. The pile faces down into the towel.
- Blot the dye residue on the velvet face with rubbing alcohol. Usetiny amounts on a white cloth.
- Steam (don’t iron) the pile back to life with a garment steamer held 2 inches above.
- If this is a dry-clean-only velvet, skip to the dry cleaner after step 2.
When to Call a Professional Dry Cleaner
Most wax stains on fabric are DIY-friendly. But here are the situations where professional help is the smart choice:
- Silk garments especially if the wax covers a large area or the fabric is very delicate
- Antique or vintage textiles. the risk of damage isn’t worth it
- Velvet or embroidered items of significant value
- Set-in colored wax stains on delicate fabrics that haven’t responded to two home treatment rounds
- “Dry clean only” care labels on curtains, upholstery covers, or structured garments
- Any fabric where DIY methods have already made the stain slightly worse
Tell the dry cleaner exactly what type of wax it was (paraffin, soy, beeswax, colored), how long it’s been there, and what you’ve already tried. That information helps them choose the right solvent treatment.
Frequently Asked Questions
1. Can you remove dried candle wax from fabric that’s been there for weeks?
Yes. But it takes more effort than a fresh stain. Re-soften the old wax with a hair dryer on low heat, scrape what you can, and follow with a long oxygen bleach pre-soak (4–6 hours) and an enzyme stain remover before washing. You may need 2–3 treatment rounds. The dryer should not touch the item until the stain is fully gone. Not even after the first treatment round.
2. Does rubbing alcohol remove wax from fabric?
Rubbing alcohol doesn’t remove the physical wax, but it’s excellent for tackling the dye stain and oily residue left behind after the wax is removed. Blot it onto the stained area with a white cloth (never rub) and it lifts color and grease effectively from most fabric types. Always dilute to 1 part alcohol and 2 parts water for delicate fabrics like wool and silk. A useful follow-up to this article is How to Remove Mildew Smell From Towels. It develops a related idea in more depth and gives you additional practical guidance.
3. Will the iron method damage my fabric?
Only if you use the wrong heat setting. For cotton and linen, a medium iron is safe. For polyester and synthetics, use the lowest setting or skip the iron and use a hair dryer instead. For velvet, iron only from the back with the pile facing down. For silk, don’t use an iron at all. Use the hair dryer on the coolest setting. The key is matching heat intensity to what the care label actually permits.
4. What’s the difference between removing soy wax and paraffin wax from fabric?
Paraffin sits closer to the fiber surface and is generally easier to remove completely. Soy wax is oilier. It often leaves a greasy residue behind even after you’ve removed all visible wax, and that residue needs an extra treatment step with dish soap or a stain remover. Beeswax is the most stubborn of the three, penetrating deeply into textured fibers and sometimes requiring multiple treatment cycles, especially on wool or knits.
5. Can I use a hair dryer instead of an iron to remove candle wax from fabric?
Yes, and in many cases a hair dryer is actually the safer and more controlled option especially for delicate fabrics, upholstery, curtains, and anything where laying flat and ironing isn’t practical. Set it to low heat, hold it 4–6 inches from the fabric, and immediately blot the softened wax with a white paper towel as you apply the heat. It takes a little longer than the iron method but is gentler and lowers the risk of heat damage significantly.
Your Complete Cheat Sheet at a Glance
| Fabric | Iron Heat | Best Cold Method | Safe Solvents | Machine Wash |
|---|---|---|---|---|
| Cotton | Medium-high | Ice freeze | Enzyme remover, rubbing alcohol | Warm-hot |
| Linen | Medium | Ice freeze | Dish soap, oxygen bleach | 40–60°C |
| Silk | None — use hair dryer | Ice freeze only | Mild dish soap, cool water only | Hand wash or dry clean |
| Wool | Lowest setting | Ice freeze | Glycerin, diluted alcohol (1:2) | Cold wool cycle |
| Polyester | Lowest only | Ice freeze | Dish soap, cool water | Cold water only |
| Velvet | Back of fabric only, lowest | Ice freeze | Diluted rubbing alcohol | Dry clean or very gentle |
| Microfiber | Low-medium | Ice freeze | Check tag (“S” or “W”) | Cold gentle cycle |
| Upholstery | Use hair dryer only | Ice pack | Dish soap, Goo Gone | Not washable — spot treat |
| Curtains | Depends on fabric | Ice pack | Check care label | Gentle cycle |
| Tablecloths | Medium (cotton/linen) | Ice freeze | Enzyme remover, oxygen bleach | 40–60°C |
Final Thoughts
Here’s what I want you to remember after reading this.
Candle wax on fabric is almost always fixable. But the two things that make people fail at removing it are: touching it while it’s still warm, and skipping the residue treatment before the dryer.
Get those two things right, and you’re 80% of the way there.
The other 20% is just knowing your fabric. Silk needs cold and gentle. Cotton can handle heat. Wool needs glycerin. Velvet needs the iron on the back. Polyester needs a hair dryer, not a hot iron. Upholstery needs to stay in place and dry thoroughly.
You now know all of it. Your fabric is going to be just fine.
Did this help? Save this guide for the next time a candle moment becomes a fabric crisis. For more candle care guidance and fire-safe burning tips, visit the National Candle Association.
Sources used in this article: University of Georgia Extension Textiles Program, The Flaming Candle, Tide Stain Guide, Persil Laundry Tips, Speed Queen Laundry Guide, Reader’s Digest cleaning experts, National Candle Association, American Cleaning Institute.