


How to Remove Candle Wax: The Complete Surface-by-Surface Guide
You lit your favorite candle. The room smelled amazing. And then? A drip! A pool of wax landed exactly where you didn’t want it.
Does it sound familiar to you?
Whether it’s on your dining table, your favorite shirt, or your carpet, wax spills happen to everyone. I have a good news! You don’t need to panic, and you definitely don’t need to throw anything away.
Learning how to remove candle wax is actually pretty simple once you know the right method for each surface. Most of the tools you need are already sitting in your kitchen or bathroom.
In this guide, I’m going to tell you every surface (wood, carpet, glass, fabric, leather, walls, stone, and more). You’ll also get expert tips, a quick comparison chart, and answers to the most common questions people ask.
So, let’s get into it.
Why Candle Wax Is Actually Tricky to Remove
Before you grab a cloth and start scrubbing, it helps to understand what you’re dealing with.
Candle wax is a combination of petroleum-based or natural wax (like soy or beeswax), dye, and fragrance oils. Each of those components behaves differently on different surfaces.
The wax itself is the main issue. It hardens as it cools and bonds to fibers, wood grain, or porous stone. If the candle was colored, the dye adds a second problem on top of the wax removal.
Here’s the key thing most people get wrong: never try to clean wax while it’s still liquid or warm. Hot wax spreads. It sinks deeper into fabric fibers. It makes the stain worse, not better.
Always let the wax cool and harden completely before you touch it. That’s rule number one.
What You’ll Need Before You Start
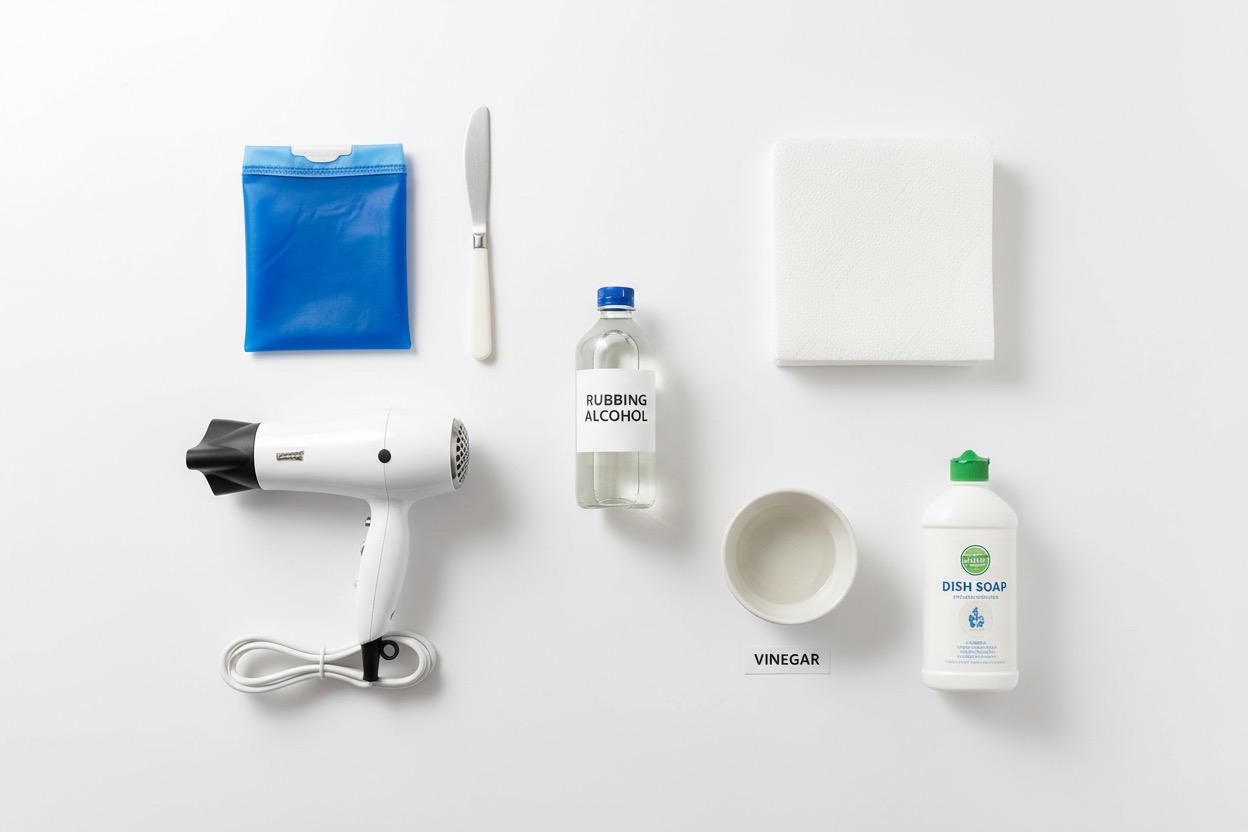
You probably have most of these already:
- Ice cubes or an ice pack (for the freezing method)
- A hair dryer or warm iron (for the heating method)
- A dull butter knife, spoon, or old credit card (for scraping)
- Paper towels or a clean white cloth (for blotting and absorbing)
- Rubbing alcohol (for residue and dye stains)
- Dish soap (mild, clear)
- White vinegar (for wood and glass surfaces)
- A soft-bristled brush or old toothbrush (for textured surfaces)
- Enzyme-based stain remover (like Zout or OxiClean) for fabric and upholstery
One more rule is that you must always test any cleaning solution on a hidden spot first. Every surface is different, and it’s better to find out on an invisible corner than on a visible area.
Before starting discussing how to remove candle wax, I will suggest you to read our previous post on How to Prevent Calcium Buildup on Faucets (For Good). You will get a lot of information there.
How to Remove Candle Wax From Wood
Wood is one of the most common surfaces where wax ends up. It my be dining tables, coffee tables, or wooden floors. This discussion naturally leads to How to Clean Bamboo Flooring. That article covers a connected topic and can help fill in a few details that are only touched on here.
The tricky part with wood is that it can scratch easily and you don’t want to damage the finish. So the method depends on whether the wood is finished (sealed, polished) or unfinished (raw, untreated).
For Finished Wood
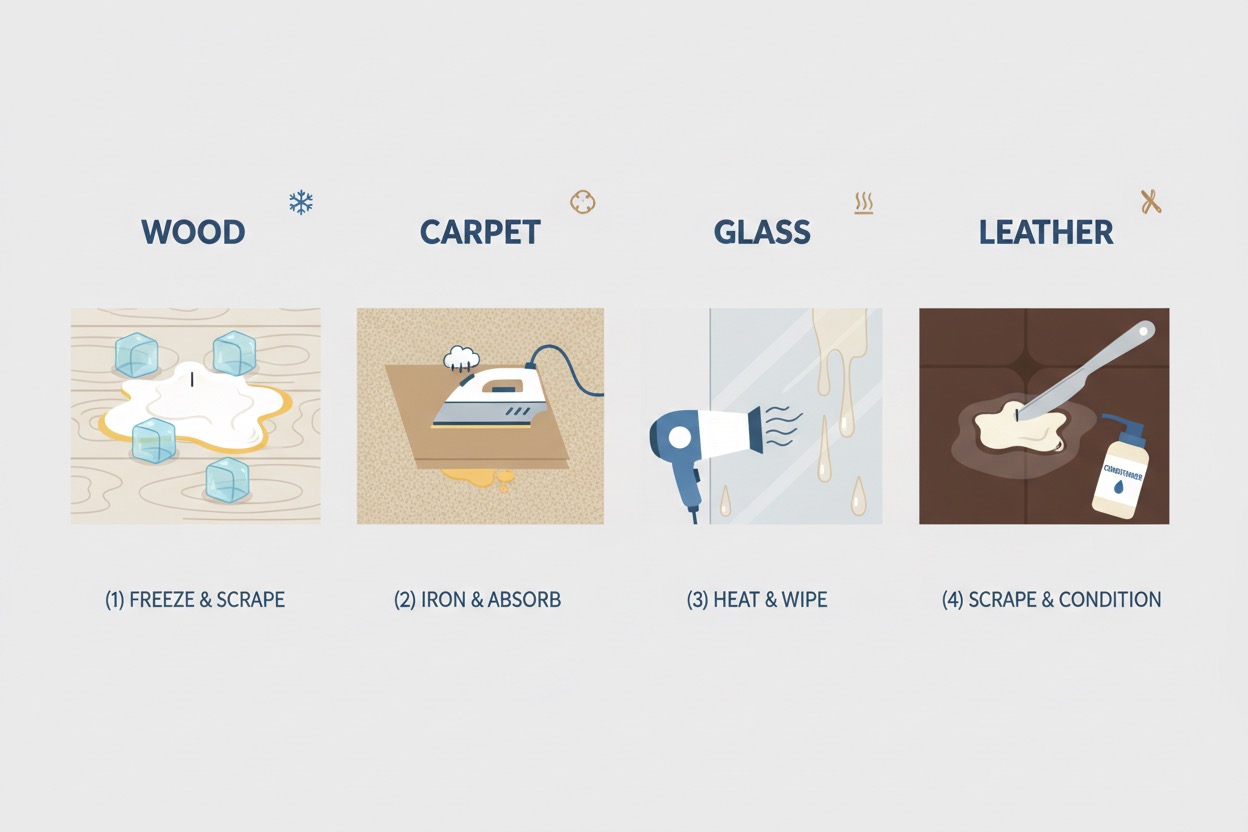
Method 1. Freezing (Recommended):
- Rub an ice cube over the hardened wax for a few seconds. You can also use a sealed bag of ice.
- Once the wax turns brittle, gently scrape it away with the edge of a spoon or old credit card. Work along the grain of the wood.
- Wipe the area with a soft cloth dipped in a mix of ½ cup white vinegar and 1 cup warm water.
- Dry with a clean, soft cloth.
- Apply furniture polish or wood wax to restore the shine.
Method 2. Gentle Heat:
- Set your hair dryer to the lowest heat setting.
- Hold it about 4–6 inches from the wax. Let the wax soften slowly. Don’t overheat.
- Wipe away with a clean paper towel immediately.
- Follow up with the vinegar solution to clean residue.
- Polish as usual.
⚠️ Don’t use a hair dryer on unfinished or antique wood. Heat can warp or damage raw and aged wood surfaces.
For Unfinished Wood
- Freeze the wax with an ice bag and scrape gently.
- Wet an old toothbrush, shake off excess water, and sprinkle baking soda on the bristles.
- Gently scrub in the direction of the wood grain.
- Wipe clean with a cloth dampened in a 50/50 mix of white vinegar and water.
- Let it air dry completely before using the surface.
According to Lowe’s home improvement guidance, always move the hair dryer carefully and keep it at a safe distance to avoid surface damage.
How to Remove Candle Wax From Carpet
Carpet feels like the worst-case scenario for a wax spill. But with the right method, it’s totally fixable.
There are two approaches that work really well. That are freezing and ironing. I’ll explain both in detail.
The Freezing Method
- Place ice cubes inside a sealed plastic bag. Press the bag over the wax stain and let it sit for 5–10 minutes.
- Once the wax is hard and brittle, use a dull butter knife to gently chip it off. Always work from the edges toward the center.
- Collect the wax pieces and drop them into a trash bag.
- Use the upholstery attachment on your vacuum to pick up tiny flakes.
- Mix a few drops of clear dish soap with warm water. Dampen a white cloth and blot (don’t rub) the area to lift any residue.
The Iron Method
- Make sure the wax is dry and as hard as possible.
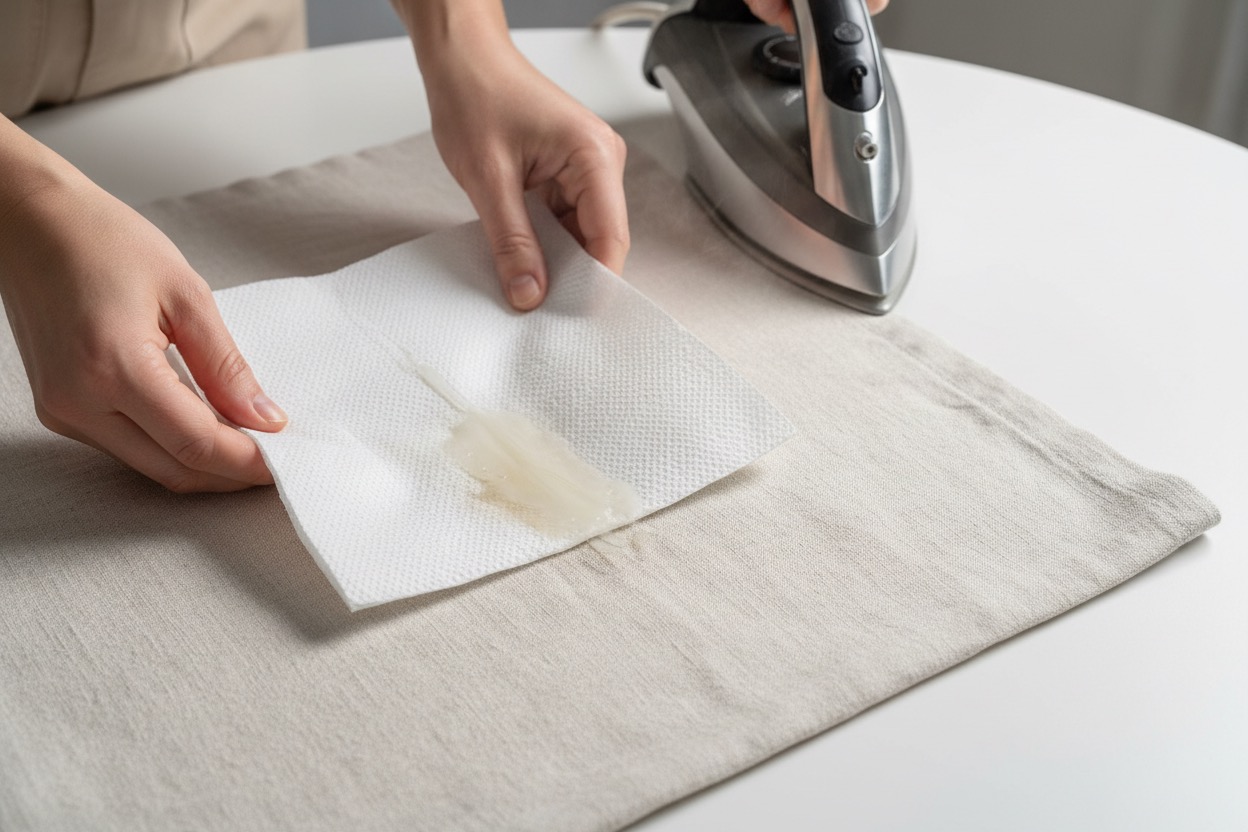
- Lay a clean white cloth or a sheet of brown paper bag over the stain.
- Set your iron to a medium, no-steam setting.
- Press the iron gently over the cloth. The heat melts the wax, and the cloth absorbs it.
- Move to a clean section of cloth as the wax transfers. Repeat until the stain is gone.
- Blot with a small amount of rubbing alcohol if any dye remains.
⚠️ Never let the iron touch the carpet directly. The heat can melt synthetic carpet fibers and cause permanent damage.
According to cleaning experts at Angi, the iron method works especially well on carpet because the paper or cloth acts as a wick. It pulls the wax completely out of the fibers.
How to Remove Candle Wax From Fabric and Clothing
A wax drip on your favorite sweater or tablecloth doesn’t have to mean it’s ruined. Here’s exactly how to handle it.
Step-by-Step for Clothing
- Don’t rub it. Warm wax rubbed into fabric goes deeper into the fibers.
- Let the wax harden fully. Speed it up by placing the garment in the freezer for 15 minutes.
- Once frozen, gently chip away the wax with a blunt knife or your fingernail.
- Place a clean paper towel over the remaining stain. Apply a warm iron on the lowest setting suitable for the fabric.
- The remaining wax transfers into the paper towel.
- If there’s a dye stain left behind, blot with rubbing alcohol on a clean white cloth.
- Apply an enzyme-based stain remover and let it sit for at least 15 minutes.
- Wash in the hottest water safe for that fabric according to the care label.
⚠️ Never put the garment in the dryer until the stain is completely gone. Dryer heat sets stains permanently.
Fabric Type Quick Guide
| Fabric Type | Best Method | Heat Level | Extra Notes |
|---|---|---|---|
| Cotton / Denim | Freeze + Iron | Medium heat | Most forgiving, handles heat well |
| Linen | Freeze + Iron | Low-medium heat | Use extra paper layer |
| Silk / Wool | Freeze only | Very low or no heat | Consider dry cleaning for stubborn stains |
| Synthetics (polyester) | Freeze + blot | Low heat only | Iron can melt synthetic fibers |
| Velvet | Freeze + gentle scrape | No iron | Very delicate — blot only |
Laundry expert Mary Marlowe Leverette, as cited by Reader’s Digest, recommends using an enzyme-based stain remover with a soft toothbrush for any residual oil or dye mark that remains after the wax is lifted.
How to Remove Candle Wax From Glass
Glass is actually one of the easier surfaces to deal with because wax doesn’t bond as deeply. But you need to be careful not to scratch it.
Method. Heat and Wipe
- Set your hair dryer to medium heat.
- Hold it about 4–6 inches from the glass and heat the wax for 30–60 seconds.
- As the wax softens, wipe it away gently with a clean microfiber cloth.
- Clean the glass with a spray of window cleaner or rubbing alcohol to remove any greasy residue.
- Buff with a dry cloth for a streak-free finish.
For glass candle jars or votives, you can also put the jar in the freezer for 30 minutes. The wax contracts and pops right out.
According to Merry Maids cleaning professionals, make sure you’re not pressing too hard against glass. You want to let the heat do the work, not the pressure.
Bonus Tip for Candle Jars
Do you want to reuse your candle jar? Put it in the freezer overnight. In the morning, use a butter knife to pop the remaining wax out in one piece. Wash with warm soapy water and it’s ready to use as a pen holder, planter, or storage jar.
How to Remove Candle Wax From Upholstery and Couches
Moreover, your couch is a big investment. Wax spills here can feel catastrophic. But with patience, you can fix it without calling a professional.
Step-by-Step for Upholstery
- Let the wax harden. Speed it up with an ice pack over the spot for 5 minutes.
- Scrape off the hardened wax with a dull knife or old credit card. Work slowly and gently.
- Lay a paper bag or clean white cloth over the remaining stain.
- Apply gentle heat with a hair dryer on low or a warm iron, keeping it moving constantly.
- The wax lifts into the paper. Use a fresh section as each area fills with wax.
- For colored wax dye left behind, blot with rubbing alcohol on a white cloth.
- Mix one part powdered oxygen-based bleach (like OxiClean) with two parts water to create a paste. Apply to the stained area and let sit for 4 hours.
- Vacuum away the dried paste. Repeat if needed.
⚠️ Skip acetone (nail polish remover) if your upholstery is colored. It can strip the dye from fabric permanently.
For microfiber couches, use the same scrape-and-heat method but avoid alcohol-based cleaners unless the tag says “S” (solvent-safe).
COIT cleaning services note that for leather upholstery specifically, you should skip heat entirely and go with the freezing method followed by a leather conditioner.
How to Remove Candle Wax From Walls
Wax on walls, especially painted ones, can look really alarming. But it’s manageable with a careful approach.
For Painted Walls
- Plug in your hair dryer near the wall.
- Set it to medium heat and hold it 4–6 inches away from the wax.
- Heat for 1–2 minutes until the wax softens (don’t overheat or you risk bubbling the paint).
- Wipe gently with a soft microfiber cloth, moving from the edges of the spill inward.
- Mix a few drops of dish soap with warm water and wipe again with a clean cloth.
- Let the wall air dry.
⚠️ Don’t use boiling water on painted walls. It can damage the paint finish. Warm water only.
For Wallpaper
Wallpaper is more delicate. You should use the freezing method instead:
- Hold an ice bag against the wax until it hardens.
- Very gently scrape with a plastic card — no metal tools.
- Blot with a cloth barely dampened with cool water and mild soap.
- Pat dry immediately. Don’t let moisture soak into the wallpaper backing.
According to Lowe’s home care experts, always wear heat-protection gloves when using a hair dryer close to surfaces, and always test any cleaner on a tiny hidden area of the wall first.
How to Remove Candle Wax From Stone, Marble, and Granite
Stone surfaces feel solid and tough, but many of them are porous and sealed with special coatings. That changes everything.
What NOT to Do on Stone
- Don’t use a hair dryer on marble or granite. The heat doesn’t hurt the stone itself, but it can damage the protective sealant.
- Don’t use abrasive scrubbers. They can permanently scratch polished stone.
- Don’t let dyed wax sit too long. Porous stone absorbs color over time.
What to Do Instead
- Place a bag of ice cubes directly on the wax and wait 5 minutes.
- Gently scrape with a plastic card or plastic putty knife. Avoid all metal tools.
- Use light, gentle strokes. Don’t press hard.
- Apply a commercial granite or marble cleaner with a soft dry cloth, working in circular motions.
- Buff the surface back to its original shine.
If there’s still oily residue, apply a small dab of Goo Gone surface cleaner, let it sit for 2 minutes, and wipe clean with a dry cloth.
How to Remove Candle Wax From Leather
Leather requires special care. Too much heat or harsh chemicals can crack, stain, or permanently damage it.
For Regular Leather (Sofas, Bags, Jackets)
Option 1. Freezing Method:
- Place a bag of ice over the wax for 10–15 minutes until it hardens completely.
- Use a dull plastic knife or plastic putty knife to lift the wax carefully.
- Blot any remaining residue with a damp cloth.
- Apply a leather conditioner to restore moisture and even out the surface.
Option 2. Gentle Heat (Recommended by Experts):
Cleaning expert Logan Taylor from Dazzle Cleaning Company recommends gentle heat for the best results on leather:
- Carefully scrape off large wax pieces with a plastic card.
- Use a hair dryer on the lowest setting, held 6+ inches away, to soften remaining wax.
- Wipe with a clean cloth immediately.
- Blot with rubbing alcohol or nail polish remover to remove residue — but test first on a hidden spot.
- Always finish with a leather conditioner to restore the leather’s natural oils.
For Suede and Nubuck
These are more delicate and absorbent. Use only the ice method. Skip heat entirely. For stubborn stains, take the item to a professional leather cleaner.
How to Deal With Colored Wax Stains
Here’s something most wax removal guides overlook: colored candle wax leaves two problems, not one.
First, there’s the wax itself. Then, there’s the dye from the candle color. Even after you remove the wax completely, a pink, red, blue, or dark color stain can still remain.
Here’s how to tackle dye stains after wax is removed:
On Fabric or Upholstery:
- Blot with rubbing alcohol on a clean white cloth. Work from outside the stain inward.
- For light-colored fabrics, use a mix of warm water and dish soap.
- For stubborn color, try a paste of powdered oxygen bleach and water. Let it sit, then vacuum.
- Always check the fabric tag before using any bleach product.
On Wood or Sealed Surfaces:
- Wipe with a cloth dampened in rubbing alcohol.
- Follow with the appropriate surface cleaner or polish.
On Carpet:
- Blot (never scrub) with rubbing alcohol.
- Use a carpet-safe stain remover if color remains.
- Let dry and vacuum.
On Walls:
- Very gently wipe with a damp cloth and a tiny drop of dish soap.
- Avoid vigorous rubbing. It can spread the dye into the paint.
Surface-by-Surface Quick Reference Chart
| Surface | Best Method | Key Tools | Avoid |
|---|---|---|---|
| Finished Wood | Freeze first | Ice, credit card, vinegar | Sharp metal tools, excessive heat |
| Unfinished Wood | Freeze + baking soda scrub | Toothbrush, baking soda | Hair dryer |
| Carpet | Freeze or iron method | Iron, paper towel, dish soap | Direct iron on carpet |
| Clothing | Freeze + iron | Iron, paper towels, stain remover | Dryer before stain is gone |
| Glass | Heat method | Hair dryer, microfiber cloth | Metal scrapers |
| Upholstery | Freeze + heat | Hair dryer, paper bag | Acetone on colored fabric |
| Wall (painted) | Gentle heat | Hair dryer, soft cloth | Boiling water, abrasives |
| Wallpaper | Freeze method | Ice bag, plastic card | Heat, metal tools |
| Marble/Granite | Freeze method | Plastic scraper, marble cleaner | Hair dryer, abrasives |
| Leather | Gentle heat or freeze | Hair dryer (low), leather conditioner | High heat, acetone |
Expert Tips Section: What the Pros Know
These are the little things that make a big difference and most guides skip them.
1. Timing is everything.
The moment you see wax spill, resist the urge to act. Waiting for it to cool fully is the single best thing you can do. Hot wax spreads and sinks. Cold wax lifts.
2. Always use white cloths and paper towels.
Colored towels can transfer dye onto your surface while you’re trying to clean it. Always use white or uncolored materials when blotting and absorbing wax.
3. Work from the outside in.
When scraping or blotting, always start at the edges of the stain and work toward the center. This prevents the stain from spreading outward.
4. Heat and cold serve opposite surfaces.
As Rosa Nogales-Hernandez, head of home cleaning at Valet Living, explains: fabrics like carpets and upholstery respond best to heat, while hard surfaces like wood and leather respond better to cold. Knowing which to apply is the difference between a clean surface and a ruined one.
5. Never scrub — always blot.
Scrubbing pushes wax and dye deeper into fibers. Blotting lifts them out. This applies to every soft surface like carpet, clothing, upholstery.
6. Don’t forget the conditioner for leather.
Leather loses oils when you clean it. Skipping conditioner after wax removal can leave the leather dry, cracked, and dull over time.
7. Use Goo Gone for the stubborn stuff.
For really sticky wax residue that just won’t budge, a product like Goo Gone is a trusted go-to among cleaning professionals. Apply, wait 2 minutes, and wipe clean.
Pros and Cons of the Two Main Methods
❄️ Freezing Method
| Pros | Cons |
|---|---|
| Safe for most surfaces including leather, stone, and wallpaper | Takes a little longer to set up |
| No heat risk | Doesn’t work as well on deep fabric stains |
| Simple and low-cost | Wax can become too wet if ice melts |
| Great for fragile or delicate surfaces | May leave behind more residue |
🔥 Heating Method
| Pros | Cons |
|---|---|
| Faster and very effective on fabric and carpet | Risk of heat damage on delicate surfaces |
| Pulls wax completely out of fibers | Not suitable for leather, stone, or wallpaper |
| Works on large stained areas | Requires iron or hair dryer |
| Leaves less residue | Can spread wax if cloth isn’t changed |
My recommendation? Use cold for hard, porous, or delicate surfaces. Use heat for soft surfaces like carpet, upholstery, and clothing.
How to Prevent Candle Wax Spills (Before They Happen)
A little prevention goes a long way. Here’s how to avoid the whole problem:
- Always use a candle holder. Even jar candles benefit from a tray or plate underneath.
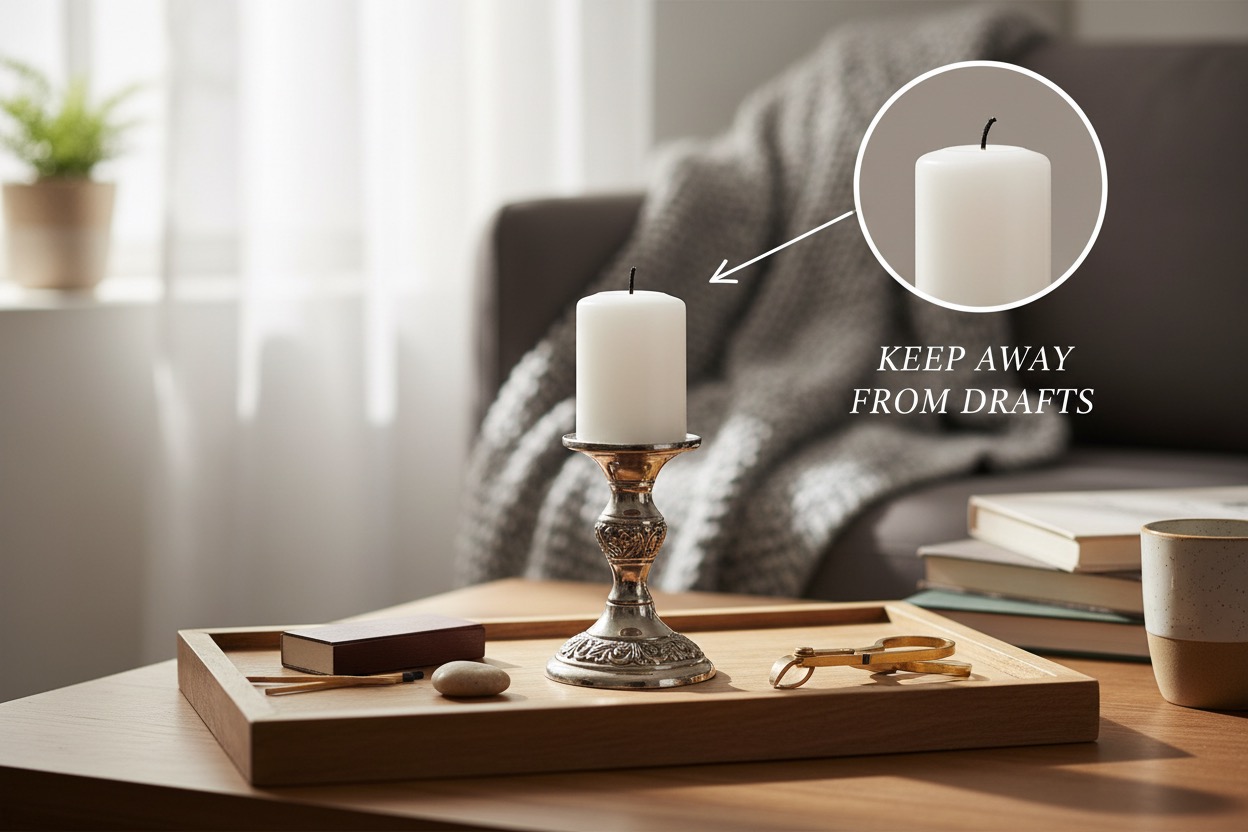
- Keep candles away from drafts. A draft makes a candle flame flicker and drip. Close windows or keep candles away from ceiling fans.
- Place candles on a flat, stable surface. Uneven surfaces tip candles. Knocked candles make big messes.
- Trim your wick to ¼ inch before each burn. A long wick creates a bigger, drippy flame. The National Candle Association recommends keeping wicks trimmed for a cleaner, safer burn.
- Don’t move a candle while it’s lit or just blown out. The wax stays liquid for several minutes after you blow out the flame.
- Use dripless candles for decorative settings like dinner tables or events.
Frequently Asked Questions
1. What is the fastest way to remove candle wax from a surface?
The fastest method depends on the surface. For hard surfaces like glass or wood, use a hair dryer on low heat to soften the wax, then wipe it away. For fabric and carpet, the iron-and-paper-towel method lifts wax quickly and thoroughly. Always let the wax harden first. That one step saves you a lot of extra work.
2. Does vinegar remove candle wax?
Vinegar doesn’t dissolve wax on its own, but it’s excellent for cleaning the oily residue left behind after you’ve removed the bulk of the wax. A mix of white vinegar and warm water works well on wood and glass surfaces to restore shine and remove any greasy film. For a slightly different perspective, read How to Remove Avocado Stains for Good. It deals with a related issue and adds useful context to what you have just read.
3. Can candle wax permanently stain fabric?
In most cases, no — as long as you act before washing and drying. The wax itself usually comes out cleanly. The tricky part is the dye from colored candles, which can leave a stain. Blotting with rubbing alcohol and treating with an enzyme-based stain remover before washing usually gets rid of even dye stains. The key rule: never put the item in the dryer until the stain is completely gone. Dryer heat sets stains permanently. A useful follow-up to this article is How to Remove Sweat Stains From Hats Safely. It develops a related idea in more depth and gives you additional practical guidance.
4. Is it safe to use a hair dryer to remove wax from wood?
Yes, but with precautions. Use the lowest heat setting, hold the dryer at least 4–6 inches away, and keep it moving. Don’t linger in one spot or you risk warping the wood or damaging the finish. Avoid using heat on unfinished or antique wood entirely. I will suggest you to use the freezing method instead.
5. What removes wax residue after the main wax is gone?
Rubbing alcohol works on most surfaces and residue types. White vinegar mixed with water is great for wood and glass. For tough, sticky residue, a product like Goo Gone is highly effective. For upholstery and carpet, a few drops of dish soap in warm water usually clears up the last traces of greasy residue.
Common Mistakes to Avoid
These mistakes are easy to make and they all make the problem worse:
❌ Trying to clean hot, liquid wax. Wait. Always.
❌ Using a metal scraper on glass or stone. You’ll scratch the surface. Stick to plastic cards or spoons.
❌ Scrubbing the stain on fabric or carpet. This drives the wax deeper. Blot only.
❌ Putting wax-stained clothes in the dryer before treating the stain. The heat sets the stain and it becomes permanent.
❌ Using acetone (nail polish remover) on colored upholstery. It strips the dye from the fabric.
❌ Using a hair dryer on marble or sealed stone. It can damage or melt the sealant, leaving the stone vulnerable to staining.
❌ Skipping the leather conditioner. After removing wax from leather, always moisturize it. Cleaning dries leather out.
When to Call a Professional
Sometimes a stain is just beyond DIY. Here’s when it’s worth calling in the pros:
- The wax is on antique, heirloom, or high-value furniture where the risk isn’t worth it
- The candle was deeply colored (red or dark blue) and dye has soaked into the surface
- The surface is suede, nubuck, or delicate leather
- You’ve tried multiple methods and the stain isn’t improving
- The surface is a specialty stone like unsealed marble that’s absorbed dye
Professional upholstery and surface cleaning services like COIT can handle even the most stubborn wax stains without damaging your surfaces.
Final Thoughts
Here’s the short version: knowing how to remove candle wax is really just about using the right method for the right surface.
Cold for hard, delicate, and porous surfaces. Heat for fabrics, carpets, and upholstery. Patience for everything.
You don’t need fancy products. An ice bag, a butter knife, a hair dryer, and some paper towels will handle almost every situation. And if you’ve got some rubbing alcohol and white vinegar in the house, you’re fully prepared for whatever your candles throw at you.
The most important thing? Wait for the wax to cool before you do anything. That one habit alone will save you from making a small drip into a big problem.
Now you know exactly what to do. Go rescue that tablecloth, that couch cushion, or that hardwood floor. You’ve got this.
Found this helpful? Bookmark this guide and share it with someone who just had a candle disaster. And while you’re at it, check out candle safety tips from the National Candle Association to prevent future spills before they happen.
Sources referenced in this article include cleaning professionals from Reader’s Digest, Angi, Lowe’s, COIT, the University of Georgia Extension Textiles Program, and the National Candle Association.
Thanks for Reading!