


How to Make Flowers From Silk: A Beginner-Friendly Guide
Learning how to make flowers from silk is easier when you stop trying to reproduce every detail of a real bloom at once. The basic process is to stabilize the fabric, cut several petal sizes, gently shape them, build a center, layer the petals, and finish the flower with a wired stem.
This guide walks you through a safe method that does not require holding fabric over a candle. You will make one versatile, layered silk flower first, then learn how to adjust the same technique for a rose, peony, poppy, or flat flower for clothing and home decor.
Safety note: Keep hot tools, sharp scissors, wire ends, adhesives, and small flower parts away from children and pets. Work in a ventilated area and follow the instructions supplied with every adhesive, dye, stiffener, and heating tool.
What counts as a silk flower?
“Silk flower” is often used as a general name for an artificial fabric flower, even when the material is polyester satin or organza. If you want a flower made from genuine silk, check the fabric’s fiber-content label instead of relying on its shine or the word “satin.”
Satin is a weave, not a fiber. It can be woven from silk, polyester, acetate, or another material, which is why the FTC’s textile fiber guidance recommends using recognized fiber names when content is disclosed.
| Fabric | Appearance and handling | Best use | Main limitation |
|---|---|---|---|
| Silk habotai | Lightweight, smooth, and easy to layer | Delicate petals and soft flowers | Frays and may need support |
| Silk organza | Sheer, crisp, and able to hold shape | Translucent petals and leaves | Raw edges remain visible |
| Silk dupioni | Crisp with visible slubs and strong color | Decorative or stylized flowers | Less convincing for very soft petals |
| Polyester satin | Shiny, affordable, and widely available | Practice flowers and bold accessories | Can look overly glossy |
| Polyester organza | Sheer and shapeable | Layered petals and event decor | Heat can melt or distort it quickly |
For a first flower, I recommend a medium-light silk with enough body to hold a crease after gentle shaping. Very thin silk can still work, but it is easier when backed with a second layer or treated with a fabric stiffener designed for the material.
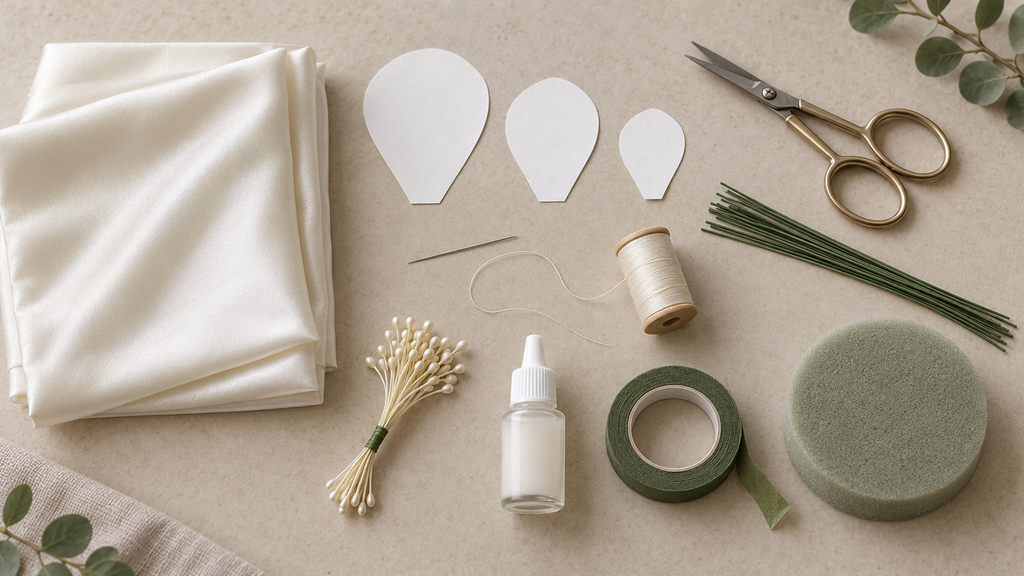
Supplies and tools
You do not need a professional millinery setup for this beginner project. Start with hand tools, then consider specialized flower irons or metal ball tools only if you decide to make fabric flowers regularly.
Essential materials
- Approximately one letter-size piece of silk for a single medium flower
- Scrap paper or cardstock for templates
- Sharp fabric scissors
- Fine sewing needle and matching thread
- Floral wire suitable for lightweight craft stems
- Green floral tape
- Purchased stamens, embroidery thread, or a small bead for the center
- Fabric stiffener, lightweight fusible interfacing, or a second silk layer if the fabric is too limp
- Fabric-safe adhesive if you prefer gluing to sewing
Helpful optional tools
- Disappearing fabric marker or tailor’s chalk
- Foam pad or folded towel for shaping
- Blunt stylus, rounded paintbrush handle, or flower-making ball tool
- Small craft iron or mini iron with a stand
- Press cloth
- Wire cutters and small round-nose pliers
- Fine artist’s brush and fabric paint or dye
A fine, sharp needle reduces snagging and oversized holes in delicate fabric. If you sew any parts by machine, the manufacturer’s needle and fabric recommendations can help you match the needle to a fine woven material.
Petal template and cutting plan
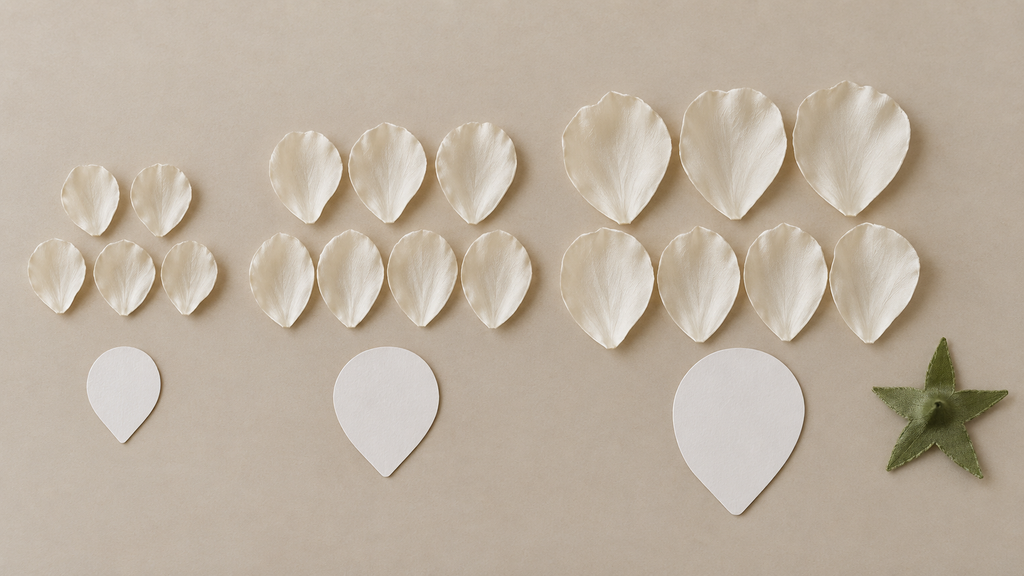
The flower in this tutorial uses three rounded petal sizes. The measurements are a starting point, so small variations will make the finished bloom look more natural rather than ruin it.
| Petal group | Approximate height | Quantity | Purpose |
|---|---|---|---|
| Small | 1½ inches | 5 | Forms the tight inner layer |
| Medium | 2 inches | 7 | Builds the main flower body |
| Large | 2½ inches | 8 | Creates the open outer layer |
| Green calyx | 1¾ inches across | 1 | Covers the base and anchors the stem |
Draw a teardrop for each petal, with a rounded top and a narrow base. Give the large petals slightly uneven edges and vary their widths slightly, since twenty mechanically identical petals can make a handmade flower look stamped out.
If your silk is very slippery, place it between two sheets of tissue paper before cutting. Keep the layers flat, use long controlled snips, and remove the tissue only after the shapes are complete.
How to make flowers from silk step by step
Set aside a clear work area and make the first flower before cutting material for an entire bouquet. One completed sample will tell you whether the petals need more structure, less adhesive, or a different color before you repeat the process.
1. Study one real flower or clear reference photo
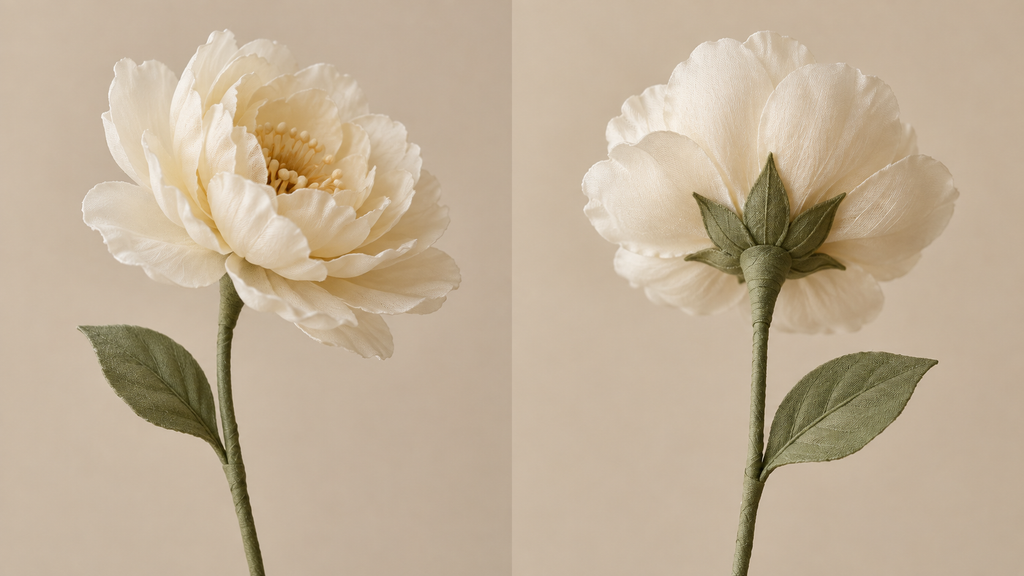
Choose one flower and look at it from the front, side, and back. Notice how many visible layers it has, whether the petals point upward or outward, and how the green calyx meets the stem.
You do not need to copy its exact petal count. The goal is to understand its construction, and Home Upright’s interesting facts about flowers explain why the visible “petals” of some blooms are actually bracts or other structures.
2. Test and stabilize the silk
Cut a small scrap before applying stiffener, adhesive, moisture, dye, or heat to the main fabric. A treatment can darken the color, leave a tide line, remove shine, or make a delicate weave too rigid.
If the silk collapses when held by one corner, apply a light coat of commercial fabric stiffener as directed, fuse a very lightweight backing, or laminate two silk layers with a suitable adhesive. Let the treated fabric dry completely and press it flat before tracing templates.
3. Trace and cut the petals
Trace the templates sparingly so marks stay near the edges that will be hidden. Cut the small, medium, and large petals, then keep the three groups separate.
Natural silk edges may fray, but a tiny amount of fringe can create a soft look. For a cleaner edge, apply a compatible liquid seam sealant to a test scrap first, or use two bonded layers, since too much sealant can leave a hard, dark outline.
4. Add subtle color before shaping
This step is optional, but it often makes the largest difference in realism. Use a fabric-compatible paint or dye to add a slightly deeper tone at each petal base, then feather the color outward with a barely damp brush.
Keep the first layer pale and let it dry before deciding whether to add more. Strong rings of color and identical brushstrokes on every petal usually look less natural than a restrained, uneven gradient.
5. Shape each petal without an open flame
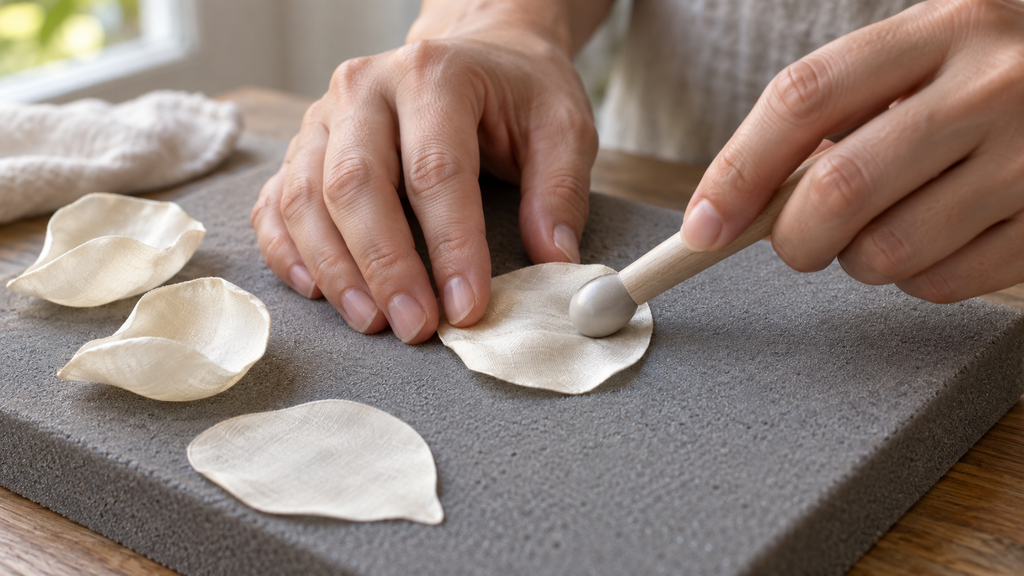
Place a petal on a foam pad or folded towel. Press a blunt, rounded tool from the base toward the upper half to create a shallow cup, then gently roll or curve the top edge between your fingers.
For more definition, use a small iron or flower-making tool on the lowest effective setting, follow its instructions and test on every fabric first. A tool with a stand and safety shield, such as the design described in the mini-iron safety features, keeps the hot tip controlled, but it still requires full attention and a heat-resistant surface.
Do not use a candle to curl genuine silk, and never assume a shiny fabric will behave like polyester. Silk can scorch, while synthetic fabric can shrink, melt, release fumes, or ignite if overheated.
6. Make the flower center
Fold a small bundle of purchased stamens or embroidery thread around the top of a short piece of floral wire. Wrap the bundle firmly with matching thread, then add a tiny amount of adhesive at the binding point if needed.
For a poppy-style center, use a round bead or a fabric-covered ball. For a peony, make the stamen bundle wider and let a few filaments sit at different heights.
7. Add the small petals
Position the five smallest petals around the center with their narrow ends overlapping. Stitch through the bases with several firm passes, or attach one petal at a time with a very small amount of fabric adhesive.
If you glue, let the adhesive set before pulling the next layer into place. The official fabric-adhesive instructions illustrate why a thin, even application and adequate drying time matter more than a large blob of glue.
8. Build the medium and outer layers
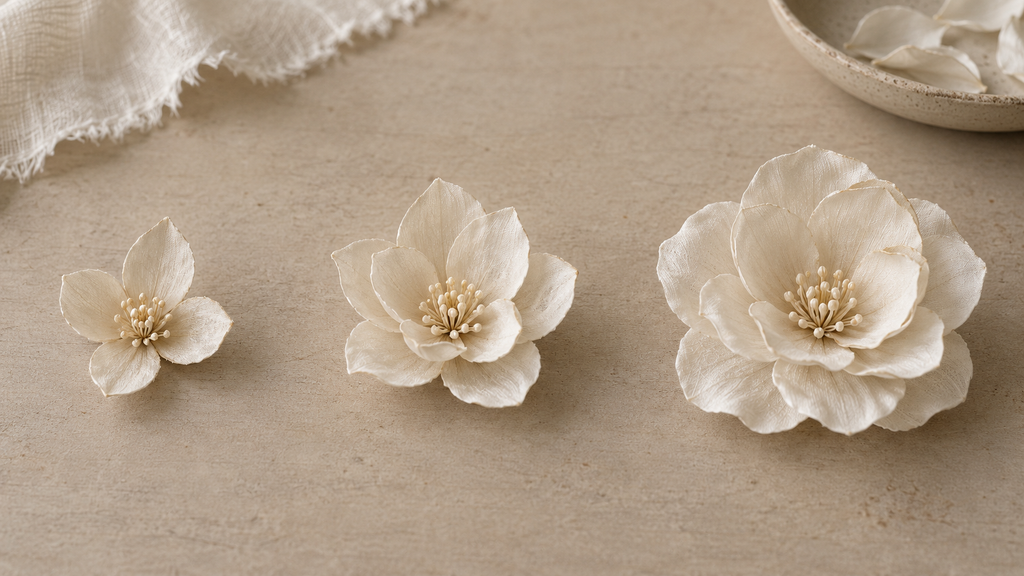
Add the seven medium petals around the first layer, offsetting them so each new petal covers a gap. Rotate the flower as you work and inspect it from the side as well as from above.
Attach the eight large petals last and let them sit more openly. Before the stitching or adhesive is fully set, adjust individual petals so some curve inward, some face forward, and others relax outward.
9. Attach the calyx and finish the stem
Cut a small opening in the center of the green calyx and slide it up the wire to cover the raw petal bases. Stitch or glue it in place, keeping the attachment compact so the back of the flower does not develop a large bump.
Starting directly below the calyx, stretch and spiral floral tape down the wire. Add one or two silk leaves as you wrap, then trim the wire with cutters and fold or cover any sharp end.
10. Make final adjustments
Hold the flower at eye level and rotate it slowly. Open crowded petals with a blunt tool, tighten loose stitches, remove visible adhesive threads, and bend the stem into a gentle natural line.
Stop before every petal becomes perfectly symmetrical. A slight shift in angle and spacing is usually what separates a convincing handmade flower from a flat fabric rosette.
Turn the basic method into different flowers.
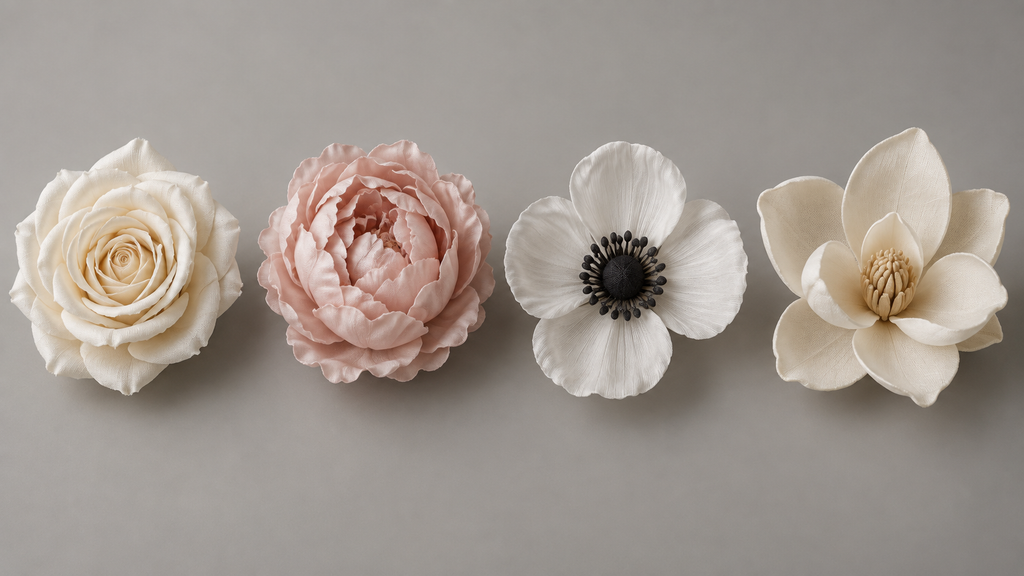
The same materials can produce several recognizable forms. Change the petal outline, center, layer density, and opening angle rather than learning an entirely new construction method for every bloom.
| Flower style | Change the petal shape | Change the assembly |
|---|---|---|
| Rose | Use rounded heart-shaped outer petals | Roll one small petal into a bud, then overlap each new petal in a spiral |
| Peony | Use wide petals with softly uneven tops | Add more medium petals and keep the center dense |
| Poppy | Use four to six broad, lightly crinkled petals | Build around a bold dark center and keep the flower open |
| Camellia | Use smooth rounded petals in several sizes | Stack orderly layers with less ruffling |
| Magnolia | Use six to nine thick teardrop petals | Keep the petal count low and form a tall center |
| Flat appliqué flower | Use one or two simple petal rings | Skip the wire stem and stitch a felt circle to the back |
For a rose, make the inner petals narrower and cup them strongly. For a peony, add fullness with more petals, but avoid packing the center so tightly that the flower becomes a heavy fabric ball.
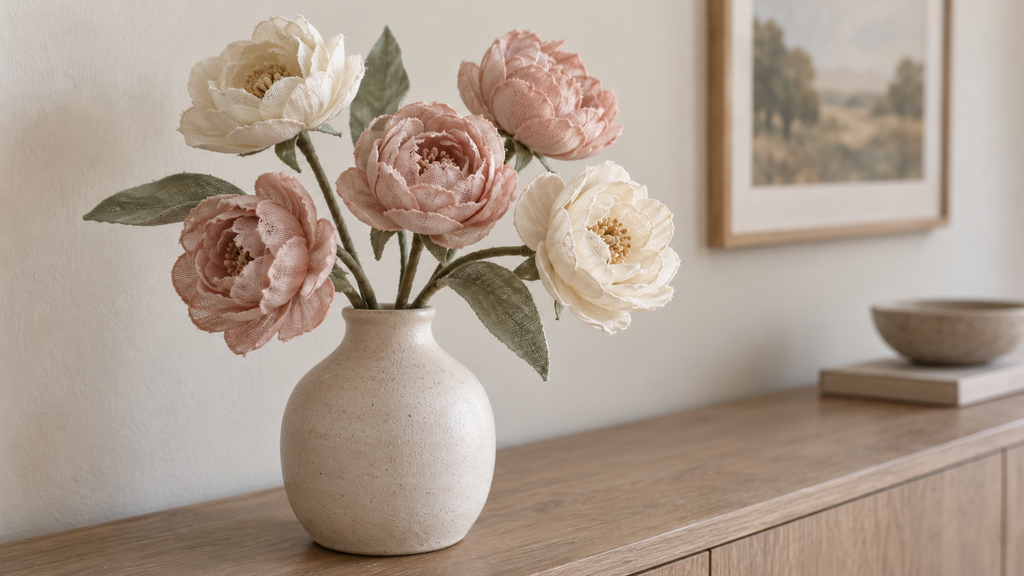
If you plan to arrange several finished stems, study real bouquet proportions instead of making every bloom the same size. Home Upright’s hibiscus flower bouquet ideas can help you think about focal flowers, supporting blooms, foliage, and spacing even when your final bouquet uses handmade silk flowers.
Sewing versus fabric glue
Both methods work, but they create different results. Sewing offers more control and makes it easier to reposition petals, while adhesive is faster and avoids visible thread.
| Method | Advantages | Limitations | Best for |
|---|---|---|---|
| Hand stitching | Strong, adjustable, and discreet at the base | Slower and requires a fine needle | Wearable flowers and long-term use |
| Fabric adhesive | Quick and accessible to beginners | Can bleed, stiffen silk, or remain visible | Home decor and hidden joins |
| Hot glue | Sets quickly and fills gaps | Bulky, easy to overapply, and can burn | Heavier synthetic flowers, not delicate silk |
| Mixed method | Stitches carry the load while tiny glue dots control details | Requires both sets of supplies | Stemmed flowers and bouquets |
I prefer small hand stitches for the main structure and adhesive only where a tiny detail needs support. If you choose a no-sew flower, test the glue on scrap silk and let each layer cure according to its label before shaping or wearing the piece.
How to make silk flowers look realistic
Realism comes from structure and restraint, not the number of petals. These adjustments have more impact than adding another decorative layer.
- Use at least three petal sizes.
- Vary the width and edge of a few petals.
- Darken the petal base slightly instead of outlining every edge.
- Place petals in overlapping, offset layers.
- Shape petals individually before assembly.
- Keep the back of the bloom compact and tidy.
- Bend the stem gently instead of leaving it perfectly straight.
- Mix flower sizes when making a bouquet.
- Add leaves selectively rather than at identical intervals.
One detail I would not overlook is the center. A carefully made center gives the eye a focal point and can make simple outer petals feel convincing. In contrast, an oversized plastic bead can make otherwise beautiful silk work look artificial.
Common problems and how to fix them
Most first attempts fail for predictable reasons. Diagnose the material or construction issue before remaking the entire flower.
| Problem | Likely cause | Practical fix |
|---|---|---|
| Petals stay flat | Fabric lacks shaping or support | Add light stiffener to a test piece and deepen the cup |
| Edges fray excessively | Loose weave or too much handling | Stabilize before cutting and handle by the petal base |
| Glue shows through | Too much adhesive or incompatible formula | Use smaller dots, test first, or switch to hand stitching |
| Flower looks like a stack of circles | Petals align directly over one another | Offset each layer and vary the angles |
| Center leans | Wire bundle is loose | Rewrap the base firmly before adding more petals |
| Bloom feels heavy | Too many layers or too much glue | Remove hidden petals and reduce adhesive |
| Petals scorch or change shine | Heat is too high | Stop, lower the setting, use a press cloth, and test a scrap |
| Stem looks bulky | Too much material at the flower base | Trim hidden fabric and restart the floral tape tightly |
Avoid correcting a stain by soaking an assembled silk flower. Silk becomes weaker when wet, and mixed components such as wire, dye, adhesive, and paper-covered stamens may react differently.
Displaying and caring for handmade silk flowers
Dust a finished flower with a clean, soft artist’s brush or use a cool, gentle stream of air from a distance. Support the bloom from underneath while cleaning so the wire and petal base do not carry unnecessary strain.
Keep genuine silk out of strong, direct sunlight. The Canadian Conservation Institute’s guidance on caring for textiles explains that silk is especially vulnerable to light damage and that fading and fiber weakening are cumulative.
Store loose flowers in a lidded box with enough room so petals aren’t crushed. Use soft, acid-free tissue for support, keep heavy objects off the blooms, and avoid damp areas where metal parts could corrode, or textiles could develop mold.
Frequently asked questions
Can beginners make silk flowers without special tools?
Yes. Sharp scissors, a needle, thread, a rounded tool, and a foam pad are enough for a basic layered flower. Specialized flower irons and brass tools offer more shaping options, but they aren’t necessary to learn the construction process.
Do I need to stiffen silk before making flowers?
Not always. Crisp silk organza or dupioni may hold a form without much help, while lightweight habotai often benefits from a second layer, backing, or light stiffener. Test one petal before treating the full piece because stiffener can alter the color, shine, and drape.
Can I make silk flowers without sewing?
Yes, you can assemble the petals with a fabric-safe adhesive. Apply tiny amounts at hidden petal bases, test for bleed-through, and wait for the stated curing time before handling the flower.
How do I stop silk flower petals from fraying?
Stabilize the fabric before cutting, use sharp scissors, and minimize handling along raw edges. A compatible seam sealant can help, but test it first because it may darken the fabric or leave a stiff outline.
Can I curl silk petals with a candle?
I do not recommend an open flame for this project. Genuine silk can scorch or burn, and synthetic satin may melt, shrink, ignite, or release fumes, so controlled shaping with a blunt tool or purpose-made heating tool is safer.
What is the best silk for handmade flowers?
Silk habotai works well for soft petals, silk organza adds translucency and structure, and dupioni suits more stylized flowers. A medium-light fabric is usually easiest for beginners because it layers neatly without becoming too bulky.
How long does it take to make one silk flower?
Your first flower may take an evening because you will be testing the fabric, refining templates, and learning how tightly to assemble the layers. Later flowers usually move faster once the templates and construction order are settled, but drying time still depends on the stiffener, dye, and adhesive you use.
Make your first silk flower.
The most reliable way to learn how to make flowers from silk is to complete one simple bloom and use it as your sample. Cut three petal sizes, shape each piece gently, build from the center outward, and keep the back of the flower as neat as the front.
Start with inexpensive silk remnants or a small labeled piece of fabric before buying material for a full bouquet. Once your first flower holds its shape, use the variation table to create a rose, peony, poppy, or magnolia, then arrange the finished stems somewhere protected from strong sunlight and moisture.