


How to Fix a Leaking Shower Head: The Complete DIY Guide
That drip-drip-drip at 2 a.m. is not your imagination. It is real water, and it is going straight down your drain along with your money.
If you searched for how to fix a leaking shower head, you are probably standing in your bathroom right now, staring at the culprit. Good news. This is one of the easiest plumbing repairs you can do yourself.
You do not need to be a plumber. You do not need fancy tools. In most cases, you need a wrench, some Teflon tape, and about 20 minutes.
Most guides hand you a list of “possible causes” and let you guess. This one doesn’t. This guide will explain how every version of this problem works. A dripping head. A leak at the base. A leak in the wall. A brand new head that still drips. We cover it all, in plain language, with steps you can actually follow.
Grab a wrench. Let’s find out what’s actually leaking.
Is Your Shower Head Actually Leaking?
Before you take anything apart, let’s confirm you have a real leak. Not every drip is a problem.
Shower heads hold a small amount of water inside. When you shut off the water, that leftover water has to go somewhere. A few drops right after you turn off the shower is normal. Plumbers call this “run-on,” and it usually stops within a minute or two.
You have a real leak if any of these are true:
- Water keeps dripping for more than a couple of minutes after you shut the water off
- Water drips steadily even hours later, or overnight
- Water sprays or seeps from somewhere other than the nozzles while the shower is running
- You see wet streaks running down the wall or the shower arm
- You hear dripping inside the wall
If any of that sounds familiar, keep reading. We will find the exact source of the leak and fix it.
Why Is Your Shower Head Leaking? Common Causes
A leaking shower head almost always comes down to one of five things. Here is a quick breakdown.
| Cause | What’s Happening | How You Fix It |
|---|---|---|
| Loose connection | The shower head has worked loose from the shower arm over time | Hand-tighten or use a wrench with a cloth |
| Worn washer or O-ring | The rubber seal inside has dried out, cracked, or flattened | Replace the washer or O-ring |
| Missing or worn Teflon tape | The threads on the shower arm no longer seal tightly | Re-wrap with fresh Teflon tape |
| Mineral buildup | Hard water deposits clog the nozzles and force water out elsewhere | Soak in vinegar and scrub clean |
| Worn valve cartridge | The internal parts inside your shower’s on/off valve have degraded | Replace the cartridge (bigger job) |
The first four causes are simple, low-cost fixes you can knock out in one afternoon. The fifth one, a bad valve cartridge, is a slightly bigger job but still very doable. We will cover that one further down, since it is the answer to the two-handle shower and “dripping when water is off” questions.
According to the Environmental Protection Agency’s WaterSense program, a showerhead that drips just 10 drops per minute wastes more than 500 gallons of water a year. That is enough water to run about 60 loads of dishes in your dishwasher. Multiply that across the average American household, and leaks like these add up to nearly 10,000 gallons of wasted water every year, per EPA estimates.
That is not a small problem. It is a slow, steady drain on your water bill.
Tools and Materials You Will Need
You probably already own most of these. If not, everything on this list is available at any hardware store for under $15 total.
- Adjustable wrench or channel-lock pliers
- Soft cloth or old rag (to protect the finish while you grip the fixture)
- Teflon tape (plumber’s tape)
- Replacement rubber washer or O-ring (bring the old one to the store to match it)
- White vinegar
- A small plastic bag and a rubber band, or a bowl
- Old toothbrush
- Flashlight (helpful for looking inside tight fittings)
That is it. No specialty plumbing tools required for a standard shower head repair.

How to Fix a Leaking Shower Head: Step-by-Step
This is the process for a standard fixed shower head or a handheld shower head leaking at the connection point. It works whether the leak is at the base, at the swivel ball, or right where the head threads onto the shower arm.
Step 1: Turn Off the Water
Some homes have a shutoff valve right behind the shower head or under the handle access panel. If yours does not, turn off your home’s main water supply.
Turn the shower handle on for a second afterward to release any pressure left in the line, then shut it back off.
Step 2: Remove the Shower Head
Grip the shower head by the collar, the part closest to the wall, and turn it counterclockwise. Most shower heads come off by hand.
If it will not budge, wrap a rag around the connection to protect the finish, then use an adjustable wrench for extra leverage. Turn gently. You are loosening a threaded connection, not trying to snap a bolt.
Step 3: Inspect the Washer or O-Ring
Look inside the shower head where it connects to the arm. You will find a small rubber washer or O-ring sitting in a groove.
Pull it out and check it. If it looks flat, cracked, brittle, or misshapen, that is very likely your leak. Rubber degrades with heat and time, and a compressed or dried-out washer can no longer form a watertight seal.
Take the old washer to a hardware store and match it to a new one. This part costs a couple of dollars.
Step 4: Clean Out Mineral Buildup
While the showerhead is off, take a close look at the nozzles. White or greenish crusty deposits are mineral scale from hard water, and they can clog the holes and force water to leak out through the seams instead.
Fill a plastic sandwich bag with white vinegar, submerge the shower head, and secure the bag around it with a rubber band. Let it soak for 30 to 60 minutes. For heavy buildup, leave it overnight.
Scrub the nozzles gently with an old toothbrush afterward. Rinse well.
Step 5: Clean and Re-Wrap the Threads
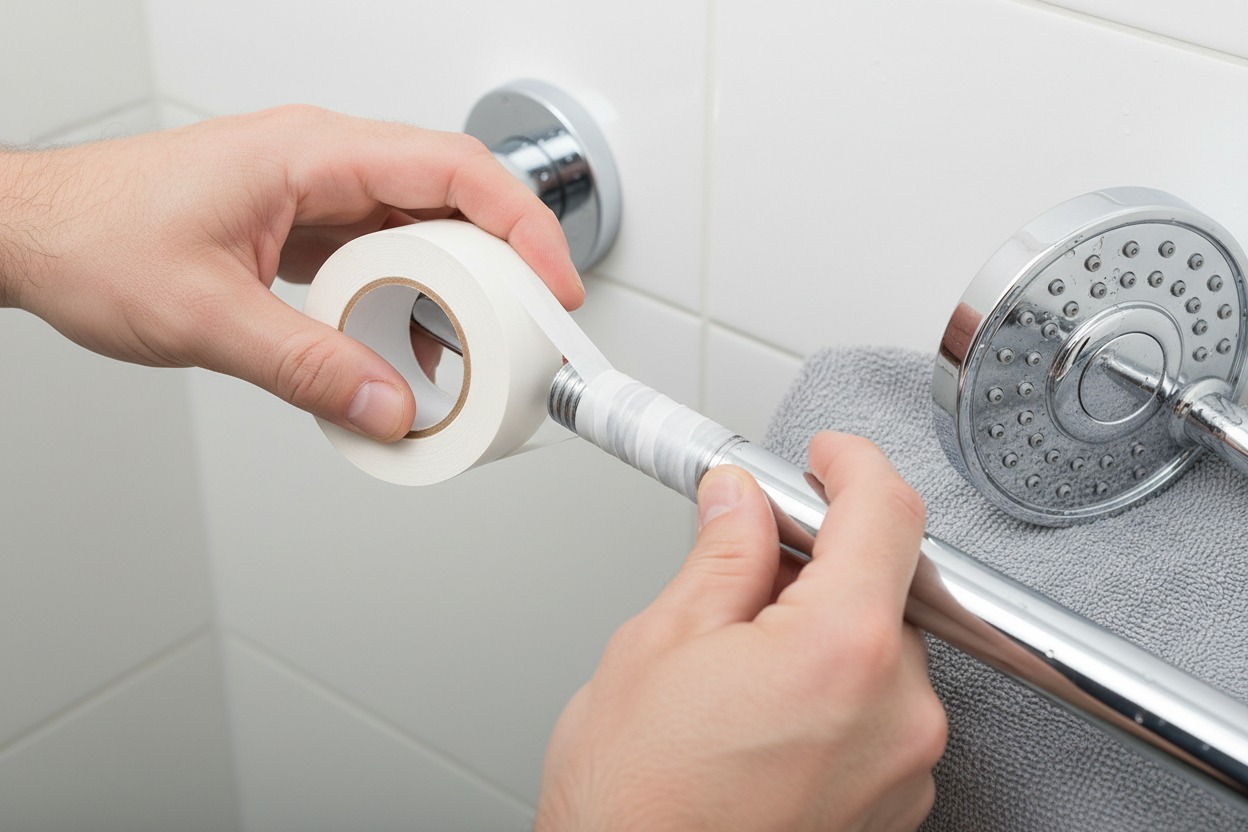
Wipe down the threads on the shower arm and the pipe coming out of the wall with your rag. Remove any old, torn Teflon tape.
Wrap new Teflon tape clockwise around the threads, three to four wraps, pressing it into the grooves as you go. Wrapping clockwise matters. It means the tape tightens instead of unwinding as you screw the shower head back on.
Step 6: Reassemble and Test
Put the washer back into the shower head, then thread the head back onto the arm clockwise. Hand-tighten it snugly, then give it a quarter turn with the wrench if needed. Do not overtighten. Cranking too hard can crush the washer or crack the threads, which just creates a new leak.
Turn the water back on and run the shower for a minute. Watch the connection point closely. If it is dry, you are done.
If your shower also takes a long time to get hot, it’s worth understanding what affects your water heater’s recovery time. Our guide on how long it takes for hot water to come back explains what to expect and when delays may signal a problem.
How to Fix a Leaking Shower Faucet
“Shower head” and “shower faucet” are used interchangeably, but they are two different things. The shower head is the piece through which water sprays out. The shower faucet is the valve-and-handle assembly that controls water flow and temperature.
If your showerhead is dry but you notice dripping from the handle, wall plate, or tub spout, your faucet is the real problem.
Shower faucets come in three common styles:
- Single-handle faucets use one cartridge to control both temperature and flow
- Two-handle faucets use separate hot and cold valves, either stem-type or cartridge-type
- Three-handle faucets add a third handle as a diverter between the tub spout and the shower head
Each type leaks for a similar reason: a worn seal, washer, or cartridge inside the valve.
How to Fix a Leaky Shower Head With Two Handles
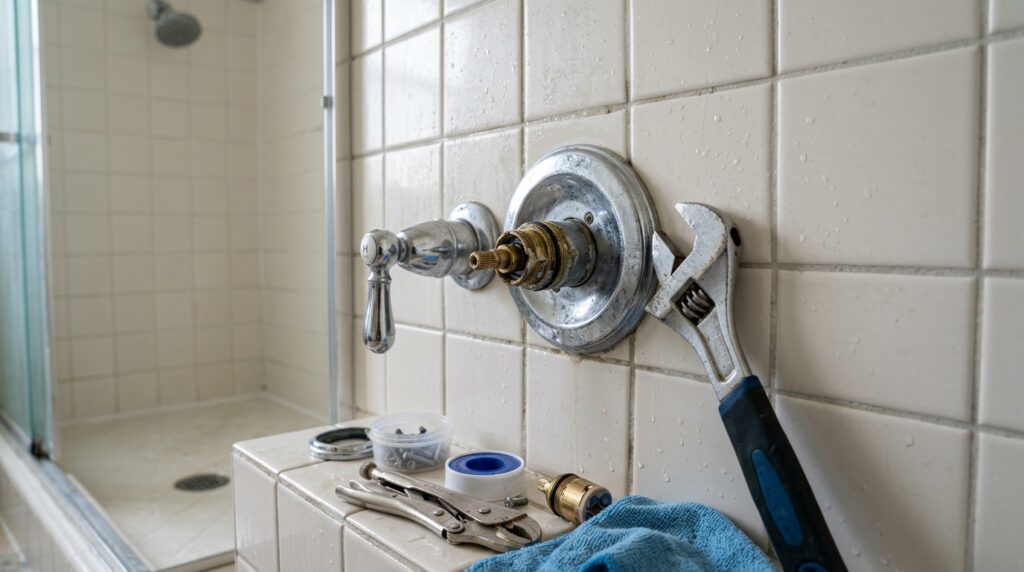
Two-handle shower faucets are common in older homes. If yours drips, it is usually due to a worn stem washer or cartridge, depending on the valve’s age and style.
Here is the general process, based on repair steps recommended by Family Handyman’s plumbing guides:
- Turn off the water supply to the shower, or shut off your home’s main valve if there is no local shutoff
- Pry off the decorative cap on the leaking handle with a small flat-blade screwdriver
- Remove the handle screw underneath, then pull the handle straight off
- Unscrew the escutcheon, the round trim plate behind the handle
- Use a wrench, or a bath socket wrench for older stem-type valves, to remove the valve stem or cartridge
- Inspect the rubber washer and O-rings on the stem. If they are worn, replace them
- If the valve is a cartridge-style unit, replace the entire cartridge instead. Bring the old one to the store so you get an exact match
- Reassemble everything in reverse order and turn the water back on to test
One important tip. Even if only one side is leaking, hot or cold, it is smart to replace the washers on both sides while everything is already apart. They wear out at roughly the same rate, so you are likely to be back in there soon if you fix only one.
Dripping Shower Head When Water Is Off
This is one of the more confusing leaks because it seems to make no sense. The shower is off. Nothing is running. And yet, water is still dripping out of the head.
Here is what is actually happening. When your shower head keeps dripping after you have fully shut off the water, the shower head itself is rarely the problem. The leak is coming from inside the valve, specifically the cartridge or the washer that controls water flow.
Over time, that internal seal wears down and stops closing completely. A tiny stream of water keeps sneaking past it, through the pipe, and out of the showerhead, even though the handle is off.
Why Does My Shower Head Drip in the Middle of the Night?
This is the exact same issue, just noticed at a different time. During the day, background noise usually drowns out a slow drip. At night, in a quiet house, that same drip becomes impossible to ignore.
A shower head dripping at night, or any time the water is fully off, points to:
- A worn valve cartridge that no longer seals tightly
- A worn washer inside an older stem-type valve
- Mineral deposits prevent the internal seat from closing all the way
- High water pressure in your home, which puts extra stress on an already-weakening cartridge
The fix here is the same one covered in the two-handle faucet section above: replace the cartridge or the stem washer. If you have a single-handle faucet, the process is similar; you only have one cartridge to deal with instead of two.
If you are not confident in identifying your cartridge brand, remove it and take it to a plumbing supply store or home center. Most stores can match it visually or by model number stamped on the part.
If replacing the cartridge does not stop the drip, or if you are dealing with corroded, hard-to-remove parts, that is a reasonable point to call a licensed plumber.
Shower Head Leaking at the Base or Connection
A leak specifically at the base, where the shower head meets its swivel ball or where the arm meets the wall, has a slightly different set of usual suspects.
Shower Head Leaking at the Base
This usually means the washer or O-ring inside the swivel connection has worn out, or the connection has simply worked loose from vibration and regular use over the years.
Fix it the same way you would a standard leak. Remove the head, inspect and replace the washer, re-wrap the threads with Teflon tape, and reattach it snugly.
Shower Head Leaking at Connection
If the leak is happening where a hose connects to a handheld shower head, rather than where the arm meets the wall, check both ends of the hose. Handheld models have a washer at the showerhead end and another at the point where the hose meets the wall bracket or diverter. A worn washer at either end will cause a slow, steady drip right at that joint.
Shower Head Leaking From the Wall
This one deserves extra attention, because it can point to a bigger issue than the previous ones.
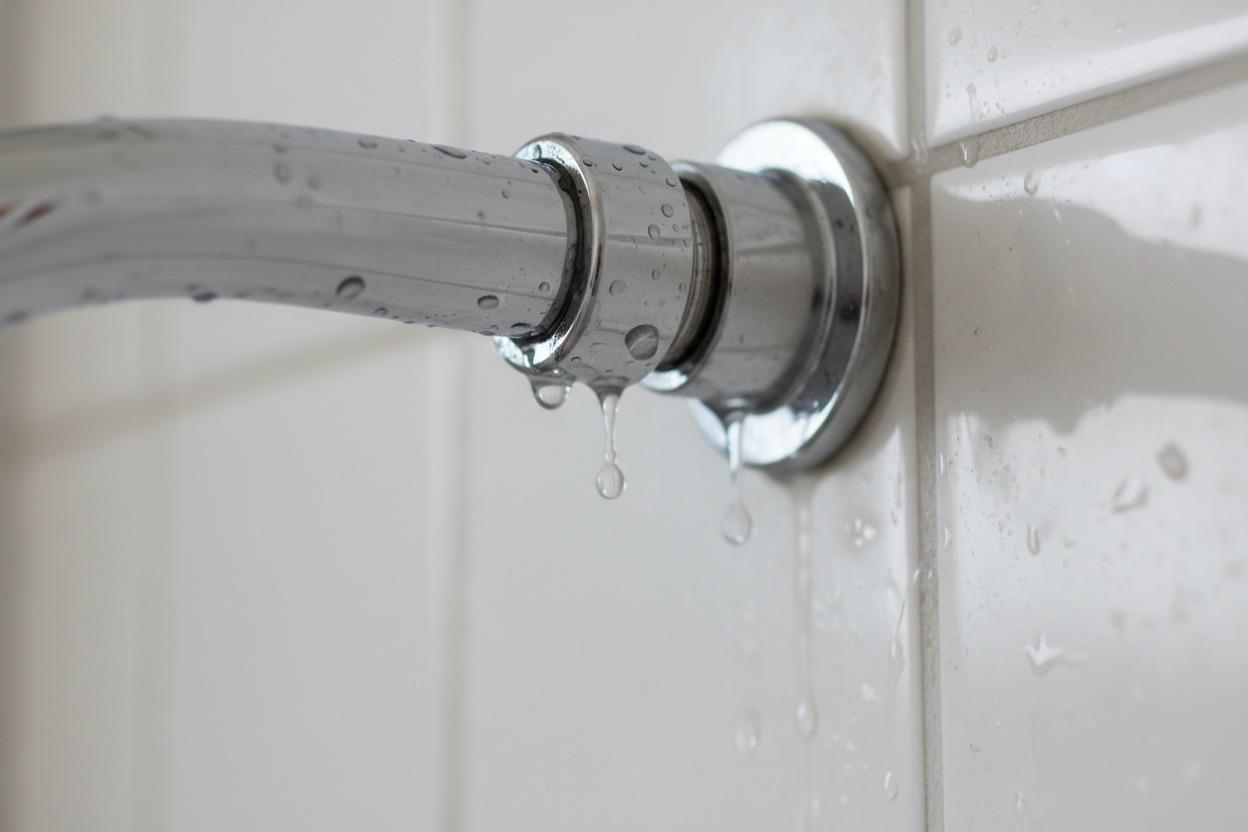
If water is leaking from the wall itself, behind the tile, around the shower arm’s base plate, or from the escutcheon plate around your faucet handles, you may have a leak inside the wall. That is different from a leak at a visible connection point.
Signs this is a wall leak, not a fixture leak:
- Water stains or discoloration on the wall or ceiling below the bathroom
- A soft or spongy feeling in the wall around the shower
- Persistent moisture even when the shower has not been used recently
- A musty smell that will not go away with cleaning
If you notice any of these signs, stop the DIY repair and call a licensed plumber. Water damage inside a wall can lead to mold and structural problems if left unchecked. It is worth mentioning that persistent bathroom moisture, from a hidden leak or just heavy shower use, is also one of the most common causes of the musty odor on your bathroom linens. If you are also fighting that smell, our guide on how to remove mildew smell from towels walks through how to get rid of it for good.
New Shower Head Dripping When Off
You just installed a brand-new showerhead, and it is already dripping. That is frustrating, but the cause is usually simple and rarely means the product is defective.
The most common reasons a new shower head drips are:
- No Teflon tape, or not enough of it. New shower heads do not always come with tape pre-applied, and factory threads are not always perfectly sealed on their own
- Installed crooked. If the head was threaded on at an angle before you straightened it out, the seal may not be sitting evenly
- The old washer was left inside. Some installers forget to swap the washer, and a worn one from the old fixture gets reused by mistake
- Overtightening. Cranking too hard can actually distort the washer and create gaps instead of sealing them
The fix is quick. Remove the new shower head, check that the washer is properly seated, wrap the arm threads with three or four clockwise wraps of Teflon tape, and reattach by hand before giving it a gentle final turn with a wrench. In most cases, this solves it immediately.
If your new shower head still drips after that, and you are also noticing weak water flow, it may be worth checking your home’s overall water pressure. Fixtures installed on a high-pressure system are more prone to leaking at connection points. Our guide on how to increase water pressure in the house also explains how to test and balance your home’s pressure, which affects both weak flow and stubborn leaks.
Rain Shower Head Leaking From Top
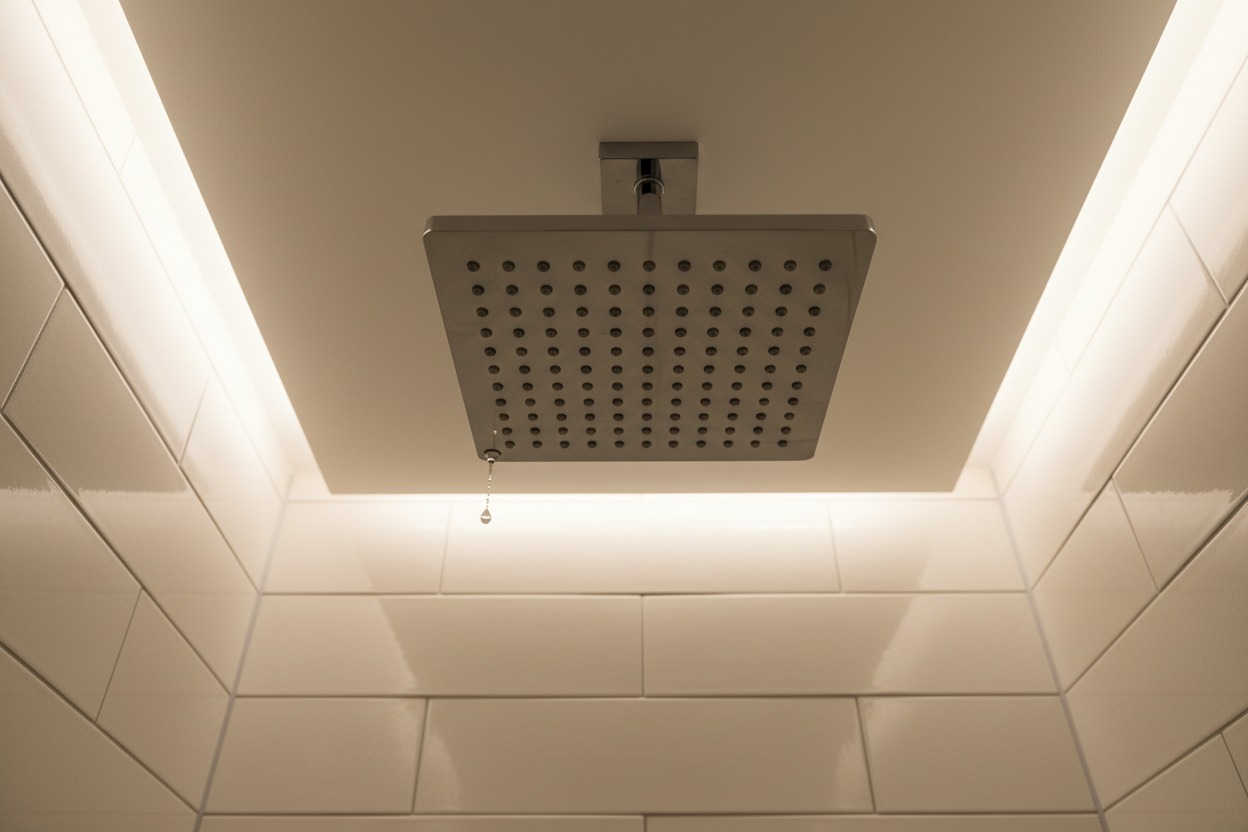
Rain shower heads are popular for good reason. That wide, gentle overhead spray feels great. But their large, flat design makes them more prone to a specific kind of leak: water seeping from the top or around the mounting arm, rather than from below.
This usually comes down to one of these:
- Mineral buildup in the wide nozzle plate. Rain heads have dozens, sometimes hundreds, of small nozzles. Hard water scale clogs some of them, which increases pressure and forces water out through the seams around the top
- A loose or worn gasket at the arm connection. Many rain shower heads mount on an extended arm or ceiling mount, which has its own washer or gasket that can wear out just like a standard shower arm connection
- Weight and gravity. Larger rain heads are heavier than standard heads. Over time, that extra weight can gradually loosen the connection point, especially if it was not tightened firmly during installation
To fix it, remove the head from its arm and soak it in a vinegar-and-water solution, following the same process as in Step 4 above, since mineral clogging is the most common cause with rain heads. Check the gasket at the connection, replace it if worn, and re-wrap the threads with Teflon tape before reinstalling.
If your rain shower head is ceiling-mounted, double-check that the mounting plate itself is sealed against the ceiling. A leak that looks like it is coming from the shower head can sometimes actually be condensation or a loose mounting seal above it.
How Much Water (and Money) a Leaking Shower Head Actually Wastes
It is easy to ignore a small drip. It feels harmless. The numbers say otherwise.
According to EPA WaterSense, household leaks nationwide waste nearly 1 trillion gallons of water every year. That is roughly the same amount of water used by 11 million homes annually. A single leaking shower head is a small part of that picture, but it adds up faster than you think.
Here is a quick breakdown of what different drip rates can cost you over a year:
| Leak Rate | Estimated Water Wasted Per Year | What That Equals |
|---|---|---|
| 10 drips per minute | Over 500 gallons | About 60 dishwasher loads |
| Constant slow drip (1 drip/second) | Over 3,000 gallons | About 180 showers |
| Steady trickle, valve not fully sealing | Thousands of gallons | Multiple months of extra water bills |
The Home Depot’s water conservation team also notes that dripping faucets, dripping showerheads, and running toilets are the most common sources of household water waste, and all three are relatively simple, low-cost repairs.
Fixing a leaking shower head is not just about the annoying sound. It is a genuinely useful way to lower your water bill, and it takes less time than a load of laundry.
When to Call a Plumber Instead
Most shower head leaks are DIY-friendly. But there are a few situations where it makes more sense to bring in a professional.
Call a licensed plumber if:
- You have replaced the washer, O-ring, and Teflon tape, and the leak is still there
- You suspect the leak is inside the wall, not at a visible connection point
- You see water stains on the ceiling of the room below your bathroom
- The valve cartridge is corroded or seized and will not come out, even with a cartridge puller
- Your home has a three-handle shower valve. These older setups are generally considered outdated, and some plumbing professionals recommend upgrading them to a single-handle, pressure-balanced valve, which also improves scald protection
- You are dealing with low water pressure alongside the leak, and you are not sure whether the two issues are connected
Replacing a basic showerhead or faucet washer typically costs very little in parts. A full valve or cartridge replacement, done by a professional, usually runs somewhere between $150 and $350, depending on your area and the complexity of the job, though pricing varies by region and plumber. It is worth getting a quote before assuming the worst.
Expert Tips to Stop Leaks for Good
A few small habits make a big difference in how long your fix lasts.
- Never overtighten. This is the single most common mistake people make. A shower head only needs to be snug, not cranked down with all your strength. Overtightening crushes washers and can crack plastic housings
- Always wrap Teflon tape clockwise. Wrapping it the wrong direction means it unravels as you screw the fixture back on, instead of tightening into the threads
- Replace washers in pairs when possible. If one side of a two-handle faucet is leaking, the other side is usually close behind. Swap both while you have the tools out
- Descale every few months in hard water areas. If you notice white, chalky buildup on faucets or shower heads, your water is hard. A quarterly vinegar soak keeps mineral scale from clogging nozzles and causing new leaks
- Look for the WaterSense label when replacing fixtures. WaterSense-certified shower heads and faucets are independently tested to use at least 20% less water while maintaining solid performance, according to the EPA
- Keep the old part until the new one is installed. If you are unsure whether a replacement washer or cartridge is the right size, having the original on hand for comparison saves you a second trip to the store
How to Prevent Shower Head Leaks in the Future
A little maintenance now saves you a repair later. Here is a simple routine that keeps leaks from coming back.
- Soak your shower head in a vinegar solution every two to three months, more often if you have hard water
- Check the connection point for looseness every few months and hand-tighten if needed
- Replace Teflon tape any time you remove and reattach a fixture, even if it looks fine
- Keep an eye on your water pressure. Consistently high pressure puts extra strain on washers, gaskets, and cartridges, and shortens their lifespan
- If your home has unusually high pressure, a pressure-reducing valve can protect your entire plumbing system, not just your shower
Small maintenance habits like these make the difference between fixing this problem once a year and once every five years.
Frequently Asked Questions
Why does my showerhead keep dripping even after I replace the washer?
If you have already replaced the washer and Teflon tape and it is still dripping, the problem is likely inside the valve itself, not the shower head. A worn cartridge or stem washer inside the wall valve is the next thing to check.
Is it normal for a shower head to drip a little after I turn it off?
Yes, a small amount of leftover water draining out for a minute or two is normal. It is called a run-on. A real leak continues dripping steadily well beyond that, or drips even when the shower has not been used recently.
Can hard water cause a shower head to leak?
Yes. Mineral deposits from hard water clog the small nozzles inside the shower head. That buildup increases internal pressure and forces water to escape through the seams or connection points rather than the nozzles, which can look and feel like a leak.
Do I need to shut off my home’s main water shutoff to fix a leaking showerhead?
Only if your shower does not have its own local shutoff valve. Many showers have one behind the head or under the handle’s access panel. If yours does not, shutting off the main supply is the safer option.
How do I know if the leak is coming from the shower head or the faucet valve behind the wall?
If the shower head drips only while water is running, the head or its connection is usually the cause. If it drips even when the water is completely off, the problem is almost always inside the valve behind the wall, not the shower head itself.
Final Thoughts
A leaking showerhead is one of the most common and fixable plumbing annoyances in any home. In most cases, you are looking at a worn washer, a loose connection, or some mineral buildup, all of which you can handle yourself in under an hour with a few inexpensive parts.
Start with the basics. Check the washer. Re-wrap the threads. Clean out mineral scale. If the drip continues even with the water fully off, the valve cartridge behind the wall is your next stop.
And if you are already working on your bathroom plumbing, it is a good time to check your overall water pressure, too, since the two issues are often connected.
Got a leak you tried to fix, and it is still dripping? Save this guide, work through the sections in order, and you will find the source. Most homeowners can knock this out in one weekend afternoon, no plumber required.