


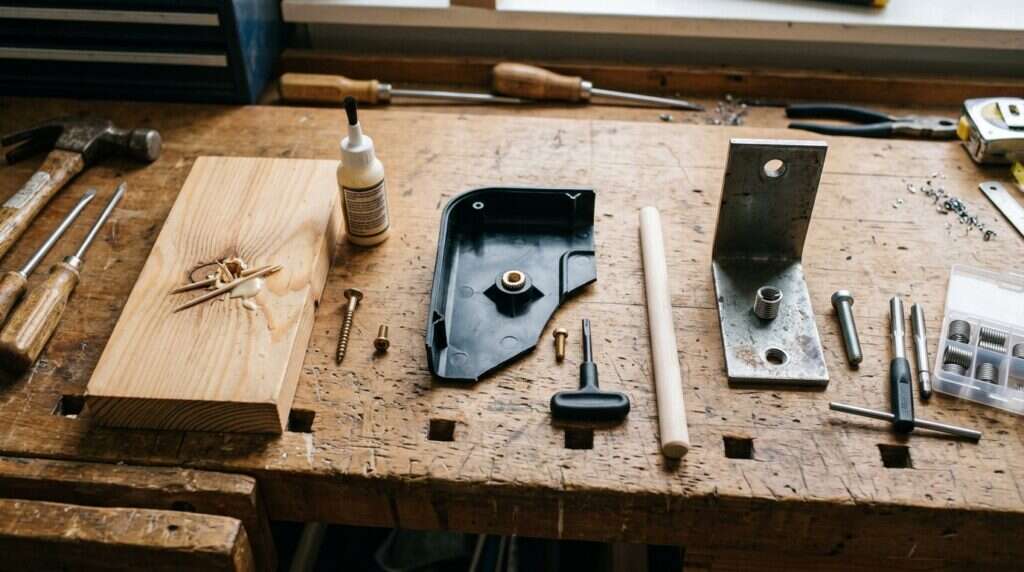
If you are searching for how to fix a stripped screw hole wood, you may have a screw that turns and turns but never tightens. The same problem can happen in a plastic appliance cover or a metal bracket, yet the correct repair changes completely with the material.
The easy internet answer is often “put toothpicks in it,” but that works only in the right kind of wood repair. A lasting repair depends on the load, the material, and whether you are replacing torn wood fibers, a worn plastic boss, or damaged metal threads.
This guide uses a decision-first approach for wood, plastic, and metal. I would rather choose a solid repair than keep tightening until a cabinet hinge sags, a plastic housing cracks, or a metal thread becomes unusable.
Quick answer: match the repair to the job
A stripped hole has lost what the screw needs to grip: wood fibers, plastic material, or metal threads. The goal is to restore the correct mating surface, then install the right screw with controlled pressure.
The strength of a wood-screw connection is not a mystery. The technical guidance on screw withdrawal explains that resistance changes with wood density, screw diameter, and threaded penetration depth. That is why a light picture hook and the top hinge of a heavy door should never get the same automatic repair.
| What you are repairing | Best first repair | Why it is the sensible choice |
|---|---|---|
| A small, shallow hole in solid softwood | Glue-coated hardwood toothpicks or matchsticks | It is quick, low-cost, and adds enough new wood for a light-duty screw. |
| A loose cabinet hinge, drawer runner, or furniture joint | Hardwood dowel plug plus a new pilot hole | It removes crushed fibers and gives the screw a clean, predictable start. |
| A door hinge that carries real weight | Plug the hole, then assess whether a matching longer screw can reach sound framing | The repair must address both the damaged jamb and the load that caused the failure. |
| MDF, particleboard, veneer, or laminate | Material-specific insert, repair plate, backing block, or replacement part | These surfaces do not behave like solid wood, so common toothpick tricks can fail quickly. |
| A plastic screw boss or plastic housing | A plastic-rated threaded insert, approved repair, or replacement housing | Plastic can crack or lose its molded shape, so wood repair methods are unreliable. |
| A tapped metal hole or thin metal bracket | Correct thread-repair insert, clip nut, rivet nut, or a specified replacement fastener | Metal needs a correctly matched thread system, not glue or wood filler. |
| A rounded or chewed-up screw head | Remove and replace the screw before repairing the hole | A damaged head and a stripped hole are two different problems with different tools. |
First, confirm that the screw hole is actually stripped
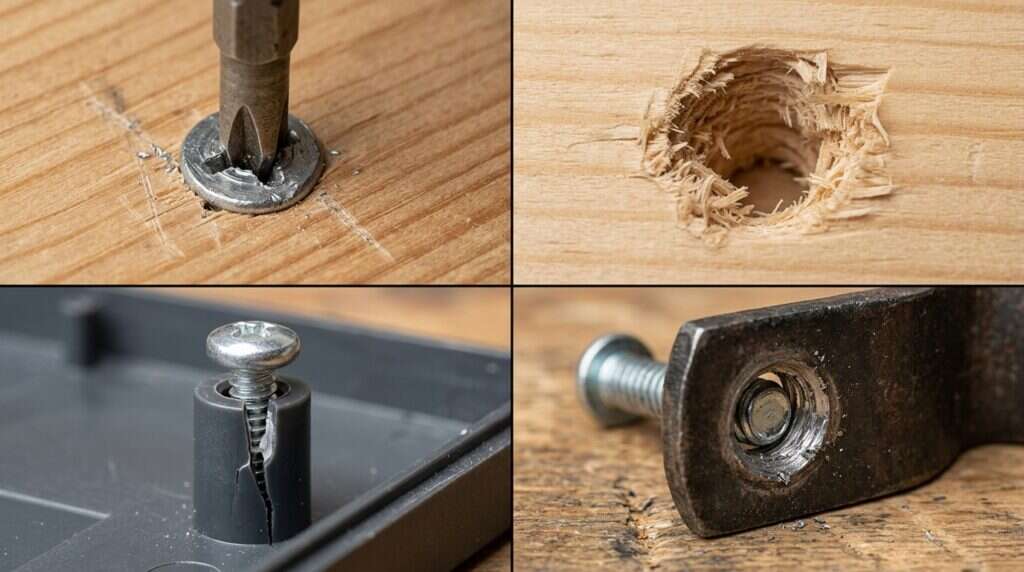
Before you bring out glue or a drill, watch the screw as you turn it. If the screwdriver slips in the cross, star, or square recess while the screw itself does not turn, the head is stripped. If the screw spins freely, rises a little, then drops back down without becoming tight, the hole has lost its grip.
That distinction saves wasted effort. Filler will not repair a worn screw head, and a new screw will still spin in a hollowed-out hole. If both are damaged, remove the old screw before repairing the material underneath.
Do the 60-second inspection
Remove the screw and inspect the hole with a flashlight. Torn fibers and pale dust point to wood damage, a cracked or polished-looking molded post points to plastic damage, and flattened or cross-threaded ridges point to metal damage. A dark, wet, or crumbly area still needs its root cause solved before any screw repair.
Check the hardware too. A bent hinge, cracked mounting plate, or pulled drawer runner can overload the same repair again. Repair the cause of the pull, not only the hole that gave way first.
Start with the material, not the filler
The word “screw hole” hides three very different systems. Wood screws cut into fibers, many plastic screws form threads in a molded post, and machine screws rely on shaped metal threads. That is why a wood dowel can be excellent in a door jamb yet completely wrong for a plastic cover or aluminum bracket.
Solid wood is best for a plug repair because you can remove damaged fibers, add new wood, and drill a fresh pilot hole. Plywood can also work when the panel is thick enough, and the hole is away from a weak edge.
MDF and particleboard need more caution because compressed fibers can crumble after repeated tightening. An insert, hinge repair plate, hardwood backing block, or new hardware is usually more dependable than packing the hole with small sticks.
Veneer and laminate have a thin visible layer that can chip under an oversized bit. For a high-use door or drawer, choose a repair that spreads the load rather than relying on the facing alone.
Plastic needs its own insert, boss repair, or replacement part because heat, brittleness, and wall thickness vary widely. Metal also needs a dedicated approach because a machine thread has a specific diameter and pitch that must be restored accurately. The dedicated sections below show how to choose a safe repair for each.
Wood method 1: Use toothpicks and wood glue for a light-duty repair
Toothpicks are practical for a small, shallow hole in solid wood, such as a light drawer pull, trim piece, or cabinet catch. I would not use them for a sagging door, a heavy cabinet door, or anything pulled hard every day.
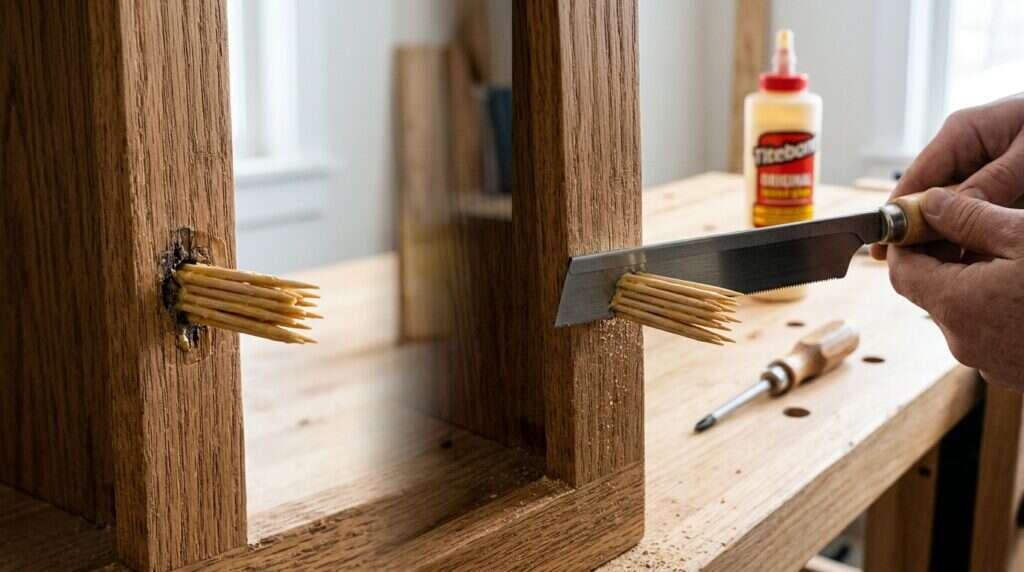
Choose plain hardwood toothpicks or uncoated matchsticks with the heads removed. You also need wood glue, a utility knife or flush-cut saw, and a screwdriver.
Step 1: Clean the hole instead of adding more dust
Remove the screw and vacuum out loose sawdust. Leave firmly attached splinters in place, because the surrounding wood supports the repair.
Step 2: Dry-fit the sticks first
Dry-fit two or three toothpicks and make sure they meet resistance. Aim for snug, not packed so tightly that the surrounding wood can split.
Step 3: Add a thin coat of glue to the wood, not a puddle
Coat the toothpicks lightly with wood glue and press them in. The wood sticks are the replacement material; glue alone is not a reliable screw thread.
Step 4: Trim flush, let it cure, then start gently
Trim the excess flush. Let the glue cure as its label directs; wood-glue curing guidance distinguishes early handling time from the longer period needed before a stressed joint. Reinstall slowly by hand, so you stop at the first resistance.
When this method is worth using
Use this method when the screw is small, the object is light, and the hole is only slightly oversized. It is quick and preserves the original hardware location.
Skip it for a heavy or safety-related load. An upper door hinge, handrail bracket, furniture leg, or wall-mounted item needs a larger plug, sound backing, or professional assessment.
Wood method 2: Plug the hole with a hardwood dowel for a more durable repair
When I want the cleaner and more repeatable option, I would choose a hardwood dowel plug. This method removes the shredded portion of the hole, replaces it with a solid piece of wood, and lets you make a fresh, centered pilot hole. It takes a little longer than toothpicks, but it is usually the better choice for cabinet hinges, drawer slides, furniture connections, and medium-duty door hardware.
Gather a drill, a sharp drill bit, a matching hardwood dowel, wood glue, a flush-cut saw, a pencil, and a pilot bit. A self-centering hinge bit keeps a hinge repair aligned.
Step 1: Support the item and remove only what you need to remove
Support a cabinet door before removing screws. For a large door, work on one hinge leaf or one repair at a time so it cannot twist, fall, or pull the remaining screws loose.
Step 2: Choose a plug size that preserves strong surrounding wood
Choose a dowel large enough to remove the ragged hole but not so large that it leaves a thin ring of weak wood. Do not drill into the edge of a narrow frame simply because the old hole is there; moving the hardware or adding backing may be safer.
Step 3: Drill a clean, controlled hole
Wrap tape around the bit to mark a safe depth. Drill straight and stop after removing the damaged fibers, especially in a thin panel or an unknown cavity. Vacuum the dust so the plug seats against clean material.
Step 4: Glue, seat, and trim the hardwood plug
Dry-fit the dowel first. Coat its sides lightly with glue, press it in, and tap with a small hammer and scrap block if needed. Trim flush after it seats, then let it cure before drilling.
Step 5: Mark the center through the hardware and drill a correct pilot hole
Put the hardware back in position and mark the center through the screw opening. Drill for the screw’s root diameter, not the full thread width. Use a wood-screw pilot-hole chart when you are unsure, especially in hardwood.
Step 6: Reinstall the screw without overdriving it
Start the screw straight, then tighten until the hardware is secure and does not move. Stop there. More force is not more strength once the hardware is seated, and overtightening is how a careful repair becomes another stripped hole.
One detail many quick tutorials skip is grain direction. A dowel placed in the same direction as the screw often receives the new screw in end grain, which behaves differently from side grain. The same fastening research supports using a stronger framing-based or professional solution for a heavy, high-cycle, or safety-critical load.
If the plug will remain visible on a stained project, sand it gently after it cures and blend the surface deliberately. The dark-stain finishing guide is useful when you need the repaired spot to look like part of the wood rather than an obvious pale circle.

Wood method 3: Use a larger or longer screw only when it solves the real problem
Using a larger screw and a longer screw are different repairs. A wider screw may bite fresh wood around a lightly enlarged hole, while a longer one may reach deeper sound material behind a jamb. Neither fixes rotten wood, crushed particleboard, or a cracked frame.
Consider a one-size-larger screw only when there is ample solid wood, the head still sits flush, and the shank will not split the piece. Pre-drill carefully, and do not force a proud head down because the hardware will not sit flat.
For a door hinge, a longer matching-head screw can help when it is deliberately chosen to reach sound framing beyond a damaged jamb. Never treat extra length as a guess in an unknown wall, hollow panel, appliance, or cabinet side.
Choose a screw with the correct head, drive type, material rating, and thread pattern. When in doubt, take the old screw and hardware to a hardware counter to compare the head profile in person.

How to repair stripped screw holes in MDF, particleboard, plywood, and veneer
MDF and particleboard often leave a powdery cavity rather than a clean hole, and extra glue does not always restore their ability to handle repeated movement. For a light-duty repair, choose an insert or repair sleeve. For a frequently used hinge, a repair plate spreads the load across sound panel material.
Plywood is more forgiving when the hole is in a broad face and away from a split edge. A hardwood plug can work there, while a thin edge may need a relocated fastener or solid backing block.
Protect veneer or laminate with painter’s tape, a sharp bit, and slow speed. For a high-use visible area, a repair plate, backing block, or insert is safer than an oversized hole that may expose the substrate.
How to fix stripped screw holes in plastic
Plastic is not simply smooth wood. Many products use screws that cut threads into a molded plastic boss, the short post or tube around the screw. A wood dowel or random larger screw can split a cracked or flattened boss further.
First, identify what the screw is actually using
Look for a molded plastic post, a metal insert set into plastic, a captive nut, or a screw that passes all the way through. If the product already uses a metal insert or nut, the plastic may not be the thread itself, so the insert or nut may be the component that needs replacement. Do not treat a loose screw in a plastic electrical device, child-safety item, appliance, or pressurized fitting as a simple DIY hole repair.
Choose a repair that preserves the plastic housing
For a lightly worn, noncritical plastic boss with adequate wall thickness, a compatible repair insert or a manufacturer-approved replacement fastener may work. For an item that is opened and closed repeatedly, a threaded-insert selection guide for plastic explains why metal inserts are often used to give plastic a durable machine-threaded connection. Do not install a heat-set insert with an improvised hot tool unless you understand the exact plastic and insert system, because excess heat can distort the housing or damage nearby parts.
If the boss is split from its base, the plastic is chalky, or the screw carries a heavy load, replacement is normally safer. Epoxy can rebuild a noncritical cosmetic area when product instructions allow it, but it is not a universal substitute for a correctly designed boss or insert. If the repair protects people, power, water, or a moving load, choose the approved part or professional repair.

How to fix stripped screw holes in metal
Metal repair starts with one important question: is this a machine screw in a threaded hole, a self-tapping screw in thin sheet metal, or a bolt passing through to a nut? A threaded aluminum bracket, a thin steel panel, and a captive nut need different repairs. Do not use wood glue, toothpicks, or ordinary filler in metal because none of them restore a correctly sized metal thread.
Match the repair to the metal fastening system
For a machine screw in a threaded hole, first identify the original screw diameter and thread pitch. A correct repair kit typically removes the damaged threads, prepares the hole with the specified drill and tap, then installs an insert that restores the original internal thread. The thread-repair kit process explains this drill, tap, and insert sequence, but use only the exact bit, tap, and insert specified for your screw size.
For a self-tapping screw in thin sheet metal, a thread insert may not be the right product. Depending on the panel design and load, the solution can be a correctly specified larger fastener, a clip nut, a rivet nut, a through-bolt and nut, or replacement of the part. I would not choose one of these by guesswork if the metal is thin, hidden, corroded, or part of a vehicle, appliance, or structural assembly.
Keep metal repairs within a safe DIY boundary
Wear eye protection when drilling or tapping metal, keep the tool square, and clear metal chips before testing the screw. Do not repair brake, steering, seat-belt, engine, gas, electrical-grounding, fire-safety, or structural threads as a general household task. For those applications, a qualified technician needs to confirm the correct hardware and torque.

A special note for loose door and cabinet hinges
A loose hinge is rarely just a loose screw. The top hinge of a heavy door carries real pull, and a misaligned cabinet door twists its mounting screws every time it closes. Check the weight, alignment, and surrounding material before you repair it.
Support the door first. Repair every hole that spins, not only the one that looks worst, and then close the door slowly to check the reveal around its edges. If an entry door is difficult to latch, scrapes the frame, or puts pressure on the lock, solve that alignment issue as well. A binding door can create lock trouble too, so the safe broken-key troubleshooting guide is worth reading if you have noticed stiffness at the keyway.
For a cabinet hinge, inspect the mounting plate and holes in both the door and cabinet wall. A repair plate or new mounting location can outlast filler in a badly damaged manufactured panel.
For an exterior door, a fire-rated door, or a door that is very heavy, do not treat hinge repair as a purely cosmetic job. Call a qualified carpenter or door professional when the jamb is split, the frame moves, the door rubs badly, or the repair affects security or egress. A secure, properly aligned door is more important than a fast DIY win.
How to fix a stripped screw when the screw head is damaged instead
The phrase “how to fix a stripped screw” usually describes a different issue from a stripped screw hole. In that case, the screw head is rounded or damaged, so your driver bit cannot grip it. You still need to remove that screw before you can inspect or repair the material underneath.
Start with the exact driver bit size and press firmly in line with the screw. If that does not work, stop before the recess becomes smoother. A manual screwdriver can give you better feel than a drill, and a purpose-made extractor is usually safer than improvising with a knife or a random bit.
If the screw turns but does not rise, pull very gently under the head with a thin pry tool only if the surrounding surface can be protected. That spinning behavior often tells you that you have both problems: a damaged head and a stripped hole. Once the screw is out, discard it and use the repair method that matches the wood and the load.
Mistakes that make a stripped screw hole worse
The most damaging repairs happen when you force one solution into every material. More glue, a bigger screw, and more torque can split wood, crack plastic, or ruin metal threads.
Avoid ordinary wood filler alone for a moving hinge or loaded bracket. Use a plug, insert, backing plate, or another repair designed for the stress of the application.
Do not drive into wet glue, epoxy, or uncured filler unless its instructions specifically allow it. Let the repair cure, then drill a controlled pilot hole.
Skip wall anchors, metal wool, paper, and random debris in a wood hole. If toothpicks are too small, move up to a hardwood plug.
Prevent the next stripped screw hole
Stop the screw when the hardware becomes firm. Use a lower drill-clutch setting and finish by hand when the material is soft, old, or highly visible.
Use a pilot hole in hardwood, near an edge, or in a repaired plug. It guides the screw and reduces splitting force. Check a pilot-hole sizing reference instead of guessing from the thread width.
Keep the driver straight and use an unworn bit that fills the recess. Test an unfamiliar screw and bit on scrap before touching a finished cabinet or door.
Deal with water, sag, and movement early. Repeated tightening after a screw starts spinning is the moment to stop and repair the hole properly.
Expert tips and repair tradeoffs
The right repair should be the smallest one that is strong enough for the job. A modest toothpick repair preserves the original hole and is ideal for light use. A dowel plug takes longer but gives you a clean restart when the hole is genuinely damaged.
| Repair choice | Main advantage | Main drawback | Best use |
| Glue-coated toothpicks | Fast and inexpensive | Not ideal for heavy or high-cycle loads | Small trim, light drawer pulls, minor solid-wood holes |
| Hardwood dowel plug | Clean, strong, and easy to re-drill | Requires a drill, cure time, and careful centering | Cabinet hinges, drawer runners, general furniture repairs |
| Larger screw | Minimal extra work if the wood is still sound | Can split wood or leave the hardware sitting proud | Slightly enlarged holes with plenty of surrounding solid wood |
| Longer hinge screw | Can reach deeper sound material in the right door jamb | Unsafe as a blind guess and not suited to thin panels | Properly assessed door-frame repairs |
| Plastic threaded insert or approved replacement | Preserves a noncritical screw boss | Must match plastic and wall thickness | Removable plastic covers or housings |
| Metal thread-repair system | Restores a precise machine thread | Requires correct size, tap, and safety assessment | Noncritical threaded brackets |
For furniture that comes apart repeatedly, a threaded wood insert can be a smart upgrade over a repeated wood screw. It creates a machine-threaded connection for removable legs, hardware, or serviceable components. Choose the insert and pilot hole from its instructions.
My final expert tip is to use a stopping rule. If the wood is cracked, wet, rotten, too thin, or carrying a safety-critical load, do not keep escalating DIY fixes. A professional repair may cost less than replacing a split jamb, a cabinet side, or an entire door after a failed experiment.
Frequently asked questions
Can I use wood filler to fix a stripped screw hole?
Wood filler can smooth a shallow cosmetic defect, but I would not depend on it alone for a stressed connection. For hinges, brackets, furniture legs, or high-use hardware, add real wood, an insert, or a repair plate.
How do I fix stripped screw holes in wood on a door hinge?
When people search how to fix stripped screw holes in wood on a door hinge, the first question is how much load the hinge carries. Support the door, plug every loose hole, let it cure, and drill centered pilot holes. For a damaged jamb or heavy sagging door, assess sound framing or call a professional.
How do I fix a stripped screw if the head is damaged?
Use the exact bit first, with firm pressure and slow turns. If it cannot grip, use a purpose-made extractor and replace the screw after repairing the wood.
How to fix stripped screw holes in plastic?
How to fix stripped screw holes in plastic depends on the part, plastic type, and whether the screw uses a molded post, nut, or insert. For a noncritical housing, use an approved insert or correctly sized replacement fastener only when the part has enough wall thickness. Do not improvise on electrical, child-safety, plumbing, or load-bearing parts.
How to fix stripped screw holes in metal?
How to fix stripped screw holes in metal is a thread-repair job, not a wood-filler job. A metal thread-repair insert restores a usable thread after measurement and preparation. For restraints, brakes, engines, structural assemblies, or electrical safety, use a qualified technician.
Final thoughts: repair the material, then protect the repair
Knowing how to fix a stripped screw hole in wood, plastic, and metal is less about finding a clever household trick and more about choosing the right repair system. Use toothpicks or plugs only for suitable solid-wood jobs, use an approved insert or replacement part for plastic, and restore metal threads with a matching thread-repair system.
If you are still deciding, remove the screw, inspect the material, and ask one honest question: “What will this fastener have to hold tomorrow?” Save this guide before your next loose hinge or wobbly cabinet repair, and browse the practical tools and hardware guides when you want to build a DIY kit around the repairs you actually face.