


How to get a broken key out of a lock: Safe, Simple Steps
If you are searching for how to get a broken key out of a lock, the worst thing you can do is rush. A broken key looks like a small problem, but one impatient pull, a blob of glue, or the wrong tool can turn it into a damaged lock, a locked-out home, or an expensive late-night call.
The good news is that many broken keys can be removed without taking the lock apart. The key is to make one calm decision before you touch anything: is the key fragment in the normal removal position, and is there enough exposed metal to grip? This guide helps you answer that first, then choose the least risky next step for a lock you own or are authorized to access.
Most articles list tweezers, paper clips, glue, and random household tricks all at once. I would not start that way. My approach is a low-regret sequence: protect the lock, identify the fragment position, try one suitable method, and stop before a simple extraction becomes a lock replacement.
Quick answer: the safest order of attack
The safest way to remove a broken key is to leave the lock alone for a minute, check that the fragment is not turned, and use the least invasive tool that matches what you can actually see. If the key sticks out, slim needle-nose pliers may be enough. If it sits flush and the cylinder is in its normal position, a purpose-made broken-key extractor is usually the better DIY choice.
Do not keep adding tools when the first attempt fails. One careful attempt is sensible. Repeated digging, twisting, or gluing is what makes the fragment travel deeper or damages the pins inside the lock. If the key broke while turned, the door is under pressure, the lock is electronic, or the piece will not move with light pressure, call a qualified professional.
| What you see | Best first move | What to avoid |
|---|---|---|
| A few millimeters of key are visible | Grip the sides with slim needle-nose pliers and pull straight | Twisting, squeezing too hard, or using bulky pliers |
| The key is flush but not turned | Use a purpose-made broken-key extractor after a very light application of lock-safe lubricant | Tweezers, glue, or forcing a paper clip |
| The key broke while being turned | Relieve any door pressure without turning the fragment, then stop if it will not return to normal | Turning the broken piece further or forcing the handle |
| The fragment is deep, bent, or wedged | Arrange professional extraction | Repeated probing with sharp household objects |
| It is in a vehicle ignition, smart lock, safe, or restricted key system | Use the manufacturer’s support route or a locksmith | DIY extraction that could affect electronics, warranty, or security |
Why a key breaks, and why the cause matters
A key rarely breaks for no reason. Wear, a dry or dirty lock, door misalignment, or forcing a resistant key can all be behind it. Treat the snapped key as a warning sign, not only a piece of metal that needs pulling out.
Extraction and repair are separate jobs. You may remove the fragment and still have a stiff cylinder, a misaligned strike plate, or a worn spare key that could cause the same problem next week.
The lock has a “neutral” position
In ordinary keyed locks, the fragment must normally be in the same position as a key that is ready to come out. If it broke while being turned, the cylinder may be slightly rotated and hold it in place.
Do not twist the broken piece with a screwdriver, wire, or the remaining key half. Gently move the door toward or away from its frame near the latch, without touching the fragment; if it will not settle easily, stop and get help.
Door pressure can fool you
A sagging, swollen, or tightly weatherstripped door can load the latch or deadbolt. Lightly push or pull near the handle to relieve ordinary pressure, but never use body weight, kick the door, or force the knob.
The 60-second safety check before you try anything
First, make sure nobody is in danger. If a child, older adult, pet, or anyone who needs urgent help is trapped or exposed to a hazard, do not spend time on DIY extraction. Use the quickest appropriate emergency route for your situation.
For an ordinary lockout, slow down and take a clear photo of the lock and broken key. It can help a locksmith later and shows whether the fragment moves after a failed attempt.
Look at the keyway with a flashlight or phone light. Check whether the fragment is visible, level in its normal removal position, and free from obvious damage; a bent keyway, shifted cylinder, or crumpled fragment means it is time for professional help.
Here is the small checklist I would use:
- Confirm that you own the lock or have permission to work on it. A rental, shared building, workplace, or managed property may have rules about who can touch the hardware.
- Keep the other half of the key. It can help identify the correct blank or explain the break to a locksmith, but never try to push it back in behind the fragment.
- Remove pressure from the door gently if the key broke while turning. Keep the lock in its normal position and do not rotate the remaining fragment.
- Set a stopping rule. If the fragment does not move after one calm attempt with the correct tool, stop rather than cycling through improvised methods.
This is where I would save myself the most frustration. It is easy to think, “I just need one more try,” but a stopping rule protects your lock, time, and repair bill.

Gather the right tools, not the most tools
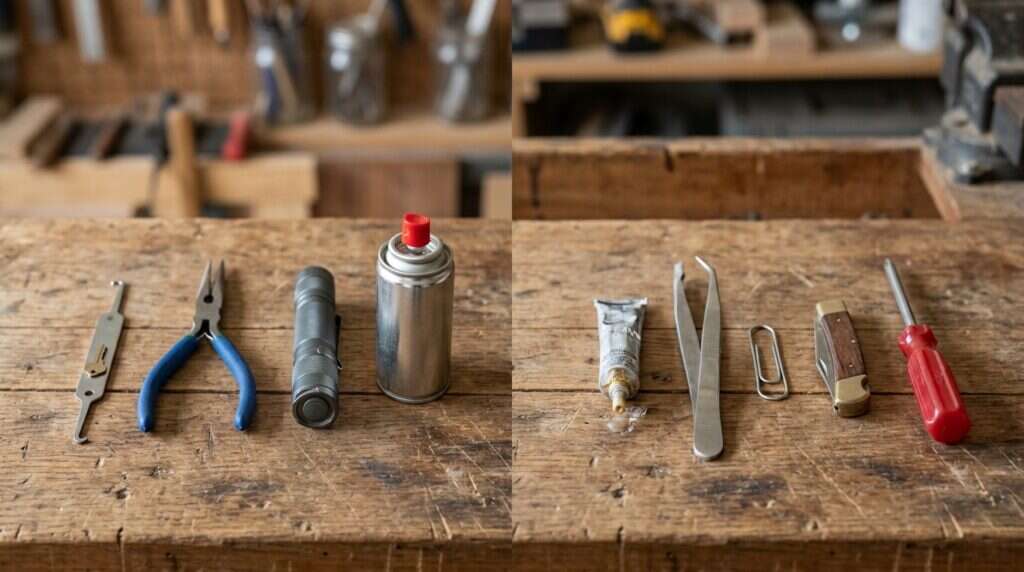
You do not need a large lock-picking set or a drawer full of metal objects. A few specific, gentle tools are better than constant switching, which can scratch the keyway or push the tip deeper.
Use slim needle-nose pliers only for a visible fragment. For a flush fragment, a broken-key extractor is the better DIY tool because its thin hook is made to reach behind the key without taking the lock apart.
Keep a flashlight, clean cloth, and a lock-rated dry lubricant nearby. A lock maker’s care instructions for cleaning and lubricating a keyway recommend using lubricant sparingly, which is exactly right here. You are reducing friction, not filling the lock with a liquid that can collect dirt.
What to buy if you want a one-time DIY solution
Choose a single-hook or double-hook broken-key extractor kit labeled for standard cylinders, not a general lock-manipulation set. It gives you more control than a paper clip and can prevent avoidable lock damage.
I would also choose a lock-specific dry lubricant. This practical guide to lock lubricants explains why dust, moisture, and old residue matter, so do not mistake a short-lived oily spray for long-term lock care.
| Tool | Use it when | Skip it when |
| Slim needle-nose pliers | The fragment clearly protrudes and can be gripped from both sides | The key is flush, slippery, or turned |
| Broken-key extractor | The fragment is flush, level, and you can work patiently | The cylinder is rotated, the key is bent, or the lock is electronic |
| Lock-rated dry lubricant | The fragment seems stuck by friction and the lock is a standard mechanical cylinder | The product manual says not to lubricate the lock, or it is a vehicle ignition |
| Flashlight and phone camera | Always, because visibility prevents guessing | Never skip this basic check |
| Compressed air | There is loose visible dust around a standard keyway | You suspect internal damage or want to blast out a deep fragment |
Tools and tricks I would not recommend
I would not use super glue inside a keyway. A tiny misplaced amount can bond the key to the pins or cylinder, and federal guidance on cyanoacrylate exposure also warns about irritation from this adhesive.
Skip flush-key tweezers, screws, knives, nail clippers, and stiff wire because they often push the fragment inward or score the keyway. Magnets are unreliable because many household keys are not strongly magnetic, and they do not give you a controlled straight pull.
How to Get a Broken Key Out of a Lock step by step
This process is for a normal mechanical door, cabinet, or padlock that you own or are permitted to service. It assumes the key is in its normal removal position, the fragment is not badly damaged, and no emergency access is needed.
Step 1: Make the lock still before you touch the key
Stand where you can see the keyway clearly and keep the door relaxed. If it broke while turning, lightly support the door near the handle and gently push or pull to reduce pressure.
Use your flashlight to confirm that the keyway is in its usual removal direction. You are not manipulating the cylinder; you are only checking that the fragment is not trapped mid-turn.
Do not press pliers, an extractor, or the remaining half of the key into the keyway just to see whether it “catches.” Take a moment to keep the door from resting hard against its frame and keep your hands steady. If a light push or pull does not reduce the resistance, the fragment may be trapped in a turned cylinder, which is a reason to stop.

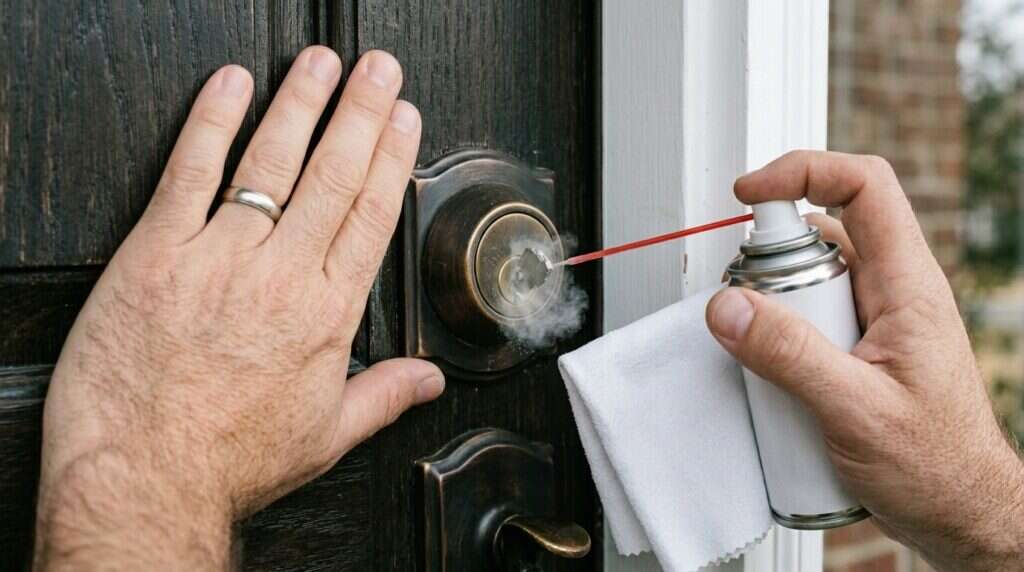
Step 2: Use only a very small amount of lock-safe lubricant
If the fragment is not loose, apply the smallest amount of lock-rated lubricant the label allows and wipe excess from the lock face. Do not pour oil or spray a long stream into the cylinder, because more product will not make the key come out faster.
Use the thin straw supplied with the product, if it has one, and give the keyway one short, controlled puff. Allow the brief settling time stated on the label, then wipe the lock face before you try again. The lubricant is there to reduce friction at the opening, not to wash the broken piece out.
Step 3: If part of the key sticks out, use slim pliers
If you can clearly see enough metal to hold, place the plier jaws on the two flat sides near the lock face and pull straight outward slowly. My rule is simple: pull, do not twist; if it does not move with light pressure, release it.
Choose pliers only when their tips can grip the exposed metal without entering the keyway. Close the jaws only firmly enough to stop slipping, then keep your wrist and tool aligned with the key’s original path. If you cannot get a secure, straight grip, do not keep trying to pinch the edge.

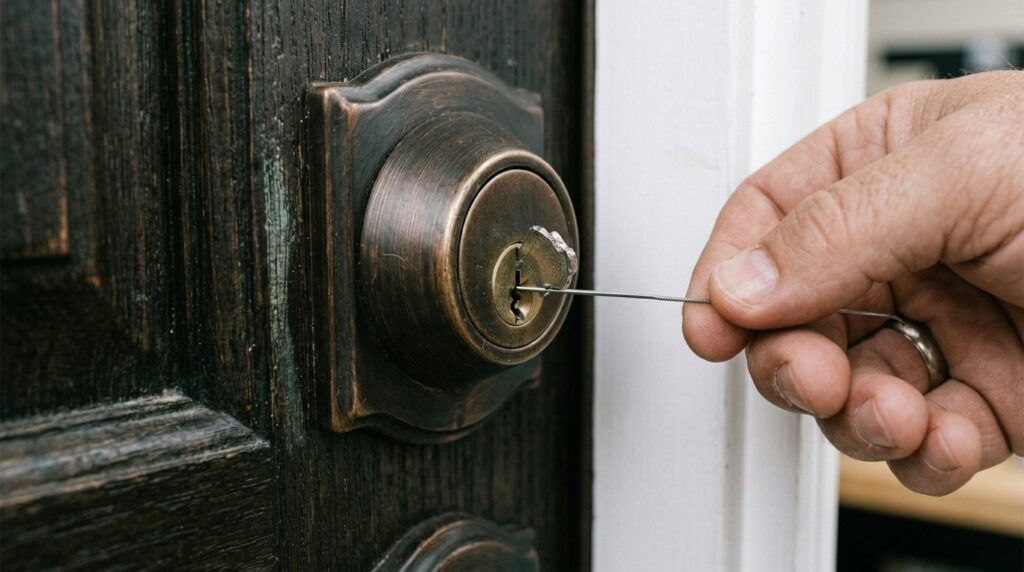
Step 4: If the key is flush, use a broken-key extractor
Hold the extractor with its hook toward the key and carefully slide it along the smoother edge beside the fragment. Keep it parallel to the keyway, only deep enough to reach the broken end.
Once the hook has passed the fragment, lift very slightly and draw it out. The motion should feel like a gentle catch and pull, not a scrape or pry; if you meet solid resistance, withdraw the tool and stop rather than probing for a long time.
Before inserting the extractor, identify the smoother edge of the broken key and guide the tool along that narrow side with very little force. The extractor should slide in smoothly rather than scrape the keyway or bend at the entrance. If it catches firmly, feels stuck, or leaves a new scratch near the lock face, withdraw it and stop.
Step 5: Pause after one failed method
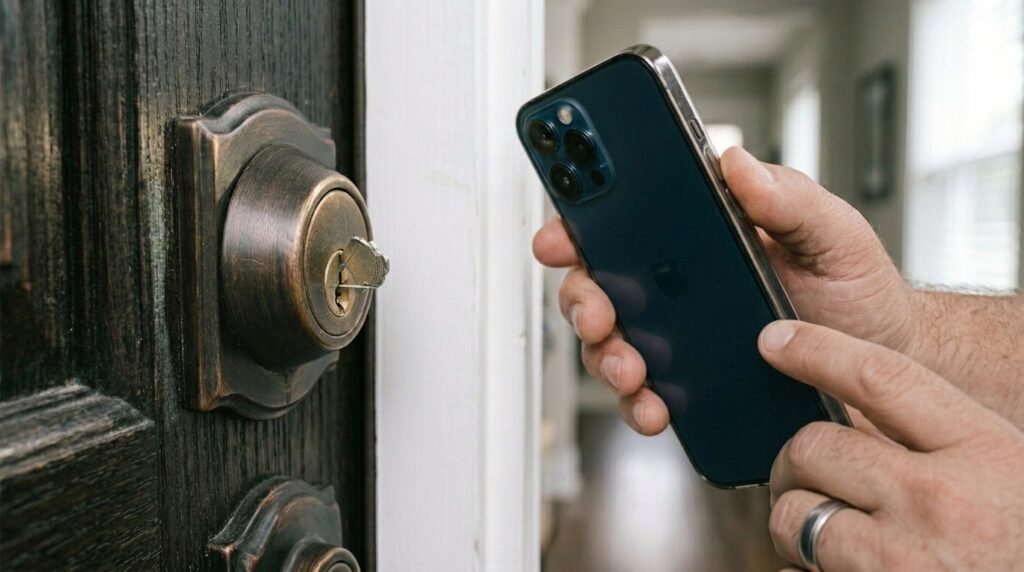
After one attempt, use your phone light to see whether the key moved outward, stayed put, or went deeper. One more gentle try with the same suitable tool can be reasonable only if it moved outward and remains level.
If it moved inward, became crooked, or feels wedged, stop. Do not switch from pliers to wire to glue to a blade.
Use the photo you took before starting as a simple comparison, because even a small inward movement matters. No movement is not a reason to add more force or a new household tool. If the fragment is no longer level, leave the lock alone and arrange professional extraction.
Step 6: Treat a padlock differently from a door cylinder
With a padlock, keep the body steady and do not pull on the shackle while you work. If it is rusty, weathered, or still binds after extraction, replacing it is wiser than repeated attempts.
Place the padlock on a firm surface, or hold its body gently, so it does not swing while you work. Do not tug the shackle or try to force it open, because that can add pressure inside the lock. Once the fragment is removed, test the shackle and keyway gently; ongoing stiffness, corrosion, or rough movement means replacement is the safer choice.

Choose the method by the fragment, not by the tool you own
The right tool is determined by the key’s position, not by what happens to be in your drawer. A visible fragment calls for a simple grip, a flush fragment calls for a thin extractor, and a turned or damaged fragment calls for restraint.
| Situation | Low-risk choice | Why it works | Main risk |
| Key protrudes straight | Slim pliers | You can grip the blade without entering the keyway | Bending the fragment by twisting |
| Key is flush and level | Broken-key extractor | It is thin enough to reach behind the fragment | Pushing too deeply or levering |
| Key broke while turned | Lightly relieve door pressure, then call if it will not settle | The fragment may be trapped by a rotated cylinder | Forcing the lock further out of position |
| Key is in an ignition | Auto locksmith or manufacturer route | Ignitions and transponder systems are more complex | Damaging the ignition or creating a bigger vehicle problem |
| Smart lock has a mechanical override | Follow the product manual or support route | The correct procedure depends on the model | Affecting electronics or warranty |
What about a paper clip or a jigsaw blade?
Both ideas can work in experienced hands, but they are not my recommendation for beginners. A paper clip is too soft and a blade can scratch the keyway, so buy the tool made for the job instead.
When to stop and call a locksmith
Calling a locksmith is the right decision when the fragment is no longer in a simple, neutral extraction position or when the lock may be the original problem. A professional can remove the key, assess the cylinder, and advise on a replacement or rekey.
Stop your DIY attempt immediately if any of these apply:
- The key broke while turned and will not return to its normal removal position with light door-pressure relief.
- The fragment is deep, bent, sharp, or has moved farther in after your first careful attempt.
- The lock is on a vehicle ignition, safe, commercial door, electronic lock, mailbox, or a door with restricted or high-security keys.
- You can see damage around the keyway, the cylinder is spinning, the handle is loose, or the door will not close and latch normally.
- You live in a rental or managed property where the lock may be the owner’s responsibility, or you do not have authority to replace the hardware.
When you call, describe the lock type, whether the door is open or closed, whether the key fragment is visible, and whether the key broke while turning. Take the remaining key half with you. To reduce the chance of a poor-quality emergency service, use a vetted locksmith directory or ask your property manager, insurer, local hardware store, or trusted neighbor for a direct recommendation.
If the lock has a recognizable manufacturer or is still within a warranty period, start with its official support resources before you authorize a replacement. This can help you find a model-specific manual, check compatible parts, or understand whether the hardware needs a professional service visit.

What to do after the key fragment comes out
Once the piece is out, do not immediately force an old spare key into the lock. Compare the two pieces on a flat surface; a twisted, bent, or rough break can suggest that the lock or door alignment was applying too much resistance.
If you still have an undamaged spare, test it carefully with the door open first. Insert it fully, turn it gently, and remove it without any resistance. Then test the lock again with the door closed to see whether alignment pressure appears only when the latch or bolt meets the frame.
If the key feels stiff with the door open, the cylinder may need service. If it is smooth open but hard to turn closed, the door or strike plate may be out of alignment.
Do not continue using a visibly worn, bent, or thin copy. Make a fresh copy from an undamaged original or have the lock assessed first.
Wipe excess lubricant from the exterior and avoid harsh cleaners or abrasives on finished hardware. Save the broken piece and your original photo until you understand why the key failed.
Prevent another broken key with a five-minute routine
Never force a key that feels wrong. If you have to wiggle hard, lean on the door, or twist your wrist sharply, pause and investigate before the metal gives way.
Inspect frequently used keys for bends, deep scratches, rough edges, cracks, or a thin area near the shoulder. Use only the maintenance routine recommended for your lock, with a light application rather than a heavy spray.
Door alignment deserves equal attention. If you notice the key turns only when you lift the handle, pull the door inward, or push your shoulder against it, the door is telling you that something is off. Address the sticking strike plate, loose hinge screws, swelling, or weatherstrip pressure before it transfers force into the key.
If you are already doing seasonal door maintenance, check the hardware, weatherstripping, and threshold. You can also make time for sealing door-frame gaps that can invite ants as part of the same home-care session.
My prevention list would be:
- Use a key only for its lock, not to pry, open packaging, scrape, or twist anything else.
- Keep a fresh spare in a safe, authorized place and test it occasionally.
- Investigate new scratching, stiffness, or a need to lift the door before the key breaks.
- Keep a small flashlight and proper extractor in your basic tool kit if you maintain older mechanical locks.
For more practical home-maintenance ideas, browse the site’s tools and hardware guides and build a modest kit around the jobs you actually have. A few well-chosen tools are more useful than a box of random ones.

Expert tips that make this guide safer than common hacks
Separate access from repair. Getting the fragment out may solve the immediate problem, but it does not prove the lock is healthy, so test it calmly afterward.
Use a “one method, then stop” rule, and keep your hands off the remaining key half because pushing it can drive the tip deeper. Vehicle ignitions, smart deadbolts, commercial doors, and restricted keys need model-specific guidance or professional help.
Frequently asked questions
Can I use a magnet to get a broken key out of a lock?
You can try a magnet only if it does not touch or push the fragment, but do not rely on it. Many keys are not strongly magnetic, and a magnet gives you little control over the pull.
If the key is flush, preserve its position instead of bumping the lock face. Use a proper extractor or call a locksmith.
Can I get a broken key out of a lock with tweezers?
Tweezers can work only when enough metal already sticks out to pinch securely, although slim needle-nose pliers usually give a better grip. For a flush key, ordinary tweezers are too thick and may push it farther inside.
Never force tweezers into the keyway. Use a purpose-made extractor or professional help instead.
Should I use super glue to remove a broken key?
I do not recommend it. Glue can spread into the lock and bond the fragment, pins, or cylinder, leaving you with a larger repair.
If you already put glue in the keyway, do not add solvent or more objects. Tell the locksmith exactly what happened.
What if the key broke in a car door or ignition?
For a car door, avoid forcing a tool into the lock. For an ignition, stop immediately because the key, cylinder, and electronics may need an automotive locksmith or dealer support.
Take a photo, keep both pieces, and say whether the key was turned when it broke. Use a spare fob or emergency key only as the vehicle manual allows.
Do I need to replace the lock after removing the broken key?
Not always. If an undamaged key turns smoothly with the door both open and closed, and the cylinder shows no damage, you may only need a fresh key copy and light maintenance. However, continued stiffness, a loose cylinder, scraping, or a key that turns only when the door is pushed or lifted deserves further repair.
When in doubt, have the cylinder inspected or rekeyed. A fresh key cannot correct a damaged lock, and a new lock cannot correct a door that is badly misaligned. The right fix depends on what the post-extraction test tells you.
Final thoughts
Knowing how to get a broken key out of a lock is less about finding a clever trick and more about making calm choices. Look first, use the least invasive tool, pull straight instead of twisting, and stop when the lock tells you the situation is no longer simple.
If I were dealing with this at my own door, I would rather spend a little on the right extractor or a qualified locksmith than turn a broken key into a damaged cylinder. Save this guide before the next lock emergency, keep a fresh spare key, and treat new resistance as a repair signal before it becomes a snapped-key problem.