



If you have ever stood in a pile of mismatched socks wondering why a room this small can feel this chaotic, you are not alone. Learning how to organize laundry room space is one of those projects that looks simple on paper. Then real life gets involved.
Kids leave clothes on the floor. Detergent bottles multiply. That one wire hanger always ends up wrapped around the mop.
I redid my own laundry room three times before it finally stuck. Every failed attempt taught me something the glossy magazine photos never mention. Below are the 15 ideas that actually made a difference, in the order I would tackle them if I started over today.
Why This Room Gets Messy So Fast
Laundry rooms are usually the smallest functional space in a house. Yet they handle more daily traffic than almost any other room, from sorting and washing to drying, folding, and ironing.
A cluttered laundry area does not just look bad. It slows down every load because you spend extra minutes hunting for the stain stick or a matching lid.
Design professionals interviewed for a piece on organizing a laundry room like a pro point to one factor above all else. Keeping the products you use every cycle within arm’s reach determines whether a system actually gets used long term. That single idea reshaped my own space, and it shows up again and again in the ideas below.
There is also a psychological cost to a messy laundry room that people rarely talk about. A cluttered space can make a routine chore feel heavier than it actually is, since your brain registers visual chaos as extra work before you have even started.
I noticed this firsthand. On weeks when my laundry room was a mess, I would put off doing laundry for an extra day or two, which only made the pile worse. Once I built a system that actually worked, laundry stopped feeling like a dreaded task and became something I could knock out in the background while doing other things.
How to Organize Laundry Room Space: 15 Ideas That Actually Work
None of the 15 ideas below require a full renovation. Most of them cost less than a single takeout order, and a few cost nothing beyond a Saturday afternoon.
1. Measure Your Space Before You Buy Anything
Every laundry room makeover I have seen fail started with buying storage before measuring the room. I made this mistake myself with a rolling cart that was two inches too wide for the gap beside my dryer.
It sat in my garage for six months before I returned it. Measure the width, depth, and height of your available wall space first, including the gap between your machines and the ceiling.
Professional designers who follow the NKBA planning guidelines recommend at least 5 feet of width in a laundry area. That gives you room to move comfortably between appliances. They also suggest mounting upper cabinets around 18 inches above your counter or machine top so you are not fighting for headroom.
2. Declutter Everything Before You Organize It
Pull everything out of the room, down to the loose dryer sheets stuck behind the machine. You cannot organize clutter. You can only rearrange it.
Sort items into four piles as you go:
- Keep and use weekly, like detergent, stain treatment, and dryer sheets
- Keep but use rarely, like an iron, sewing kit, or extra hangers
- Donate or toss, like expired products or single socks with no match
- Belongs somewhere else in the house entirely
This step alone usually frees up 20 to 30 percent of your existing storage. And it costs nothing.

3. Create Zones Instead of Random Shelves
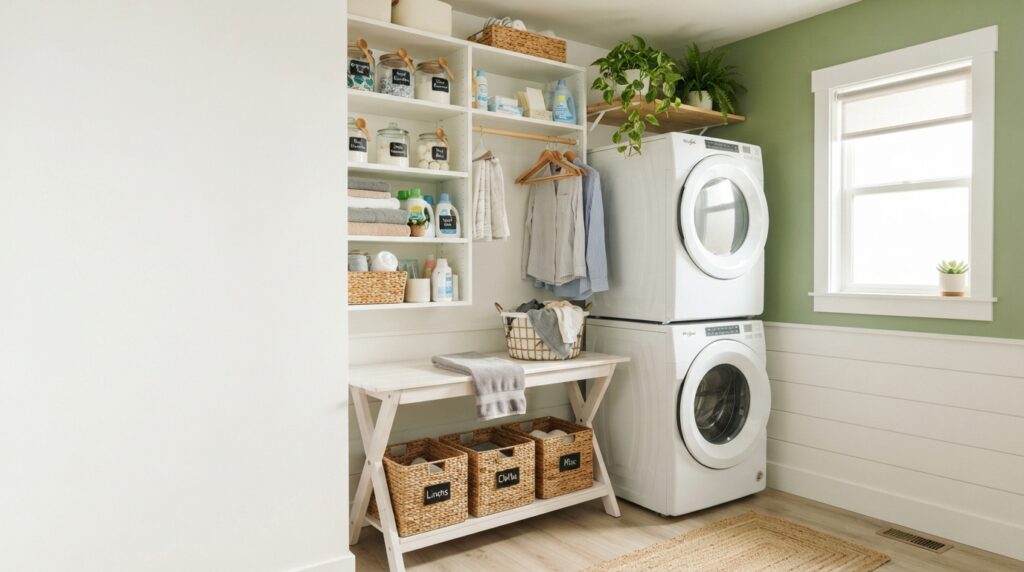
Once you know what you are keeping, group it by task rather than by type. A washing zone near your machines. A drying and hanging zone. A folding zone. A supply zone.
Even in a tiny room, this mental map matters. It means you always know exactly where something belongs when you put it away.
Here is how I broke mine down in a room that is only about 6 feet by 5 feet:
- Washing zone, right beside the washer: detergent, stain spray, and a small trash can for lint and dryer sheet wrappers
- Drying zone, on the wall opposite the dryer: a fold-down drying rack and a rod for hang-dry items
- Folding zone, my table with storage: sorting baskets and a stack of clean towels for spills
- Supply zone, the top cabinet shelf: backstock detergent, extra hangers, and seasonal items like a garment steamer
Once each zone had a clear job, I stopped putting things away “wherever there was room,” which is really what causes clutter to creep back in over time.
4. Install Laundry Room Cabinets for Hidden Storage
If you only make one upgrade to your laundry room, make it cabinets. Laundry room cabinets hide clutter behind a closed door while giving you a huge amount of vertical storage most rooms waste.
Upper cabinets above your washer and dryer work well for detergent pods, dryer sheets, and stain removers you reach for constantly. Lower cabinets, if you have the floor space, are ideal for bulk items like gallon-size refills and spare towels.
A Lowe’s buying guide on laundry room organization notes that a closed laundry cabinet keeps the room looking tidy. It also keeps cleaning chemicals out of reach of kids and pets, which matters once you actually have a toddler pulling open cabinet doors.
When I installed my first laundry cabinet, I chose a shallow 12-inch depth upper unit instead of a standard 24-inch kitchen cabinet. It looks proportionate above a washer and dryer and still holds plenty of product.
If you are painting existing cabinets rather than buying new ones, give yourself more drying time than you think you need. I closed a cabinet door too soon once and left a smudge in fresh paint. This guide on how long spray paint takes to dry on my own site walks through realistic dry times by paint type, and it saved me from repeating that mistake.
5. Choose Moisture-Resistant Cabinet Materials
Not every laundry cabinet material holds up in a humid room. Moisture-resistant MDF or plywood with a sealed finish outperforms particleboard, which can swell and warp near a washer that occasionally overflows.
If your laundry room shares a wall with a bathroom or sits near an exterior door, spend slightly more on a water-resistant cabinet line. It is worth the upfront cost.
6. Add Open Shelves for Flexibility
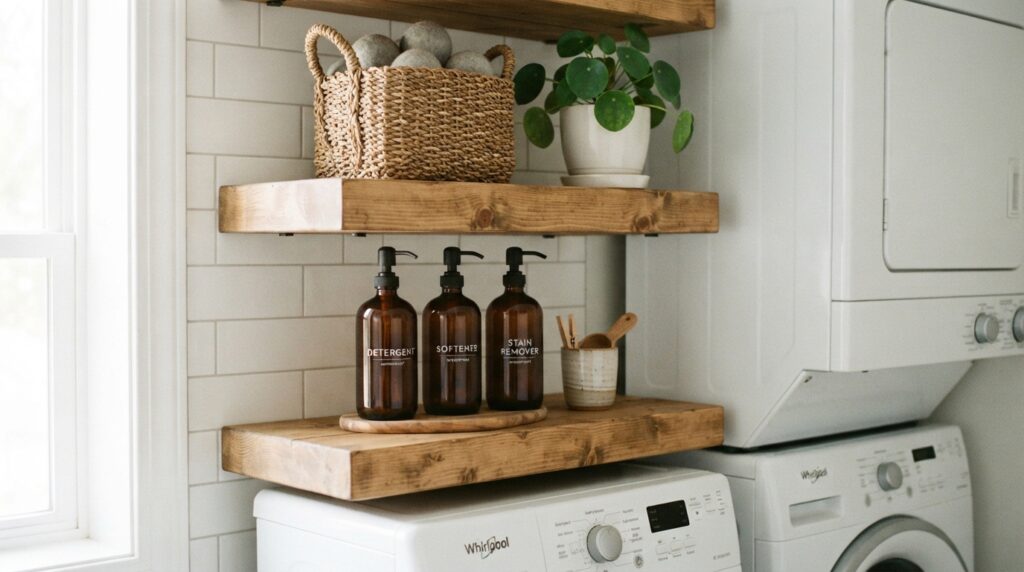
Cabinets are not always practical, especially in a rental or a tight closet where a swinging door will not fit. This is where shelves for laundry room storage earn their keep.
Open shelving costs less and installs faster. You can also see your inventory at a glance, so you never buy a third bottle of the same stain spray by mistake.
HGTV’s design team notes in their roundup of laundry room storage ideas that natural light paired with open storage can make a purely functional room feel far less like a chore closet. I found this true in my own space. Swapping a bulky floor cabinet for two floating wooden shelves made the room feel almost twice as large.
The tradeoff is visual clutter, since every mismatched bottle sits on full display. My fix was decanting detergent, oxygen bleach, and fabric softener into matching glass or amber pump bottles with simple labels. It takes about 20 minutes and instantly looks curated rather than chaotic.
7. Try a Rolling Utility Cart in Odd Gaps
Some laundry rooms have a narrow, unusable gap between a sink and a wall. A rolling utility cart is often the only storage that fits there.
Carts are mobile, so you can pull one out to access every side. Just check the weight capacity before loading it with heavy detergent jugs, since cheaper models sag over time.
8. Use a Laundry Pedestal With a Storage Drawer
If you have front-load machines, a laundry pedestal raises them to a more comfortable loading height. Many models also include a hidden drawer underneath.
That drawer space is surprisingly large. It works well for spare linens or bulk detergent you do not need on open display.
A Simple Way to Budget the Whole Project
Before you commit to any single option above, it helps to set a total budget rather than buying piece by piece. I made the mistake of buying one item at a time on my first attempt, and I ended up spending more overall than if I had planned the whole room at once.
A reasonable starting budget breaks down roughly like this for a small to mid-size laundry room:
- 40 percent toward cabinets or shelving, whichever is your primary storage
- 20 percent toward a folding surface or table with storage
- 20 percent toward flooring, if you are replacing it
- 10 percent toward accessories like bins, labels, and containers
- 10 percent held back for the surprise you did not plan for, like an outlet that needs moving
That last category matters more than people expect. My own project ran into an unexpected electrical issue behind a cabinet I planned to mount, and having a buffer meant it did not derail the whole timeline.
Laundry Room Cabinets vs Shelves vs Carts: A Quick Comparison
Most laundry rooms actually benefit from mixing two or three of these options rather than committing to just one.
| Storage Type | Best For | Approximate Cost | Main Advantage | Main Drawback |
|---|---|---|---|---|
| Upper cabinets | Hiding daily-use products, families with kids | $150 to $600 per section | Full concealment, childproof | Higher upfront cost |
| Open shelves | Renters, small closets, tight budgets | $30 to $150 per shelf | Cheap, fast to install | Needs styling to avoid clutter |
| Rolling utility cart | Odd gaps, side-by-side machines | $40 to $200 | Mobile, fits narrow spots | Limited weight capacity |
| Laundry pedestal with drawer | Front-load machines, hidden storage | $150 to $400 per pedestal | Uses dead space under machines | Raises appliance height |
| Table with storage | Folding space plus hidden bins | $100 to $500 | Doubles as workspace | Needs floor footprint |
9. Build a Laundry Room Table With Storage
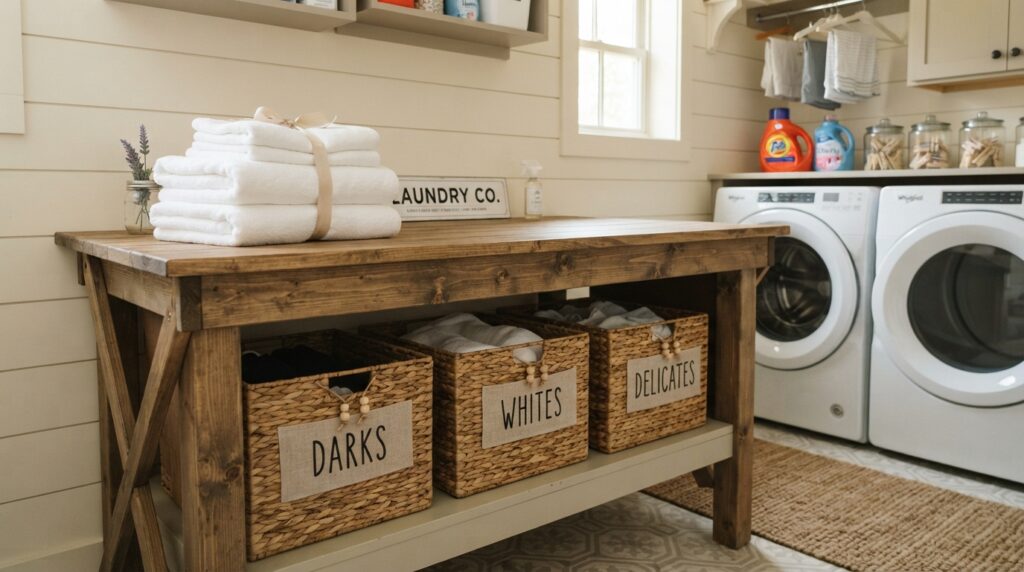
A laundry room table with storage solves one of the most common complaints I hear: nowhere flat to fold clothes straight out of the dryer. Folding on top of the washer works in a pinch, but it is uncomfortable and usually too narrow.
A dedicated folding table, even a small 24 by 36-inch surface, changes your whole workflow. Look for one with storage bins underneath rather than open legs.
That hidden space is perfect for sorting baskets labeled by family member or by wash type, such as darks, delicates, and towels. I built mine with a simple countertop over two small storage cabinets, and it cost roughly a third as much as a pre-built version.
If floor space is too tight for a standalone table, a fold-down shelf mounted at counter height works almost as well. It slides out only when needed and tucks flush against the wall the rest of the time.
10. Solve Small Spaces: Organizing Laundry in a Hallway
Not everyone has a dedicated laundry room. Organizing a laundry in a hallway closet comes with its own rulebook, and the goal shifts from filling a room to disappearing into the wall.
Vertical storage becomes non-negotiable here. Stack your washer and dryer if your model allows it, then use the freed floor space for a narrow cart or a slim pull-out shelf for folding.
A few things that made the biggest difference in tight hallway setups:
- Louvered or vented closet doors keep air moving while the door is shut mid-cycle
- A countertop above side-by-side machines instantly becomes a folding surface
- Hooks on the inside of the closet door hold an ironing board without using shelf space
- Peel-and-stick wallpaper on the back wall adds personality without a full remodel
One remodel case study noted that swapping a swinging door for a pocket door kept the hallway completely clear even when the closet was open. That small change matters a lot in a narrow walkway.
If your closet lacks a sink, keep a small stain-treatment caddy nearby. My guide on removing mustard stains stresses treating a fresh stain within minutes for the best results, and that only works if the remover is within reach.

11. Pick Laundry Room Floor Ideas That Handle Real Spills
Flooring gets ignored in most organization guides, but it directly affects how easy your space stays clean. Laundry rooms deal with constant moisture, so the wrong floor can warp or grow mold within a couple of years.
A flooring industry breakdown of the best laundry room flooring options recommends avoiding solid hardwood and carpet in this specific room. Both struggle badly with moisture over time.
Ceramic and porcelain tile, luxury vinyl plank, and sealed concrete consistently rank as the top laundry room flooring ideas. They resist water, detergent, and daily foot traffic without much upkeep.
| Flooring Type | Water Resistance | Comfort Underfoot | Typical Cost per Sq Ft |
|---|---|---|---|
| Porcelain or ceramic tile | Excellent | Cold, firm | $3 to $12 |
| Luxury vinyl plank (LVP) | Excellent | Warm, cushioned | $2 to $7 |
| Sealed concrete | Excellent | Cold, firm | $2 to $6 |
| Engineered hardwood | Fair, needs quick cleanup | Warm | $4 to $10 |
| Carpet or solid hardwood | Poor, not recommended | Warm, soft | Varies |
I chose luxury vinyl plank after a small supply line leak damaged my old floor. The peace of mind has been worth every penny.
If you are matching tones with bamboo flooring elsewhere in your home, my guide on how to clean bamboo flooring explains its moisture limits. That is exactly why I would not use it inside the laundry room itself, even though it looks beautiful in adjoining hallways.
An area rug or cushioned mat in front of your folding station adds comfort without sacrificing the waterproof base underneath.

12. Bring In Color With a Green Laundry Room
Once the functional layer is sorted, color is the easiest way to make the room feel less like a utility closet. A green laundry room has become one of the most requested palettes I get asked about, and there is a practical reason behind the trend.
Sage, olive, and deep emerald tones hide small scuffs and detergent splashes better than stark white. They also pair naturally with the wood tones common in open shelving and butcher block counters.
If you are nervous about committing to a full green laundry room, start small:
- Paint just one accent wall instead of all four
- Choose green cabinets while keeping walls neutral
- Add green through a hamper liner, rug, or curtain instead of paint
- Use real or artificial greenery on a shelf for the color payoff without commitment
Whatever palette you choose, satin or semi-gloss paint finishes hold up better than matte in a humid room. They wipe clean without absorbing moisture into the finish.
13. Stock Laundry Room Accessories You Will Actually Use
The right laundry room accessories tie all the earlier steps together. You do not need dozens of gadgets, but a handful of well-chosen pieces can noticeably speed up your daily routine.
My non-negotiable list after years of trial and error:
- Clear or labeled bins for stray buttons, coins, and pocket items
- A wall-mounted drying rack that folds flat when not in use
- A rolling hamper on wheels for moving sorted laundry between rooms
- A lint roller and small vacuum attachment kept near the dryer
- Bin clip labels that attach directly to baskets instead of peeling adhesive labels
One accessory I underestimated for years was a wall-mounted ironing board that folds down from the front of a cabinet. It freed up an entire corner I used to lose to a bulky standing board.
A magnetic knife strip mounted on the inside of a cabinet door is another trick worth trying. It holds scissors, a seam ripper, and a small screwdriver upright and visible, which beats digging through a junk drawer every time something needs a quick fix.
Do not overlook seating either, if your room has the floor space. A small stool near the folding table gives you somewhere to sit while pairing socks, which sounds minor until you have folded a full load standing up after a long day.
A Quick Seasonal Maintenance Checklist
An organized laundry room does not stay organized on its own. A short seasonal check keeps the system from sliding back into chaos.
Every month:
- Wipe down cabinet fronts and shelf surfaces
- Check that labels are still legible and reattach any that have peeled
Every three months:
- Clean behind and underneath the washer and dryer
- Check hoses and connections for any small leaks before they become big ones
Once a year:
- Have your dryer vent professionally cleaned
- Reassess your zones and adjust for any changes in your household
14. Set Up a Stain-Treatment Station
Treating a stain the moment it happens beats waiting until wash day, every time. Keep a small stain kit within arm’s reach of your washer rather than buried in a cabinet.
My guide on removing honey stains applies this same immediate-treatment principle to sticky spills. The faster you act, the less scrubbing you’ll have to do later.
15. Prioritize Dryer Vent and Fire Safety
This step gets left out of almost every laundry organization guide. Organizing this room is not just about looking tidy. It also reduces fire risk, since your laundry area runs a heat-producing appliance every single day.
Research compiled from National Fire Protection Association data found that about 81 percent of home fires involving washers or dryers begin in the laundry area itself. Dryers account for roughly 92 percent of those incidents. The leading cause is simply failure to clean the lint trap and vent system regularly.
Build these habits directly into your new system:
- Clean the lint trap after every single load, not just when it looks full
- Keep a few inches of clear space behind the dryer so the vent hose is not crushed
- Schedule a full vent cleaning once a year, especially with a long or bent vent run
- Avoid storing solvent-soaked rags beside or on top of the dryer
- Never stack bins on top of the dryer that block the exhaust vent opening
I keep a small calendar reminder for annual vent cleaning stuck inside my laundry cabinet door, right next to my detergent. It takes five seconds to see and has kept me on track for two years running.

Pros and Cons of a Full Laundry Room Overhaul
- Saves real time on every laundry cycle
- Reduces fire risk through better vent access
- Increases home resale appeal in many markets
- Makes the room genuinely pleasant to use
- Upfront cost for cabinets, flooring, or a table
- Requires a weekend or more of hands-on work
- Small rooms limit how much you can physically add
- Ongoing habit changes needed to keep it organized
Frequently Asked Questions
What is the cheapest way to organize a laundry room?
Start with decluttering and open shelves rather than cabinets. A few coats of paint, two floating wood shelves, and labeled bins from a discount store can transform a laundry room for under $150 in most cases.
How do I organize a laundry room with no cabinets?
Lean on vertical wall space with tension rods, wire baskets, a rolling utility cart in any open gap, and a fold-down shelf for folding. Open shelving paired with matching bottles gives you most of the benefit without the installation cost.
What flooring is best for a laundry room?
Porcelain or ceramic tile and luxury vinyl plank top the list because they resist water, detergent, and daily traffic without warping. Solid hardwood and carpet are best avoided in this room due to moisture exposure.
How often should I clean my dryer vent as part of laundry room upkeep?
Clean the lint trap after every load. Have the full exhaust vent professionally cleaned or inspected at least once a year, since failure to clean is the leading cause of dryer-related home fires according to national fire safety data.
Is a green laundry room a good design choice?
Yes. Green tones hide minor scuffs and splashes well, pair naturally with wood shelving, and give a small utility room a more intentional feel without a full renovation.
Final Thoughts
Learning how to organize laundry room space is less about buying the perfect product and more about building a system that matches how you actually live. Start with measuring and decluttering. Add cabinets or shelves based on your budget. Choose flooring that can survive real spills, and never skip the safety basics around your dryer vent.
My own laundry room took three attempts to get right. The version that finally stuck was the simplest one: clear zones, labeled bins, a folding table with storage, and a five-minute lint trap habit after every load.
Start with just one idea from this list this weekend, whether that is decluttering your shelves or finally treating that stain sitting in your hamper. Build from there.
If you found this useful, take a look at more home organization and cleaning guides on Home Upright for practical, tested advice on keeping every room in your home running smoother.